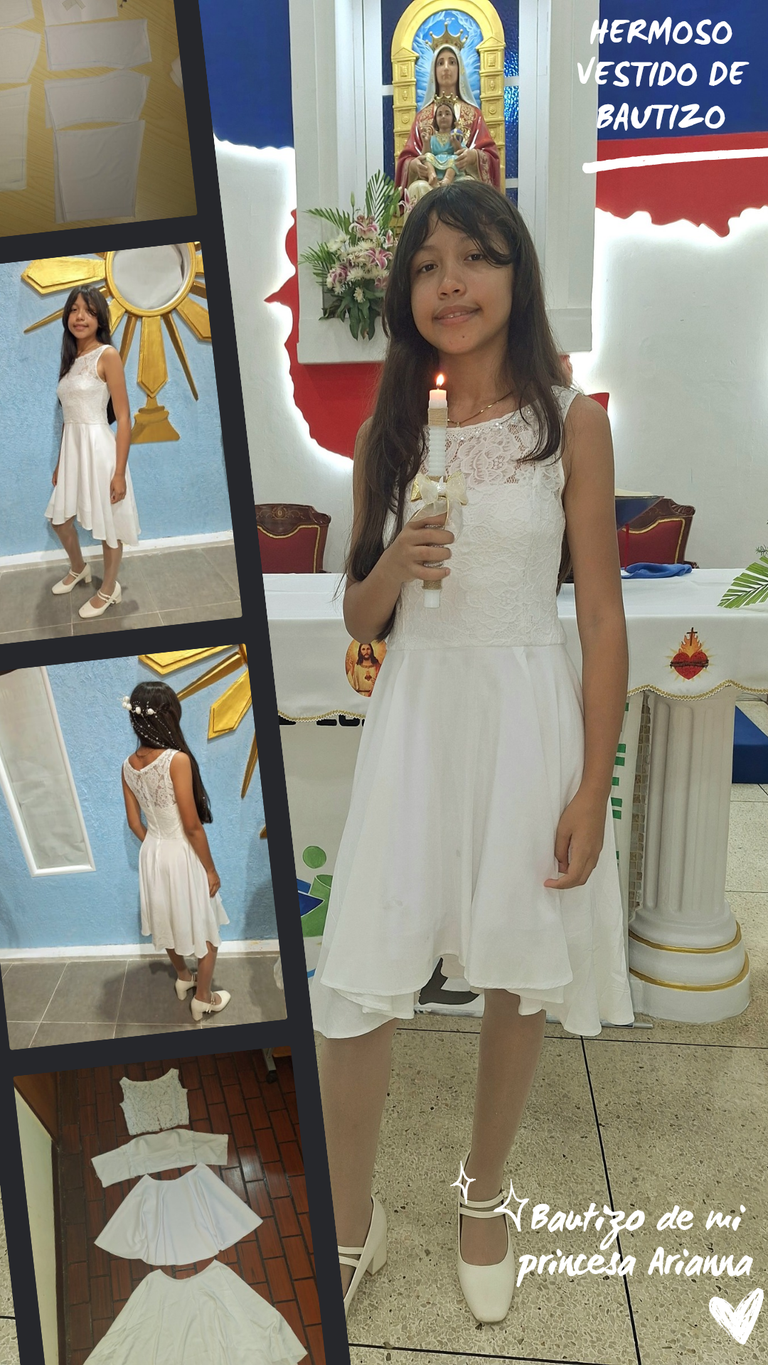
Saludos y bendiciones, mi gente linda de @needleworkmonday. Un gusto visitarlos en esta nueva semana de costuras y lindas creaciones. Hoy les vengo a compartir lo feliz que estoy de poder haber hecho el vestido de bautizo de mi princesa Arianna.
Este proyecto fue un desafío desde que empecé a escoger el modelo, ya que vi muchos videos, buscando ideas, ya que en imágenes hay bellezas, pero como soy un aprendiz, quería guiarme y así hacerlo de la mejor manera.
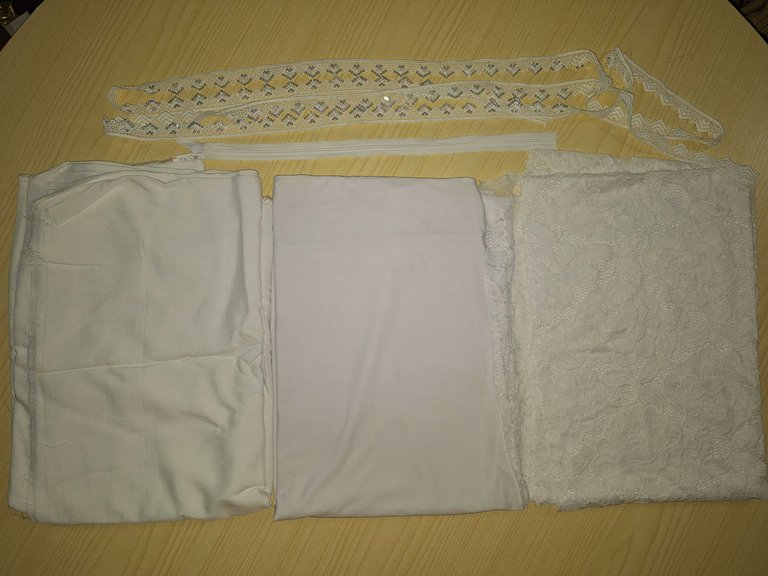
Cuando empecé a buscar los materiales, también fue todo un tema, ya que hay un sin fin de telas entre las que tenía que escoger la más adecuada, que estuviera entre las posibilidades de mi presupuesto y sobre todo que fuera algo sencillo que mi princesa @ariannamc, se sintiera cómoda y lo pudiera usar en otras ocasiones.
Compre 3 tipos de telas, una de encajes, una tipo lino, una de forro, suave y con elasticidad para el top y la falda de forro, pero al final esta tela no me alcanzó y tuve que comprar una cuarta tela para la falda del forro y una quinta tela llamada neopreno para darle fuerza al top.
 |  |  |
|---|
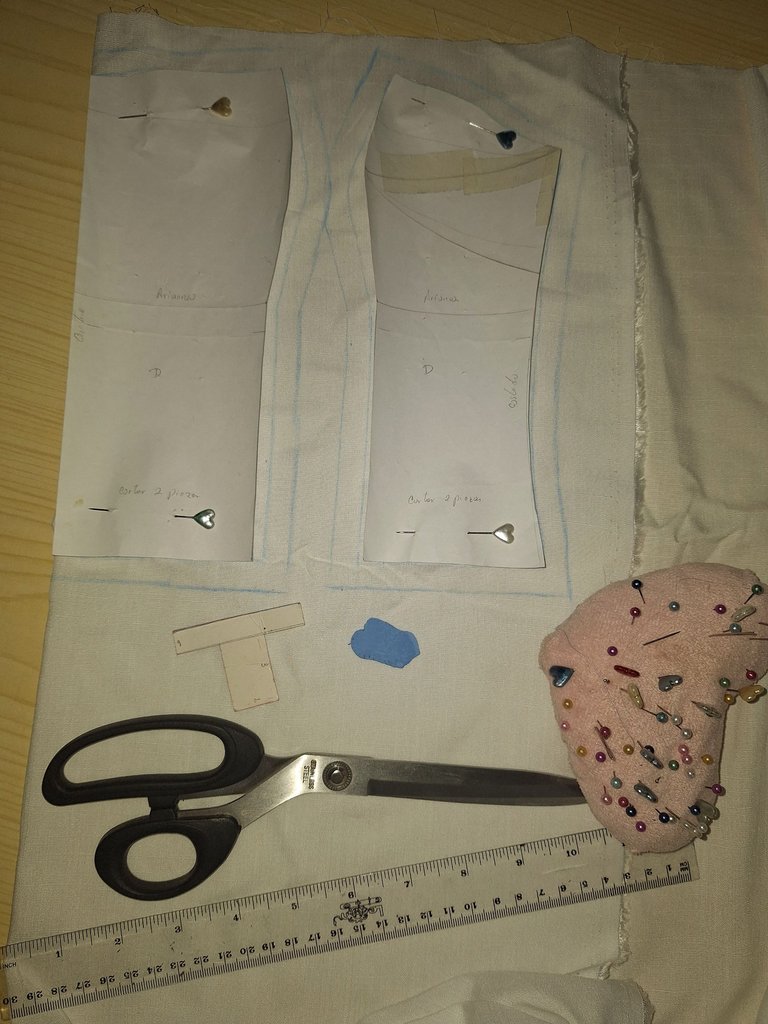
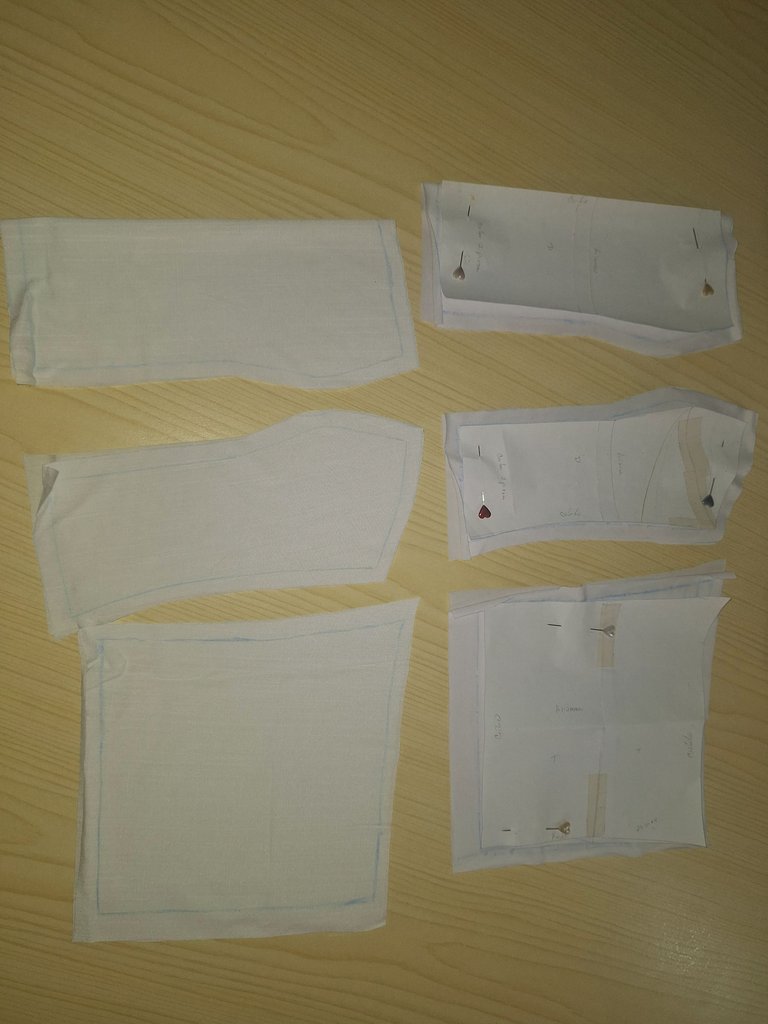
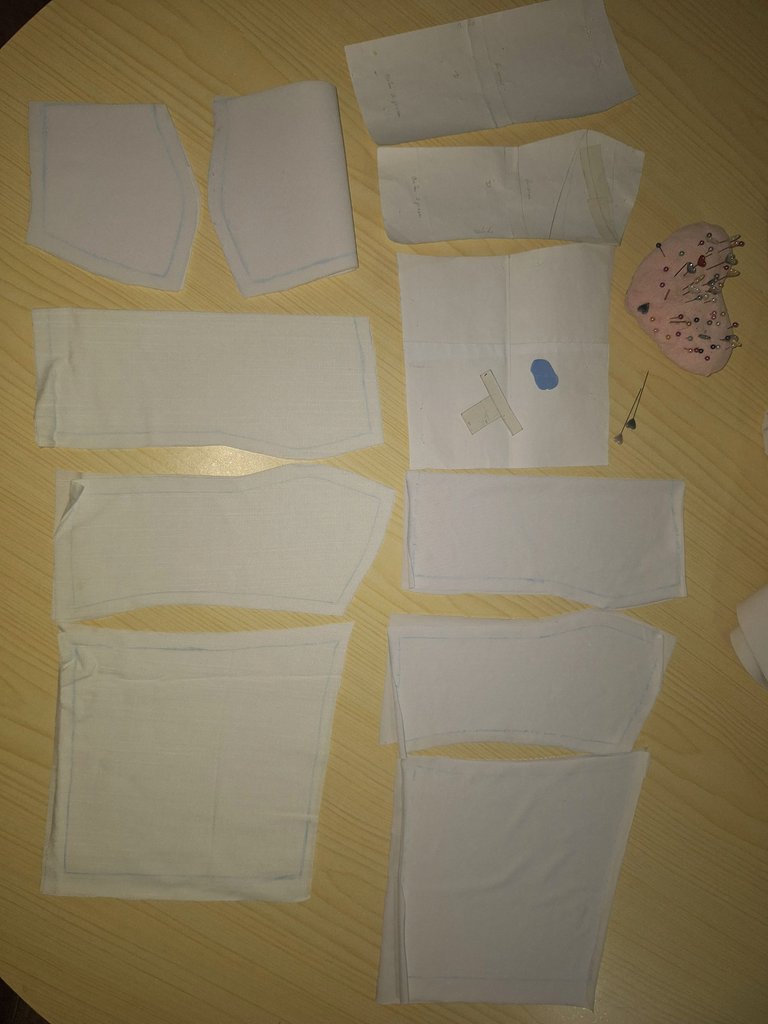
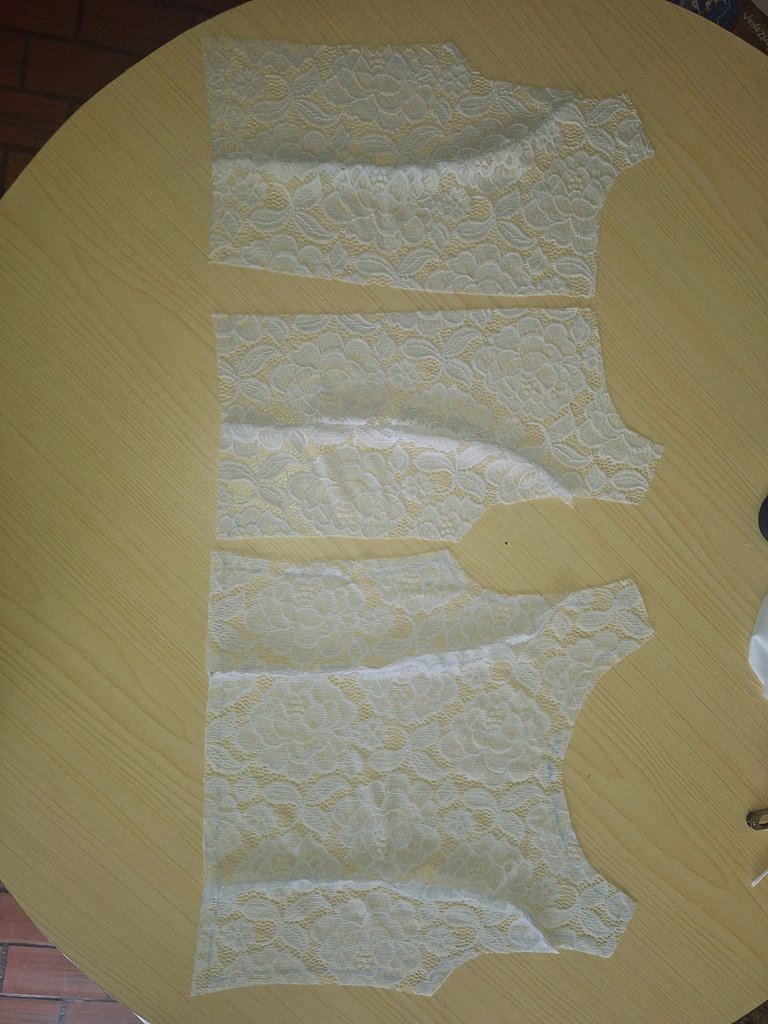
Ahora, para empezar con el proceso de elaboración del vestido, empecé a marcar los patrones, los cuales ya tenía hechos de un top que le hice para su cumpleaños.
Primero lo marqué en la tela de lino, luego en la de forro y finalmente en la de neopreno. Para luego cortarlos a un centímetro más para las costuras.
La idea de marcarlo con tiza es genial, pues por esa marca, paso la costura a máquina y se me hace más fácil de seguir el patrón y que la prenda quede a la medida.
 |  |
|---|
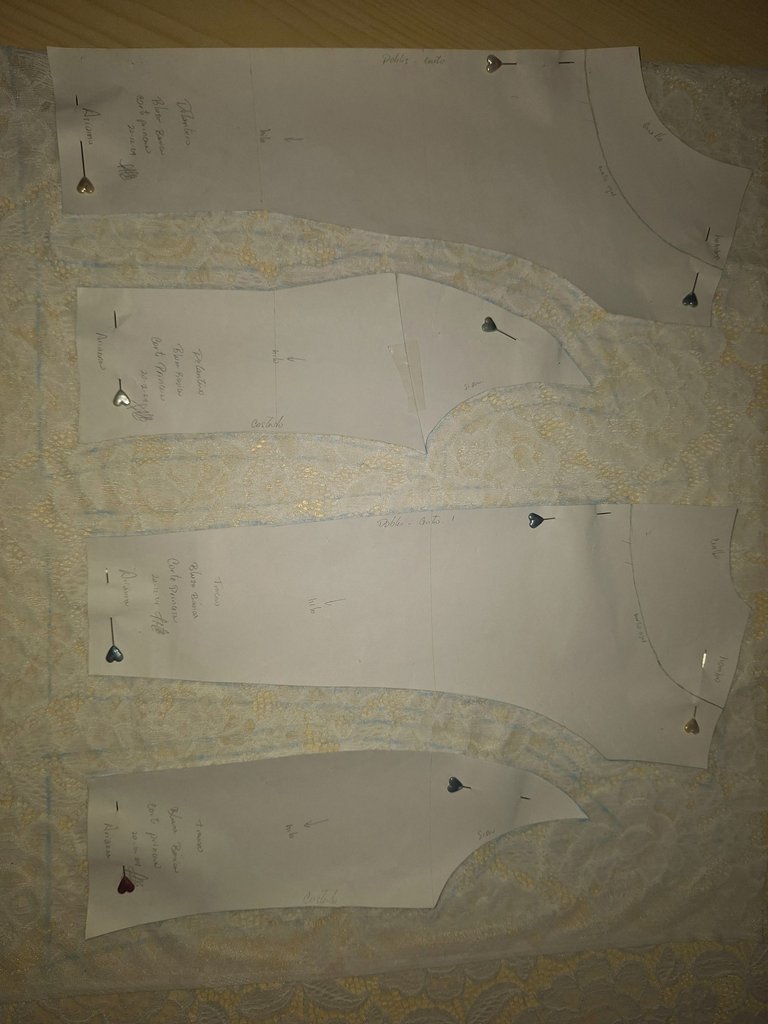
Después, para marcar los patrones de la tela de encajes, también utilice el patrón básico de camisa, modifique fue un poco el escote, para que quedara tipo ojal.
También tuve cuidado de que en el centro de blusa se vieran las flores del encaje en todo el centro. Además de ubicar los patrones de los costados, coincidirán lo más posible con el centro.
 |  |  |
|---|
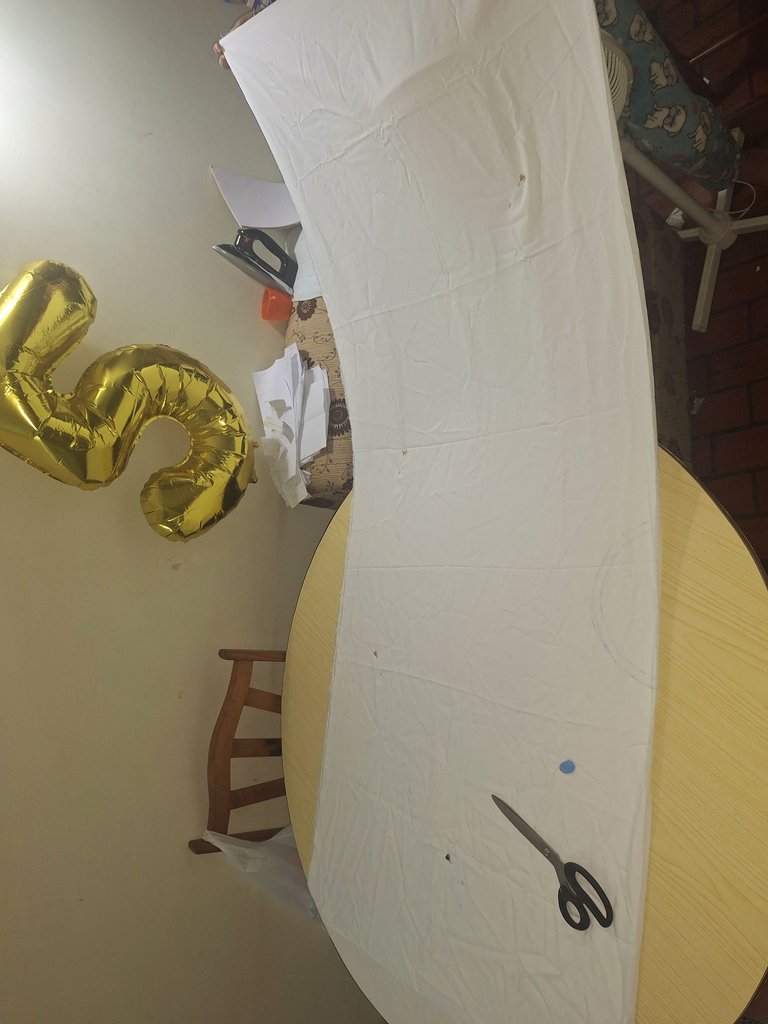
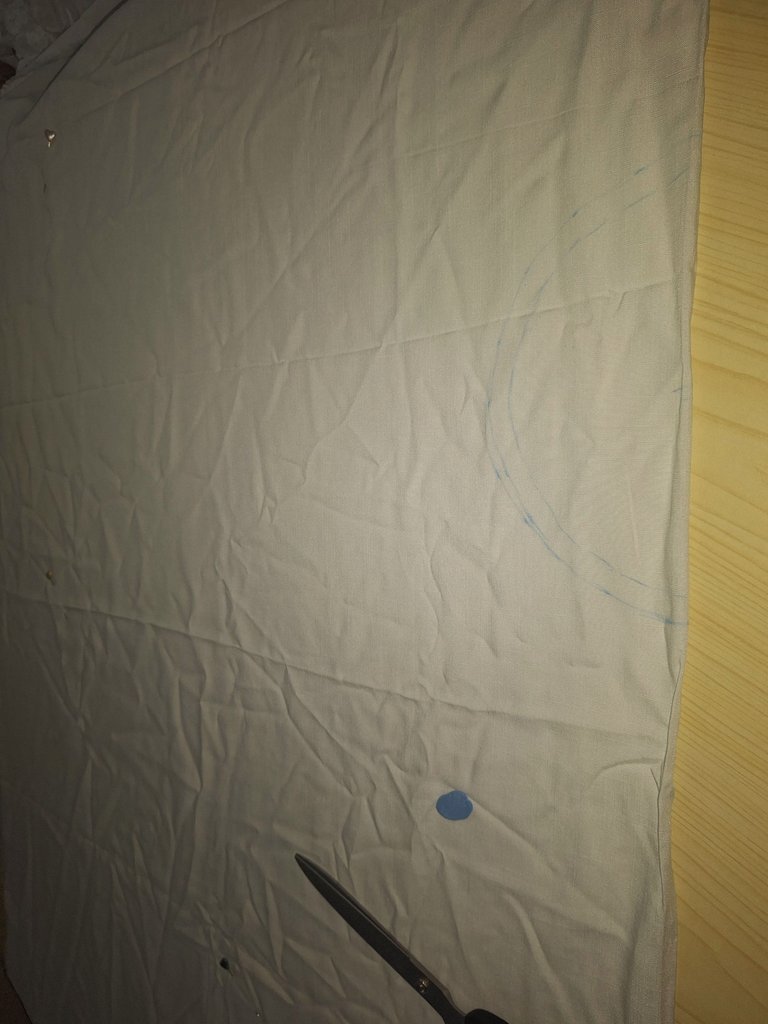
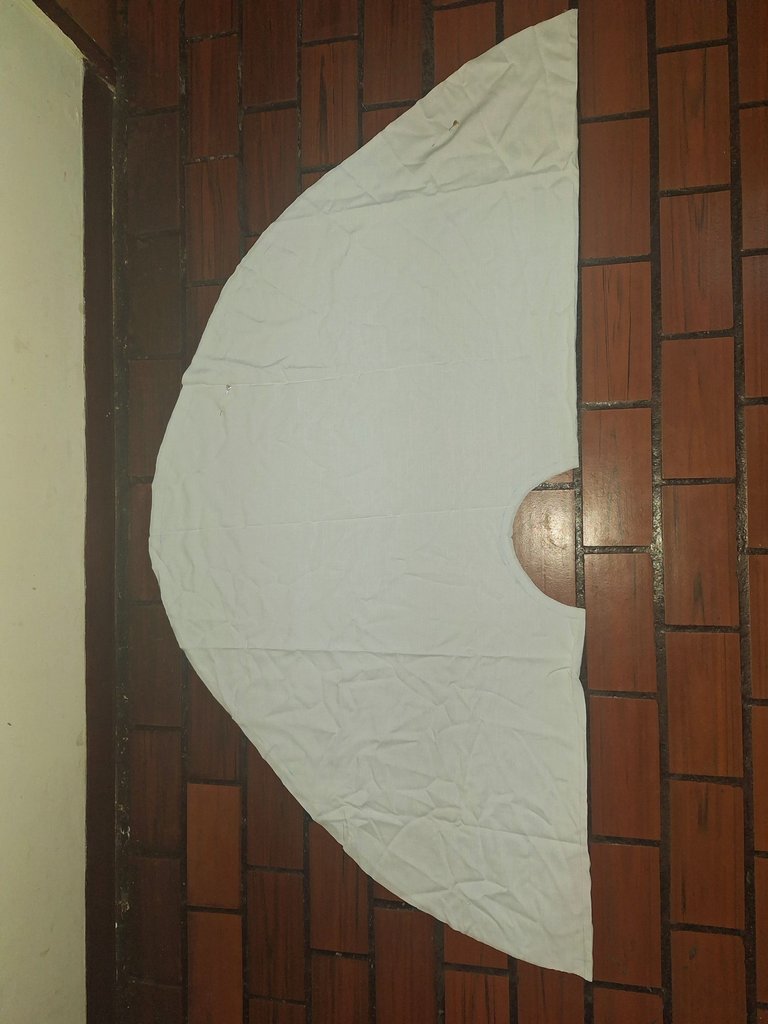
Para hacer la falda, la quería tipo cola, más corta adelante y más larga atrás, pero la tela no me daba para que tuviera mucha diferencia.
Para hacer este tipo de falda hay que hacer unos cálculos matemáticos sencillos. Gracias a Dios vi unos videos, porque no tenía idea de que era así. La verdad es que, haciéndolo de esta manera, dan unos resultados muy bonitos y exactos.
 |  |  |
|---|
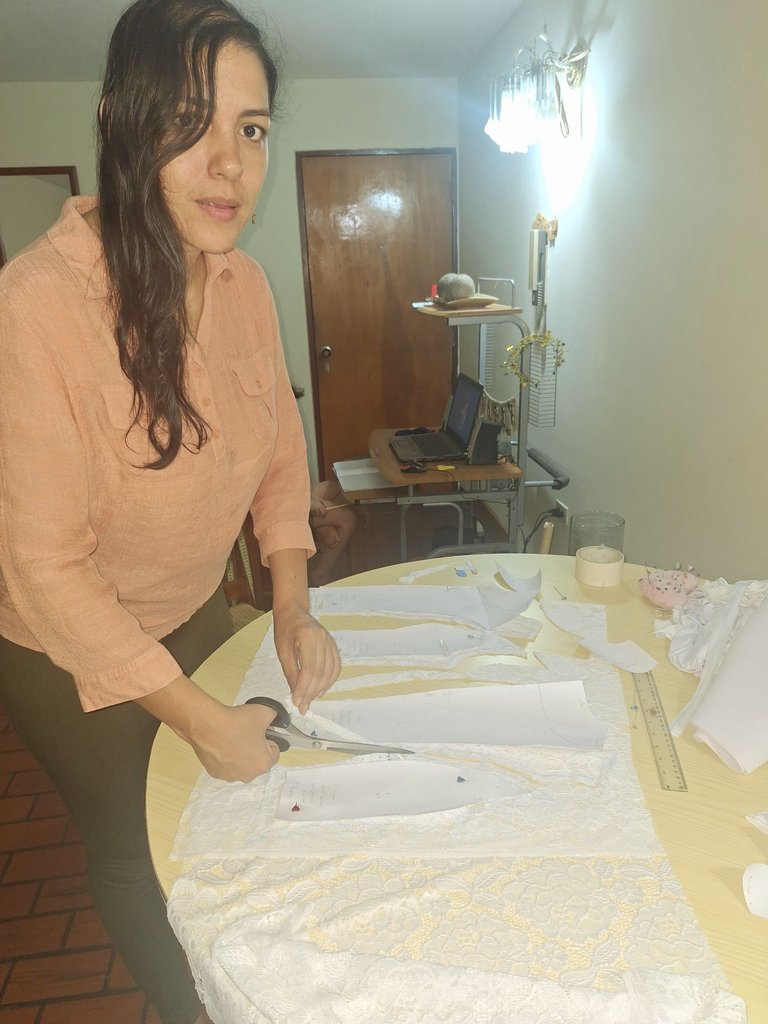
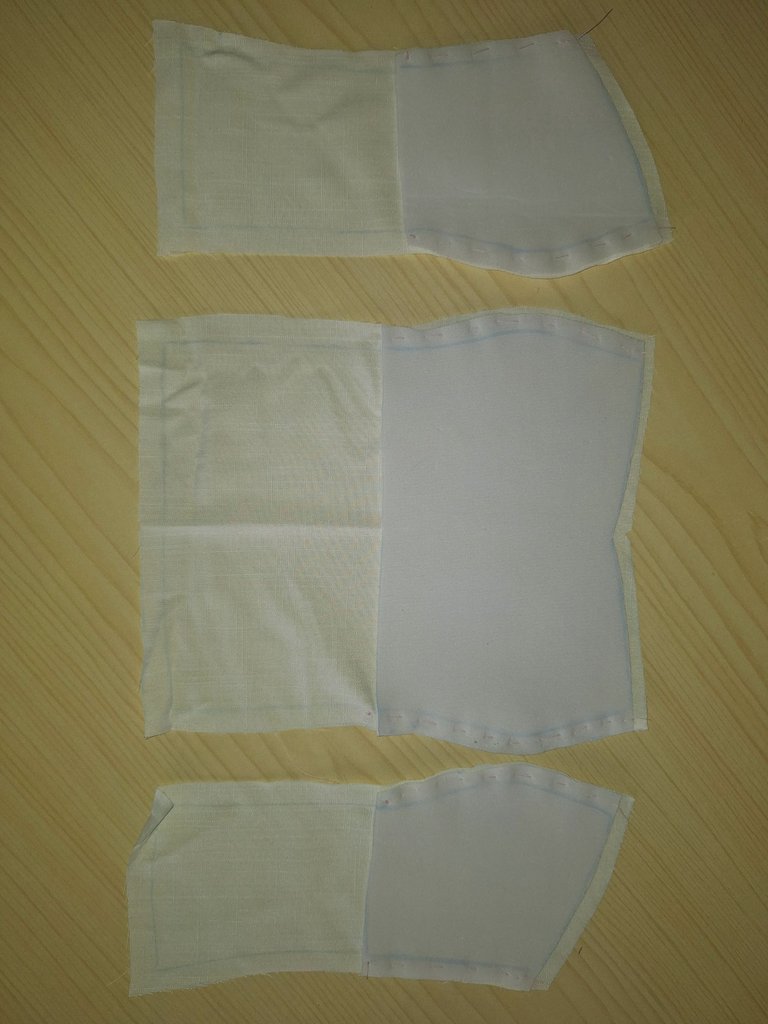
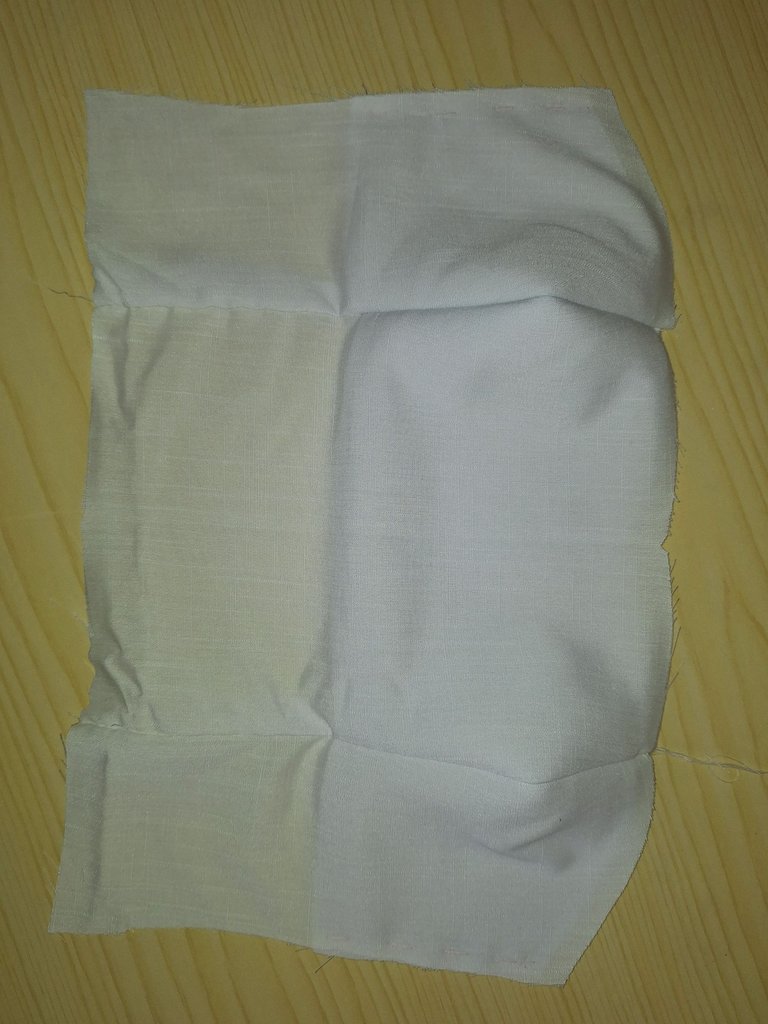
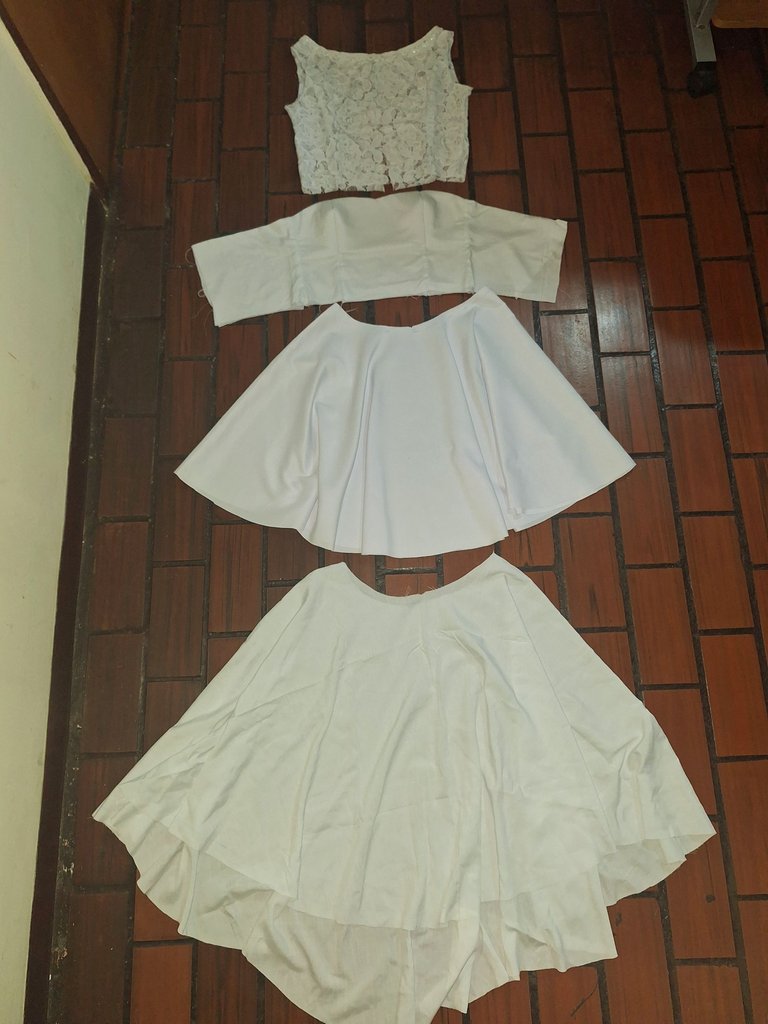
Una vez tuve todas las piezas cortadas, era el momento de empezar a pasar costura a máquina, para ir dándole forma a este lindo vestido de bautizo.
Primero empecé con el top, es decir, la parte de arriba del vestido. Pero antes de pasar a la máquina, le pasé costura floja a mano, para fijar las telas mejor.
Uní la tela de lino con la de neopreno. Formando el top, lo mismo hice con el forro y luego cosí la tela de encajes con corte princesa, para así tuviera la misma horma del top.
 |  |  |
|---|
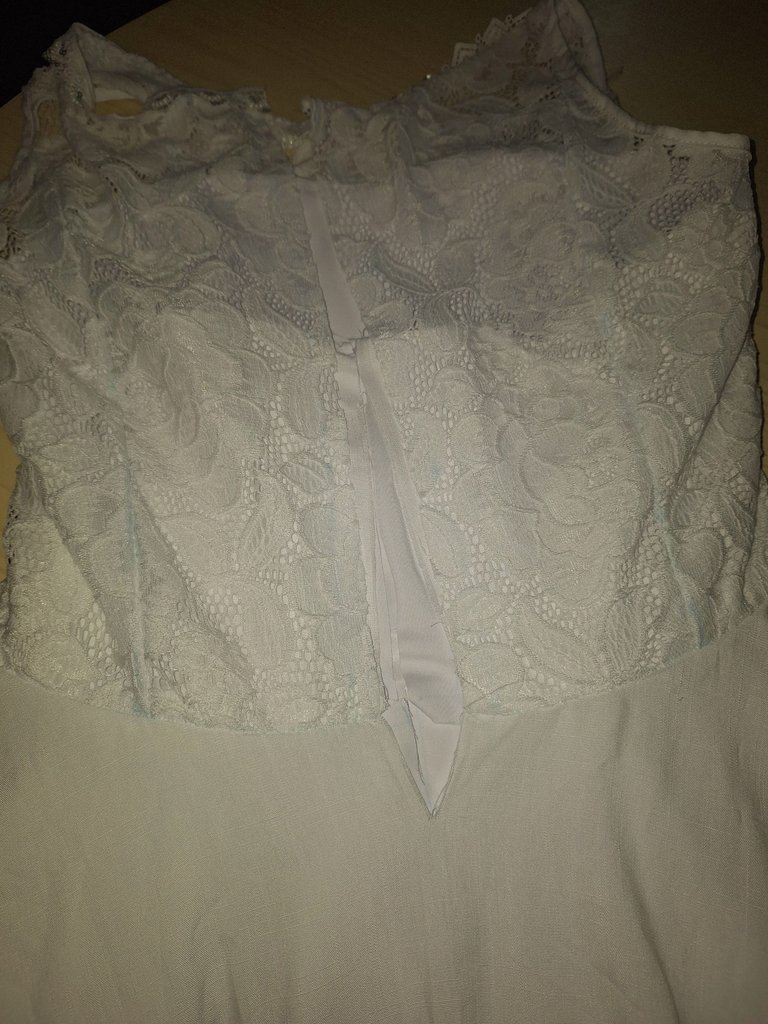
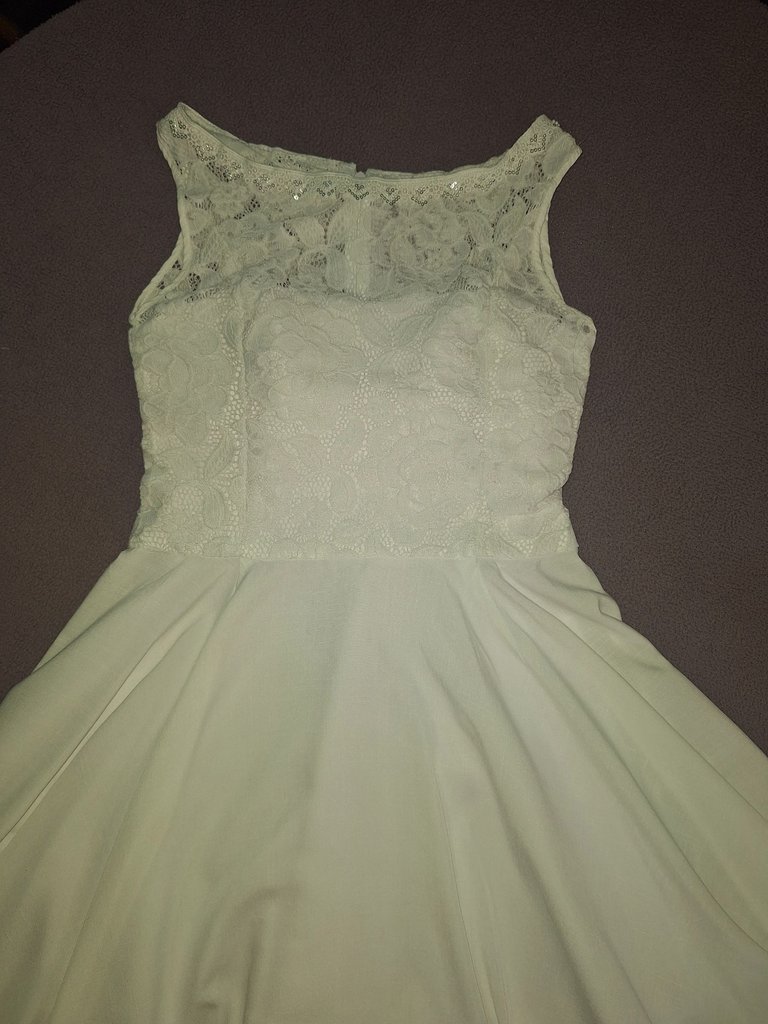
Teniendo el top listo y cocida la camisa de encaje, era hora de hacerle unos detalles. Para esto le hice un pequeño ruedo y luego le cosí un bello encaje decorado tanto en el cuello como en la siza.
Luego todo lo que le había puesto en la siza se o tuve que quitar, ya que ese encaje tenía mostacillas y a mi princesa le incomodaba el rose con los brazos. Luego le hice un vivo con la tela de lino y le quedó genial.
En este puento ya tenia todas las piezas, lo que faltaba era ensamblar.
 |  |
|---|---|
 |  |
Primero cosí la camisa de encaje al top, uniéndose por la parte de abajo. Luego todo se cosió a la falda de lino y se unieron los forros.
Hasta ahí todo iba bien. No le les voy a hecha todo el cuento de cuantas veces se me rompió el hilo o cuando tuve que coser y descoser, ya que por uno de los costados no se porque le quedó más ancho que el otro y así otros inconvenientes, pero se logró avanzar.
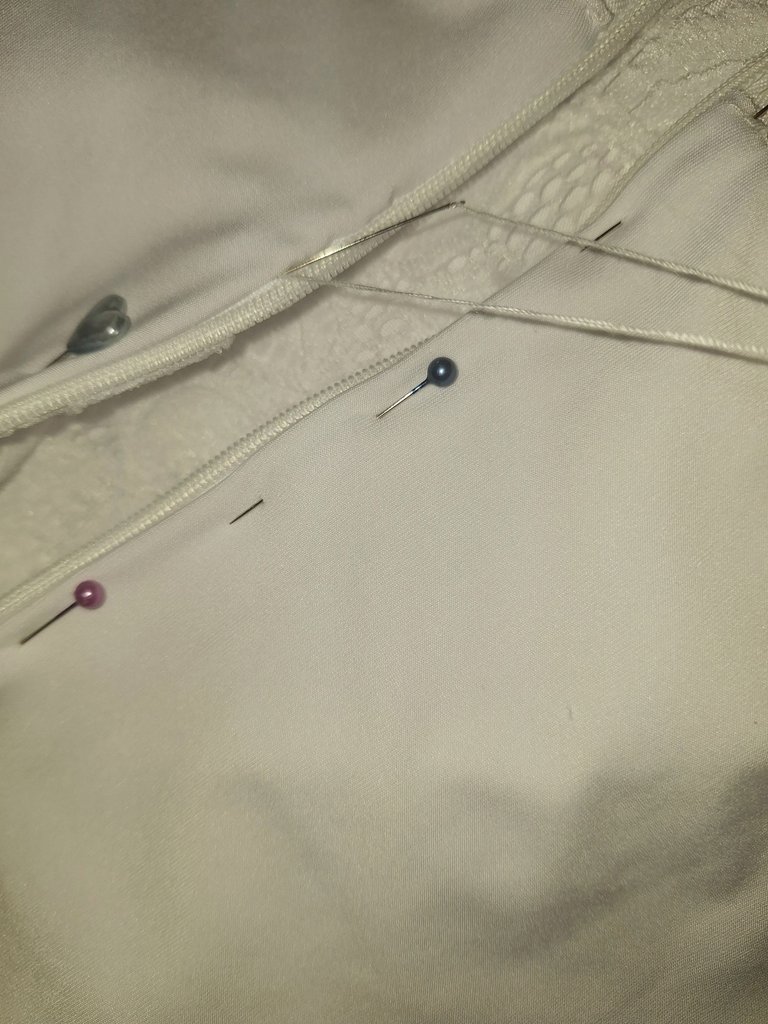
El verdadero desafío fue colocarle el cierre invisible, ya que tenía dos prendas, la camisa de encajes y el top. No se cuantos tutoriales tuve que ver, pasé varios días sin avanzar.
No dormía pensando en como colocar ese cierre, me daban varias formas, pero ninguna que se viera perfecto como lo quería, que se viera totalmente forrado.
Hasta que di con un video que me dio luz, auque tuve que descoser, también coser a mano por la parte del forro, pero al fin lo logré, quedo como yo quería, que se viera bello por fuera y por dentro, que se sintiera cómodo.
Lo planche horas antes de salir al bautizo, ya que esa tela se arruga con facilidad y mira que me costo planchary eso que la tela es delgada y suave. Igual cuando se lo puso se sentó y lo arrugó.
Ah les cuento que tuve que lavar el vestido, ya que se le notaba lo azul de la tiza. Necesito comprar una que se quite al planchar la tela.
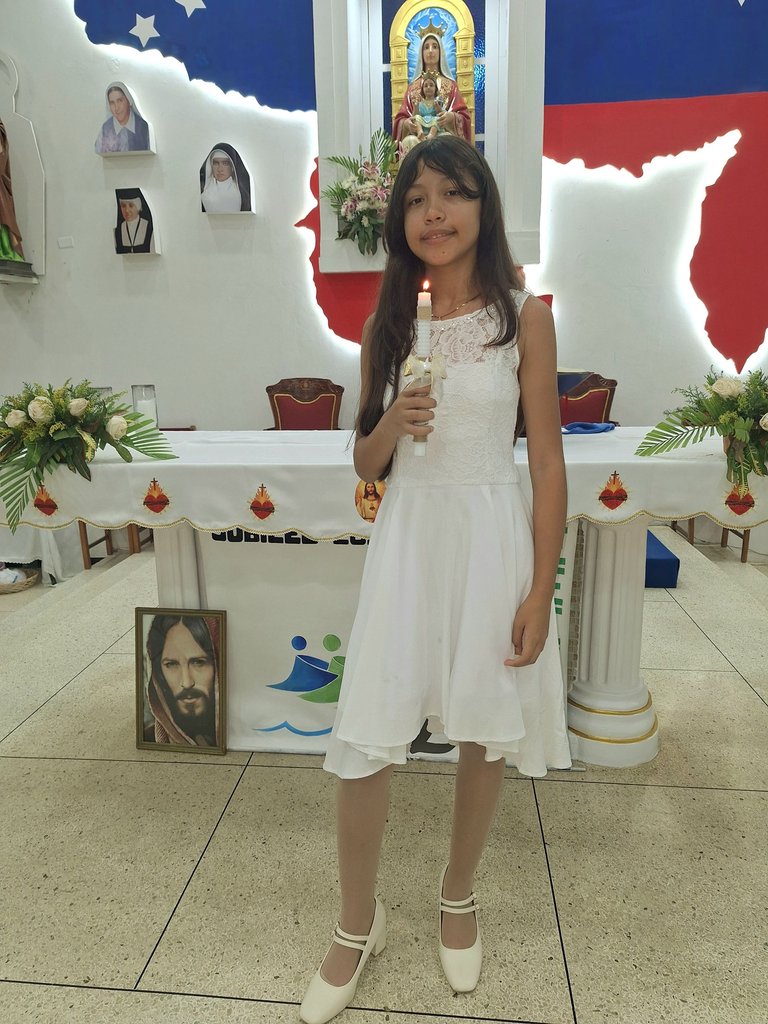
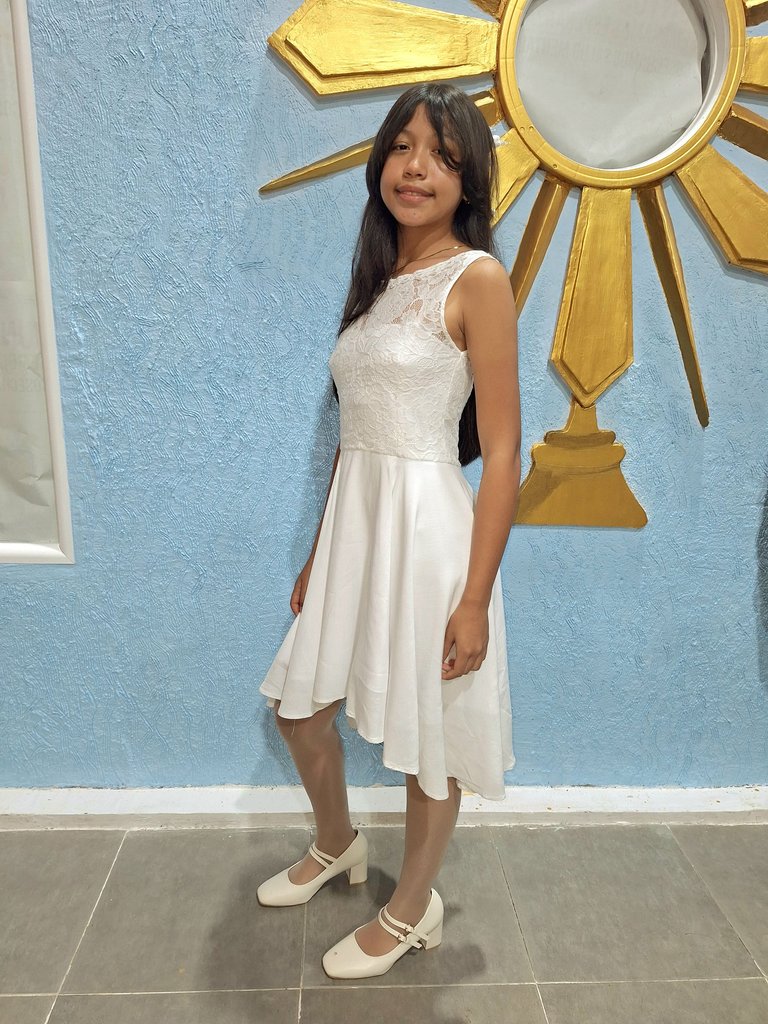

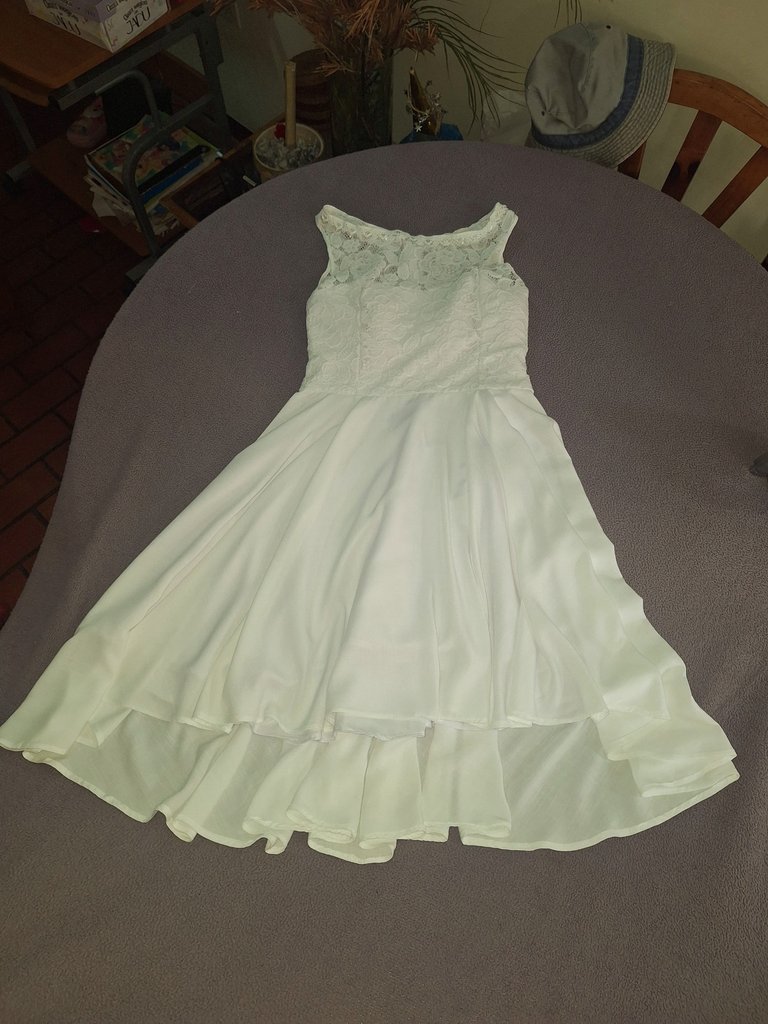
Y así de bello le quedo su vestido de bautizo a mi hija, se veía hermosa, yo feliz de ver los resultados de todos mis esfuerzos.
El vestido tiene una bella caída, que se la da tanto el modelo de la falda circular, como la tela.
El la espalda le quedó señido al cuerpo y la parte del cierre se veía muy bien a pesar que no use el prensa telas de cierre invisible porque me podía romper el encaje, use un prensa tela de cierre normal y la verdad que me funcionó muy bien, gracias a Dios.
El bautizo estuvo muy lindo, luego se los comparto, así como el vestido que le hice a mi princesa Ámbar, que también quedo hermoso, a las dos las bautizamos el Sábado Santo y estuvo genial.
Bueno, amigos, gracias por acompañarme en esta larga lectura, jejeje. Espero que les haya gustado el vestido tanto como a nosotras.

Arianna's beautiful christening dress
Greetings and blessings, my beautiful people of @needleworkmonday. Nice to visit you in this new week of sewing and beautiful creations. Today I come to share with you how happy I am to have made my princess Arianna's christening dress.
This project was a challenge since I started to choose the model, since I watched many videos, looking for ideas, since there are beautiful images, but as I am an apprentice, I wanted to guide me and do it in the best way.
When I started looking for the materials, it was also quite a topic, as there are endless fabrics among which I had to choose the most suitable, that was within the possibilities of my budget and above all that it was something simple that my princess @ariannamc, feel comfortable and could use it on other occasions.
I bought 3 types of fabrics, a lace one, a linen type, a lining fabric, soft and with elasticity for the top and the lining skirt, but in the end this fabric was not enough for me and I had to buy a fourth fabric for the lining skirt and a fifth fabric called neoprene to give strength to the top.
| | |
|---|
Now, to start with the process of making the dress, I began to mark the patterns, which I already had made from a top I made her for her birthday.
First I marked it on the linen fabric, then on the lining fabric and finally on the neoprene fabric. To then cut them to an extra centimeter for the seams.
The idea of marking it with chalk is great, because by that mark, I machine sew the seam and it is easier to follow the pattern and make the garment fit.
| |
|---|
Then, to mark the lace fabric patterns, I also used the basic shirt pattern, but I modified the neckline a little, so that it would look like a buttonhole.
I also made sure that the lace flowers were visible in the center of the blouse. In addition to placing the patterns on the sides, they will coincide as much as possible with the center.
| | |
|---|
To make the skirt, I wanted it to be tail-like, shorter at the front and longer at the back, but the fabric didn't allow me to make much difference.
To make this type of skirt you have to do some simple mathematical calculations. Thank God I saw some videos, because I had no idea it was like that. The truth is that, doing it this way, they give very nice and accurate results.
| | |
|---|
Once I had all the pieces cut, it was time to start sewing by machine, to give shape to this cute christening dress.
First I started with the top, that is, the upper part of the dress. But before going to the machine, I sewed it loosely by hand, to fix the fabrics better.
I joined the linen fabric with the neoprene fabric. Forming the top, I did the same with the lining and then sewed the lace fabric with a princess cut, so it would have the same shape as the top.
| | |
|---|
Having the top ready and the lace shirt sewn, it was time to make some details. For this I made a small hem and then sewed a beautiful decorated lace on both the collar and the hem.
Then I had to take off everything that I had put on the cheeks, since the lace had beads and my princess was uncomfortable with the rose with her arms. Then I made her a vivid with the linen fabric and it looked great.
At this point I already had all the pieces, what was missing was to assemble.
| |
|---|---|
| |
First I sewed the lace shirt to the top, joining it at the bottom. Then everything was sewn to the linen skirt and the linings were joined.
So far so good. I'm not going to tell you the whole story of how many times the thread broke or when I had to sew and unsew, since one of the sides was wider than the other and other inconveniences, but I managed to move forward.
The real challenge was to place the invisible zipper, since I had two garments, the lace shirt and the top. I don't know how many tutorials I had to watch, I spent several days without making any progress.
I did not sleep thinking about how to place that zipper, I was given several ways, but none that looked perfect as I wanted, that looked fully lined.
Until I found a video that gave me light, although I had to unpick, also sew by hand on the lining part, but finally I did it, it was as I wanted, that it looked beautiful on the outside and inside, that it felt comfortable.
I ironed it hours before leaving for the christening, because that fabric wrinkles easily and it cost me a lot of ironing because the fabric is thin and soft. Even when he put it on, he sat down and wrinkled it.
I had to wash the dress, as the blue chalk was showing through. I need to buy one that comes off when ironing the fabric.
And that's how beautiful my daughter's christening dress looked, she looked beautiful, I was happy to see the results of all my efforts.
The dress has a beautiful drape, which is given by both the pattern of the circle skirt and the fabric.
The back was close to the body and the zipper part looked very good even though I did not use the invisible zipper fabric press because it could break the lace, I used a normal zipper fabric press and the truth is that it worked very well, thank God.
The baptism was very nice, I will share it with you later, as well as the dress I made for my princess Amber, which was also beautiful, we baptized them both on Holy Saturday and it was great.
Well, friends, thanks for joining me in this long reading, hehehe. I hope you liked the dress as much as we did.
Mi blog es familiar, de mi día a día, en donde puedo subir fotos de niños u otras personas de mi entorno, NO autorizo a usar mis fotografías sin mi autorización.
My blog is a family blog, of my daily life, where I can upload photos of children or other people around me, I do NOT authorize you to use my photos without my authorization.
Dispositivo | Device | Samsung Galaxy A54
Fotos editadas en: |Photos edited in | CC Express for Picsart / Canva
Separadores hechos en | Separators made in | CC Express for Samsung
Traducción con | Translation with| DeepL
Woooow amiga!! Que belleza de vestido, te quedó muy hermoso
Gracias amiga bella, que bueno que te gustó.
Amiga, quedó muy hermoso. Me encanta la caída de la falda y la tela de encaje es delicada y bella.
Quedo pendiente de ver el de Ámbar.
Si la falda cae muy linda, además es muy cómodo. Espero se lo pueda poner en otras ocasiones.
El de Ámbar, también quedo bello.
Hermoso vestido 👗 👍😍
Gracias amiga.
Precioso el vestido y tu princesa de ve hermosa, valió la pena todo el esfuerzo amiga y las veces que tuviste que coser y descoser, al ver los resultados tu corazón está feliz. Te deseo Bendiciones y que todas tus costuras sean un éxito total. Saludos
Si amiga, valió totalmente la pena. Feliz de ver a mis princesas hermosas con mis creaciones. Muchas gracias 😘
Hermoso el vestido amiga, la verdad que hiciste un gran trabajo. Se veía muy bella. Felicidades.
Gracias amiga bella, puse todos mis esfuerzos para que quedara lindo.
wow este vestido te quedo espectacular, me encantó quedó muy hermosisimo, te felicito gracias por compartir
Gracias amiga por sus palabras.
This was sewn to perfection. Thanks for walking us through the process.
selected by @ibbtammy
Muchas gracias por el apoyo amigos.
Muy lindo vestido, tu hija se ve hermosa. es muy reconfortante ver los bellos resultados a nuestros trabajos y si es para nuestras preciosas hijas es mucho mejor jajaja. Felicidades por tu lindo trabajo.
Gracias por pasar amiga. Si es muy reconfortante ver los esfuerzos hecho en una pieza tan linda para nuestras princesas.
Preciosisimo vestido Leidimar, te quedó perfecto y a tu hija se le ve genial, justo a su medida. Muy elegante, seguramente lo pueda usar en algunas otras ocasiones añadiendo algún detalle de color. Mientras tanto para el bautizo le quedó perfecto.
Te felicito, me encantó tu trabajo 💕
Gracias amiga, que bueno que te gustó. Esa es la idea que se lo pueda poner en otras ocasiones. Gracias por la idea de ponerle algo de color para otro momento.
Mami muchas gracias, me encantó. Se que le puso mucho trabajo y amor para que quedara perfecto. Te amo mamita bella.
Todo con mucho amor para ti mi bella. Te amo con todo mi corazón ❤️