
English
Hi there, friends of the HiveDiy community, how are you today? I hope you're doing great!
The mermaids brought me a gift from the bottom of the sea: precious stones to make a necklace. Some crystalline, others being simply pearls, and a couple of stones of such a tender pink that give the perfect touch, right in the center, seeming to embrace a soft blue elongated bead.
I made this necklace inspired by the sea, and since I finished it, I got the vibe that it was a mermaid who was in charge of collecting the stones. She traveled to the deepest places, looking for a slight shimmer that would warn of the presence of a precious stone.
It is a very beautiful accessory that could even be the only protagonist of my wardrobe. With such beautiful blue tones, I almost forgot that it is my favorite color. Anyway, today you will accompany me in the process of creating this gift from the sea; here we go!
Materials
35 cm of elastic thread.
Scissors.
Hair clip.
Measuring tape.
Blue green pearl beads.
White pearl beads.
Blue pearl beads with patterns.
Flat crystal beads.
Light blue textured beads.
Pink pearl beads.
Grayish blue oval beads.
Light blue flat beads.

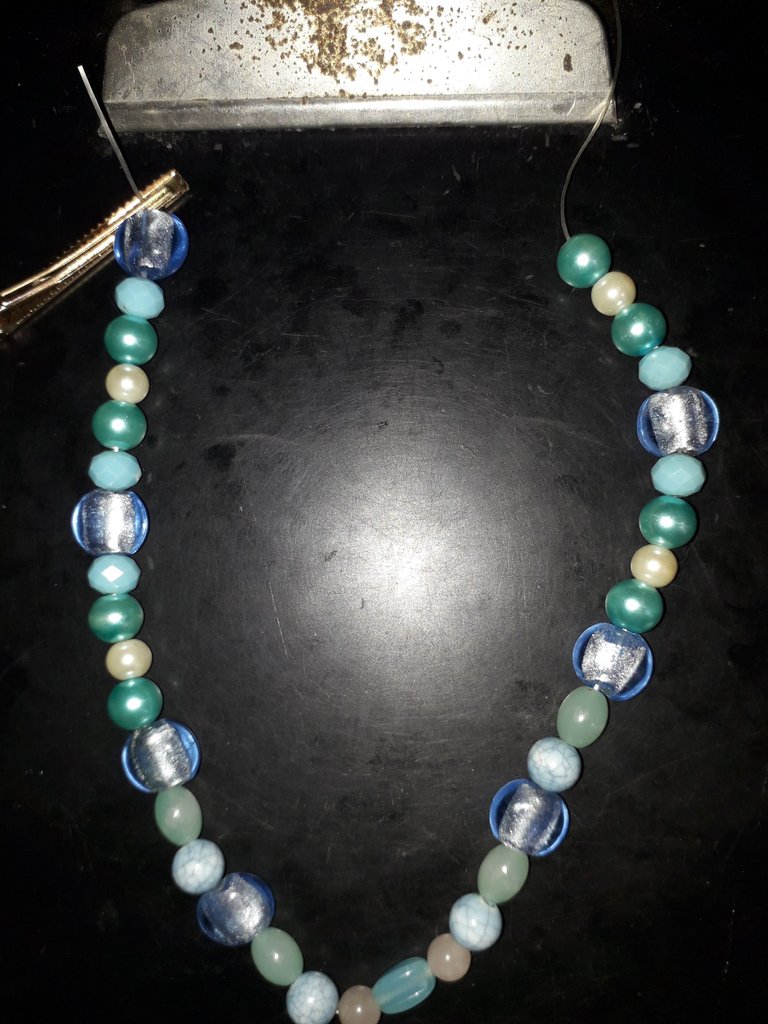
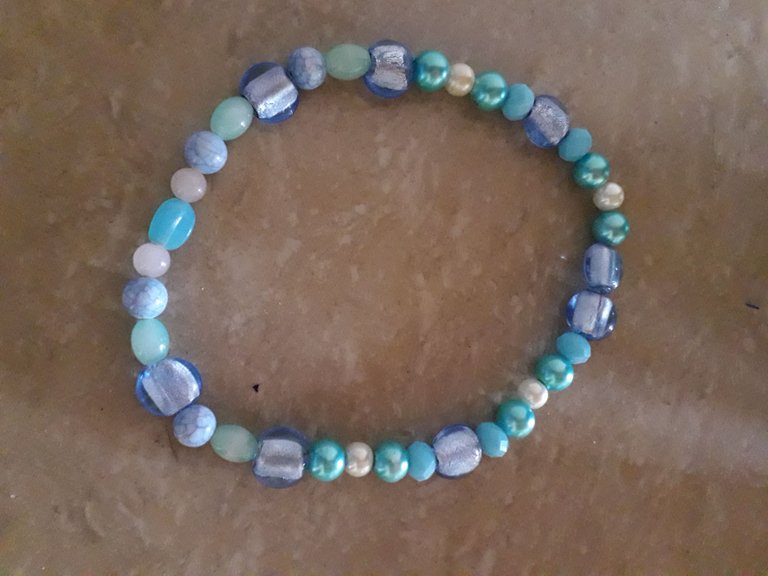
This was a photo I took to evaluate how the beads looked together. In the end, I decided to eliminate the dark blue beads and add a couple of pink beads I had among my stone chest. A real treasure chest. These beads are quite old; I've had them with me because they've been left over from necklaces or tendrils I've made in the past, and now I had the opportunity to create something pretty.
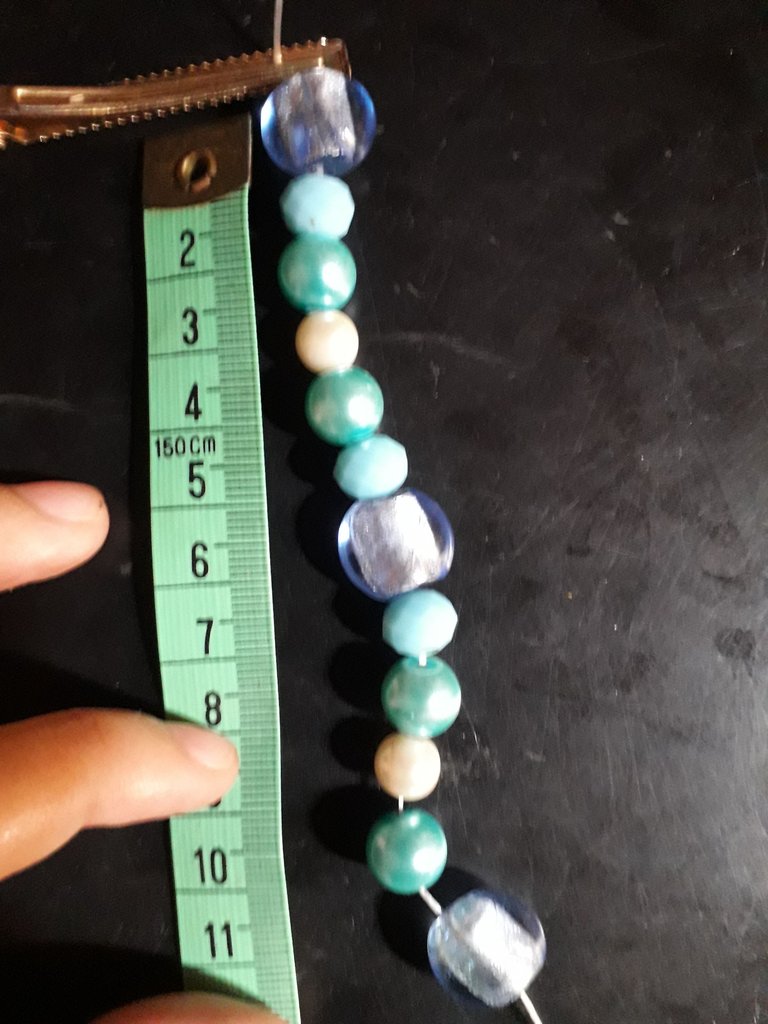
I kind of like necklaces that are a little tighter around the neck, so I decided to make this with that measurement, using the tape measure to know what the volume of my neck is.
Now yes, let's start with the process, my dears.
Process
 |  |
|---|
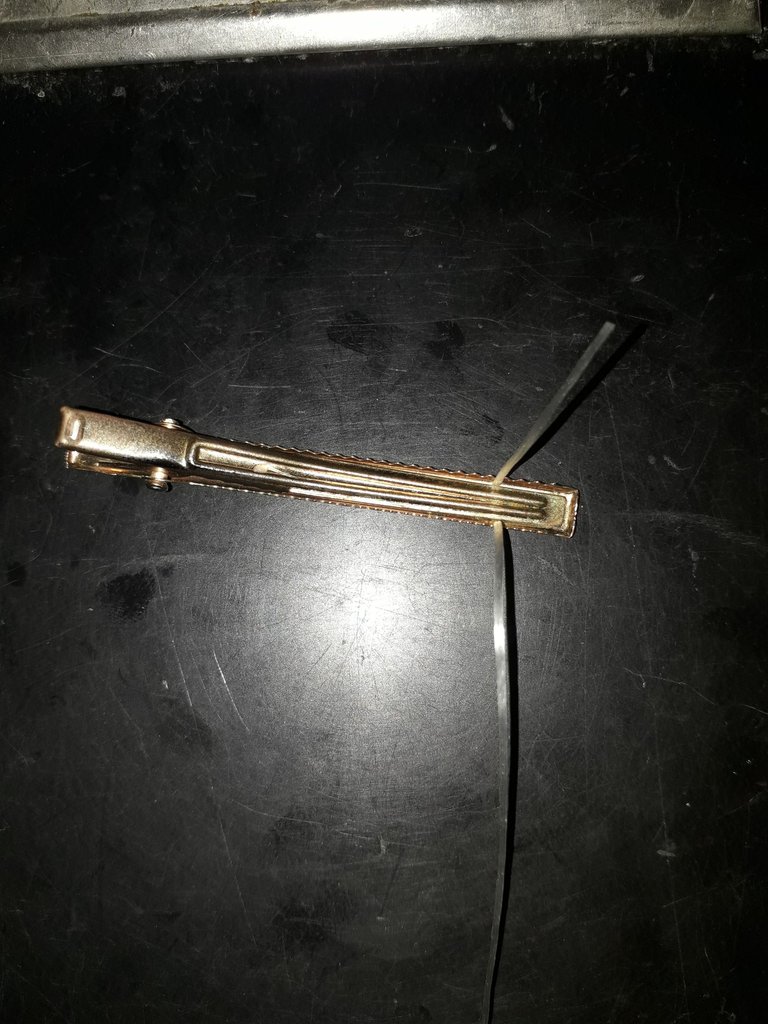
The first thing I did was to secure one end of the elastic thread with the hair clip. I do this so that the beads don't fall out while I'm stacking them. I don't know what other people use, but I use those little hair clips, hehehe; they don't support a lot of weight, so I didn't lift the elastic thread until I finished the necklace and I could grab each end of the thread. Be careful, because believe me, if it comes loose, beads will fly all over the place, and it's a disaster, hahaha.
Anyway, once the thread was secured, I placed the first bead, passing the thread through its little hole in the middle. I started with my favorite bead, which I will call “crystal clear water.”
 |  |
|---|
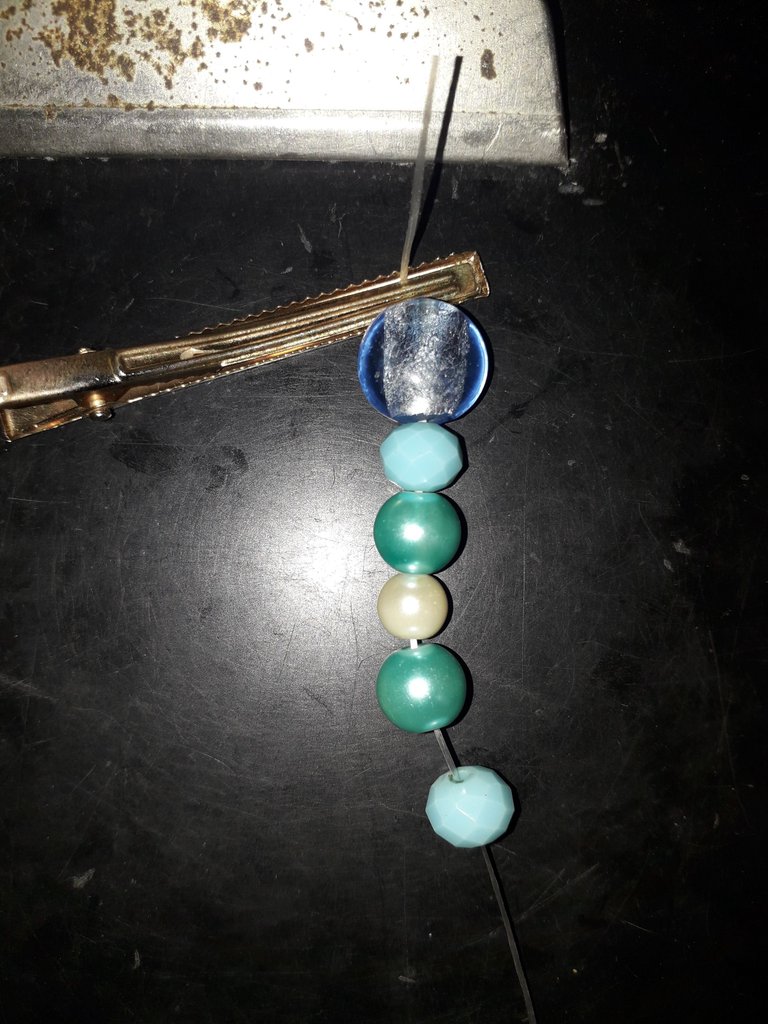
I kept putting beads in order to create a pattern. After “crystal clear water,” I put a blue textured bead, which I will call “blue coral,” then I put a bluish green pearl, which I will call “aquamarine.” And finally, I put a white pearl (which I don't need to invent a name for, haha). Then, I repeated beads to complete the pattern: an “aquamarine” and a “blue coral” to close.
The next thing was to repeat the pattern: crystal water, blue coral, aquamarine, white pearl, and aquamarine again.
 |  |
|---|
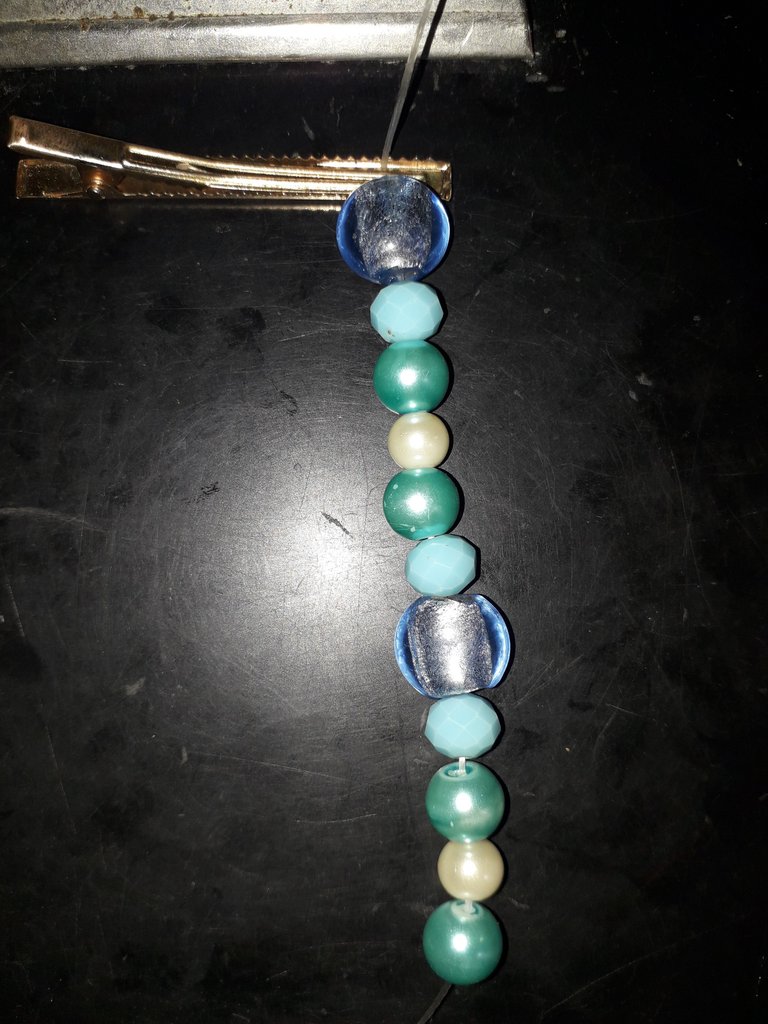
I added another crystal water bead and then started measuring to see what pattern I could follow to make it symmetrical. As I measured, I realized that I was still 5 cm short of the middle of the necklace, basically.
Then, after that crystal water bead, it was time to include two other different beads, which are the blue-patterned pearl and the blue-gray oval bead. I will call the patterned bead “sea waves,” and the blue-gray will be called “bubbles.”
I first put “bubbles” and then “sea waves” and then repeated the pattern.
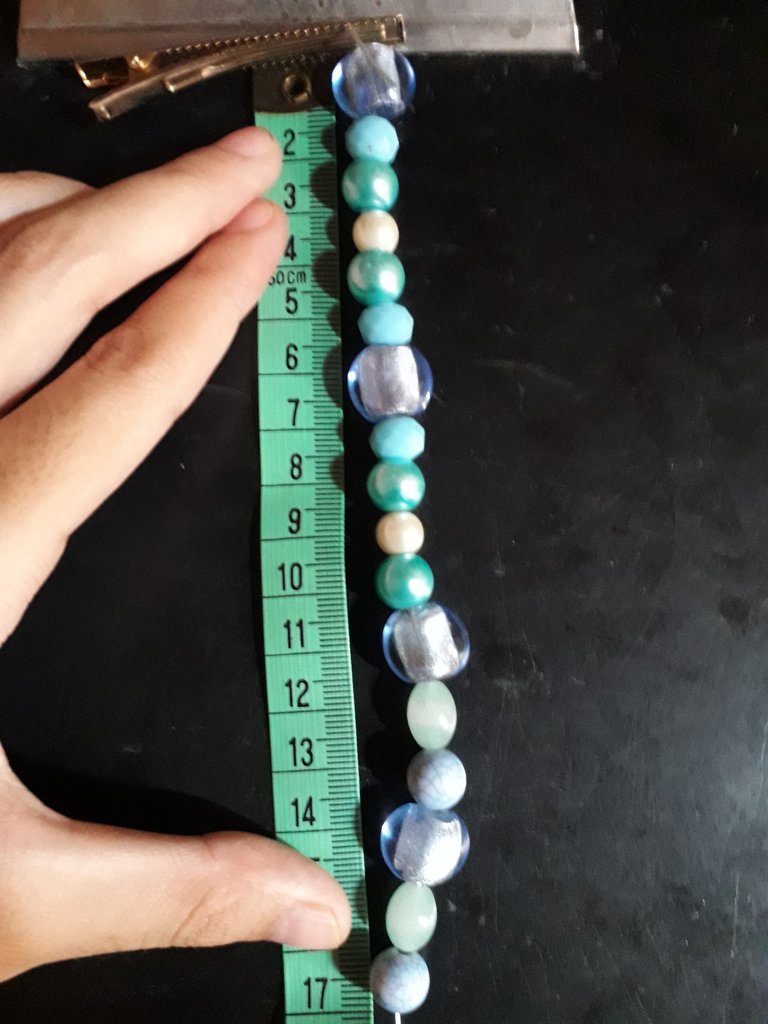
Likewise, I measured again, and now it was 17 cm, which would be the center of the necklace. Then, it's time to add the beads that will adorn, which will be the most special part of the necklace, as it will always go in front.

I then added a pink pearl, which I will call “seashell,” followed by a light blue flat bead, which I will call “wave,” followed by another “seashell.” The one in the center I called a wave because I thought of the shells of the sea being brought to shore by the waves. I don't know; I wanted to give them names to make this more fun. Also, to make the necklace more of a sea thing.
From here, now continue to put the beads in the opposite order to the previous ones, as if it were a mirror, so that it is symmetrical and exact.
 |  |
|---|
I kept adding a sea wave, then a bubble, and finally crystal clear water. The next thing was to repeat this pattern one more time.
 |  |
|---|
Now I add an aquamarine, a pearl, and another aquamarine, and then add a blue coral. The next thing was to repeat this pattern one more time: crystal water, blue coral, aquamarine, white pearl, and aquamarine.

To finish, I added a blue coral and crystal water.
Then, I took both ends of the elastic thread very carefully and tied a strong knot to close our necklace. Finally, I cut off the excess elastic thread.
 |  |
|---|
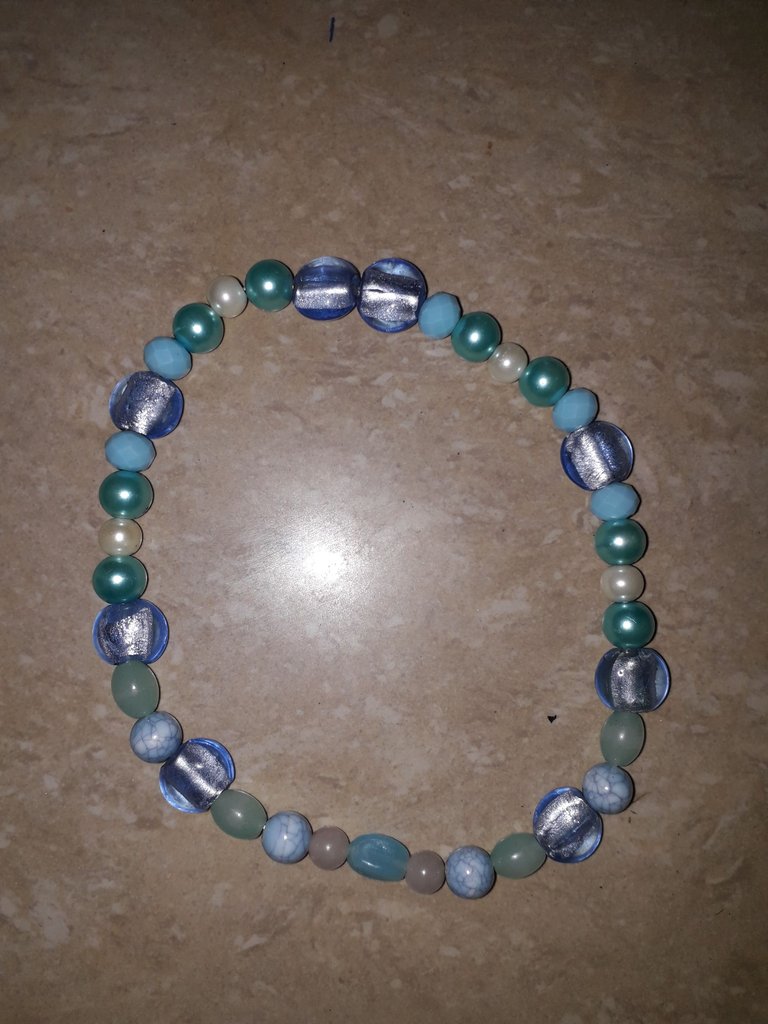
And that's it.
Don't tell me it doesn't look like a treasure that the mermaids took care of collecting with care to make a unique necklace.
Well, I'm not a mermaid myself, but I'm still proud of my work, hehehe.
The idea for this necklace came about because I realized that I don't have a white pearl necklace, and I wanted one very much. But I thought I could make a different necklace and just as pretty. Plus, I love the sea, so this came together to create this. What do you guys think? I'd love to know what inspiration you guys would use to make a necklace.
Hope you liked my post!
Without anything else to add… Take care, drink water, and don't forget to smile. Love you! See you in the next post, bye!

Español
¡Clic aquí!
Holiii, amigos de la comunidad de HiveDiy, ¿cómo se encuentran el día de hoy?, ¡Espero que muy bien!
Las sirenas me trajeron un regalo desde el fondo del mar: piedras preciosas para hacer un collar. Algunas cristalinas, otras siendo simplemente perlas, y un par de piedras de un rosado tan tierno que dan el toque perfecto, justo en el centro, pareciendo abrazar una cuenta alargada de color azul suave.
Este collar lo hice inspirado en el mar, y desde que lo terminé, me dieron vibras de que fue una sirena quien se encargó de recoger las piedras, viajando hasta los lugares más profundos, en busca de un ligerísimo brillo que advirtiera la presencia de una piedra preciosa.
Es un accesorio muy hermoso que podría incluso ser el único protagonista de mi vestuario. Con esos tonos azules tan bonitos, casi olvidaba que es mi color favorito. En fin, hoy me acompañarán en el proceso de creación de este obsequio del mar, ¡vamos allá!
Materiales
35 cm de hilo elástico.
Tijeras.
Ganchito de cabello.
Cinta métrica.
Cuentas de perla verde azulado.
Cuentas de perla blanca.
Cuentas de perla azul con patrones.
Cuentas de piedra plana cristalina.
Cuentas de piedra texturizada azul celeste
Cuentas de perla rosadas.
Cuentas de piedra ovalada azul grisaceo.
Cuenta de piedra plana azul celeste.
Esta fue una foto que tomé para evaluar cómo se veían las piedritas juntas. Al final me decidí por eliminar las cuentas de color azul oscuro y añadir un par de cuentas rosadas que tenía entre mi cofre de piedras. Un verdadero cofre del tesoro. Estas piedritas son bastante viejas, las he tenido conmigo porque han sobrado de collares o zarcillos que hice en el pasado, y ahora tuve la oportunidad de crear algo lindo.
Me gustan un poco los collares que son un poco más ceñidos al cuello, así que decidí hacer esto con esa medida, usando la cinta métrica para saber cuál es el volumen de mi cuello, jijiji.
Ahora sí, comencemos con el proceso, queridos.
Proceso
| |
|---|
Lo primero fue asegurar un extremo del hilo elástico con el ganchito del cabello. Esto lo hago para que no se salgan las piedras mientras las vaya apilando. No sé qué usarán otras personas, pero yo uso esos ganchitos, jiji; eso sí, no soportan mucho peso, así que no levanté el hilo elástico hasta que terminé el collar y pude agarrar cada extremo del hilo. Tengan cuidado, porque créanme que si se suelta van a volar piedritas por todos lados y es un desastre, jajaja.
En fin, una vez asegurado el hilo, puse la primera piedra, pasando el hilo por su huequito del medio. Empecé con mi piedra favorita, que le llamaré “agua cristalina”.
| |
|---|
Seguí poniendo piedras, con la finalidad de crear un patrón. Después de “agua cristalina”, puse una cuenta texturizada azul a la cual la llamaré “coral azul”, luego puse una perla verde azulada a la cual llamaré “aguamarina”. Y, por último, puse una perla blanca (a la cual no es necesario inventarle un nombre jjijiji). Luego, repetí piedras para completar el patrón: una “aguamarina” y un “coral azul” para cerrar.
Lo siguiente fue repetir el patrón: agua cristalina, coral azul, aguamarina, perla blanca y aguamarina de nuevo.
| |
|---|
Añadí otra piedra de agua cristalina y entonces comencé a medir para saber qué patrón podría seguir y que quedara simétrica. Al medir, me di cuenta de que aún me faltaban 5 cm para llegar a la mitad del collar, básicamente.
Entonces, después de esa piedra de agua cristalina, fue momento de incluir otras dos piedras diferentes, las cuales son la perla azul con patrones y la piedra ovalada azul grisáceo. A la piedra con patrones le llamaré “ondas del mar” y la azul grisáceo se llamará “burbujas”.
Primero puse una “burbujas” y luego una “ondas del mar”, para luego repetir el patrón.
Volví a medir y, ahora sí, llegaba a los 17 cm, lo cual sería el centro del collar. Entonces, es momento de añadir las piedras que adornarán, lo que va a ser lo más especial del collar, pues siempre irá al frente.
Añadí entonces una perla rosada, la cual llamaré “concha de mar” seguida de una piedra plana azul celeste, la cual llamaré “ola” seguida de otra “concha de mar”. A la del centro la llamé ola porque pensé en las conchas del mar, siendo traídas a la orilla por las olas. No lo sé, quise darles nombres para hacer esto más divertido. Además, para hacer el collar algo más propio del mar.
A partir de acá, ahora sigue poner las piedras en el orden contrario a las anteriores, como si de un espejo se tratase, para que quede bien simétrica y exacta.
| |
|---|
Fui añadiendo una onda del mar, luego una burbuja y, por último, una agua cristalina. Lo siguiente fue repetir este patrón una vez más.
| |
|---|
Ahora añado una aguamarina, una perla y otra aguamarina, para después añadir un coral azul. Lo siguiente fue repetir este patrón una vez más: agua cristalina, coral azul, aguamarina, perla blanca y aguamarina.
Para finalizar, añadí un coral azul y una agua cristalina.
Luego, tomé ambos extremos del hilo elástico, con mucho cuidado, e hice un nudo fuerte y asegurado para cerrar nuestro collar. Por último, corté el exceso de hilo elástico.
| |
|---|
Y ya estaría.
No me digan que no parece un tesoro que las sirenas se encargaron de recolectar con cuidado, para hacerse un collar único.
Bueno, no soy una sirena yo, pero aun así estoy orgullosa de mi trabajo, jijiji.
La idea de este collar surgió porque me di cuenta de que no tengo un collar de perlas blancas, y quería mucho tener uno. Pero pensé que podía hacer un collar diferente e igual de bonito. Además, amo el mar, así que esto se juntó para crear esto. ¿Ustedes qué opinan? Me gustaría saber qué inspiración utilizarían ustedes para hacer un collar.
¡Espero que te haya gustado mi post!
Sin nada más que añadir… Cuídense, tomen agua, y no se olviden de sonreír. ¡Se les quiere! Nos vemos en el próximo post, ¡chau!

Credits | Créditos
- English translation DeepL (sorry for any mistakes, English is my second language)
- Traducción al inglés DeepL (lo siento por cualquier error, el inglés es mi segundo idioma.)
- Cover, dividers, and banners made in Canva
- Portada, separadores y banners hechos en Canva
- Photos used in the post were taken by me, using a Samsung Galaxy J6
- Las fotos usadas en el post fueron tomadas por mí, usando un Samsung Galaxy J6
Posted Using INLEO
Wow, the necklace is so beautiful. It fits the theme, full of ocean nuances. I like it.
I'm glad to know that I accomplished my goal of making my necklace look oceanic, hehe. Thank you very much for stopping by my blog! :3
Yes, you're welcome. Keep up the spirit of creating the next work.
The necklace looks awesome, good Job 👏🩷
I'm glad you liked it. Thanks for stopping by my blog ^^
Súper lindas estas cuentas amiga. Las pulseras son mis prendas preferidas. Muchas gracias por compartir por aquí tu creación. 🫂
Siii, por eso dije que tenía que aprovecharlas. Las pulseras también son lindas, además de que son más fáciles de hacer, jiji. ¡Gracias a usted por pasar por mi blog! ✨
It is simple, nice, and beautiful. Sometimes simple things look amazing. Love this bracelet. Great job!
selected by @rezoanulvibes
It's true, sometimes less is more, because the simpler it is, the more it attracts attention. Thank you very much for your support! ^^
Que bella con sus tonalidades oceanicas, parece exactamente como el tesoro de una sirena ✨🧜🏼♀️