Holiii, amigos de la comunidad de Hivearte, ¿cómo se encuentran el día de hoy?, ¡Espero que muy bien!
Hoy ando haciendo un dibujo usando una estatua como referencia, una cosa que suelo hacer últimamente porque me gusta mucho la estética. En esta ocasión, dibujaré a una mujer que está en un ángulo un poco más complicado, porque está bastante inclinado hacia abajo, pero de esto se trata aprender, así que ¡vamos allá!
Hi there, friends of the Hivearte community, how are you today? I hope very well!
Today I'm doing a drawing using a statue as a reference, something I usually do lately because I really like the aesthetics. This time, I'll draw a woman who is in a little more complicated angle, because she is quite inclined downwards, but this is what learning is all about, so here we go!
 |  |
|---|
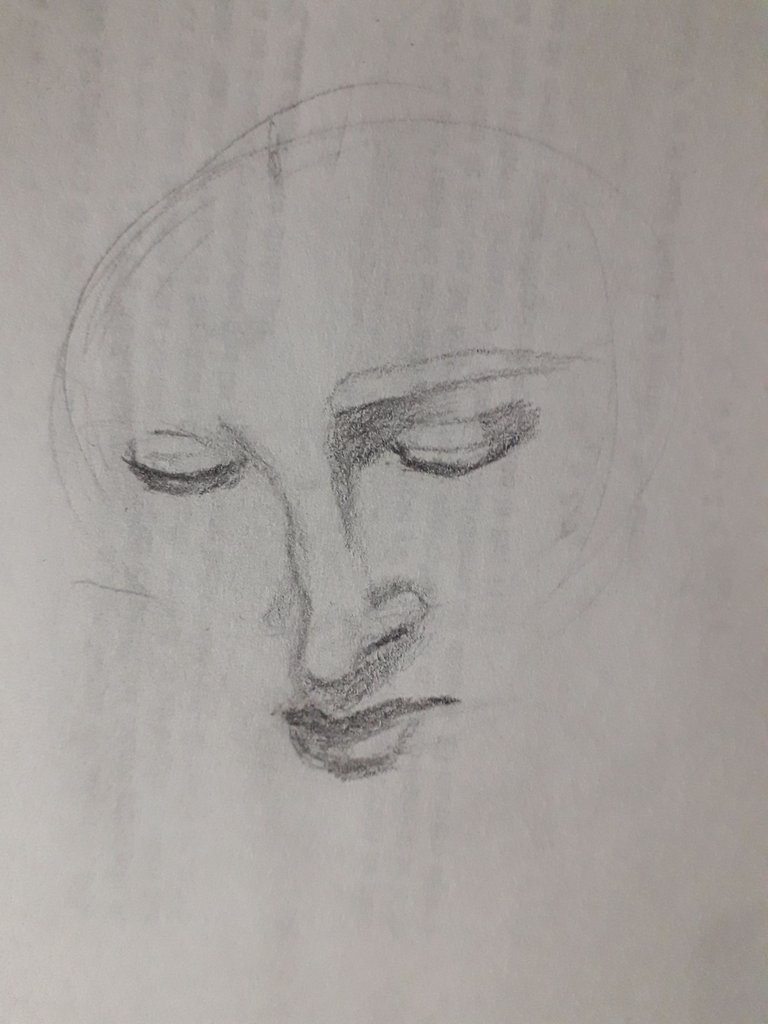
Comencé por dibujar un círculo y partirlo a la mitad, con cierta inclinación a la derecha. También lo dividí en dos partes con líneas curvadas hacia abajo. Esto lo hice para determinar la inclinación del rostro, el cual va a estar inclinado hacia la izquierda y estará mirando un poco hacia abajo.
Valiéndome de estas líneas guía, comencé a bosquejar los elementos del rostro, poniendo especial importancia en el entrecejo porque era lo que más sentía relevante. Bosquejé el entrecejo con una especie de forma triangular/cuadrada. Los ojos, los cuales están cerrados, los bosquejé con dos líneas curvadas. Siguiendo con la nariz, utilicé líneas rectas para dibujar el tabique, y un par de óvalos para la base (la punta de la nariz y la aleta). Para la boca, utilicé líneas rectas.
Una vez listo el boceto, comencé por dibujar los elementos del rostro, usando formas más redondeadas. Por ejemplo, en los parpados hice unas líneas ligeramente curvadas como los pliegues del mismo, también añadiendo una sombra sutil para dar un poco de volumen.
I started by drawing a circle and splitting it in half, with some inclination to the right. I also divided it in two parts with curved lines downwards. Furthermore, I did this to determine the inclination of the face, which will be tilted to the left and will be looking down a little.
Using these guidelines, I began to sketch the elements of the face, placing special importance on the space between the eyebrows because it was what I felt most relevant. I sketched the space between the eyebrows in a sort of triangular/square shape. The eyes, which are closed, I sketched with two curved lines. Continuing with the nose, I used straight lines to draw the septum, and a couple of ovals for the base (the tip of the nose and the flipper). For the mouth, I used straight lines.
Once the sketch was ready, I started drawing the elements of the face, using more rounded shapes. For example, on the eyelids I made some slightly curved lines as the folds of the eyelid, also adding a subtle shadow to give some volume.
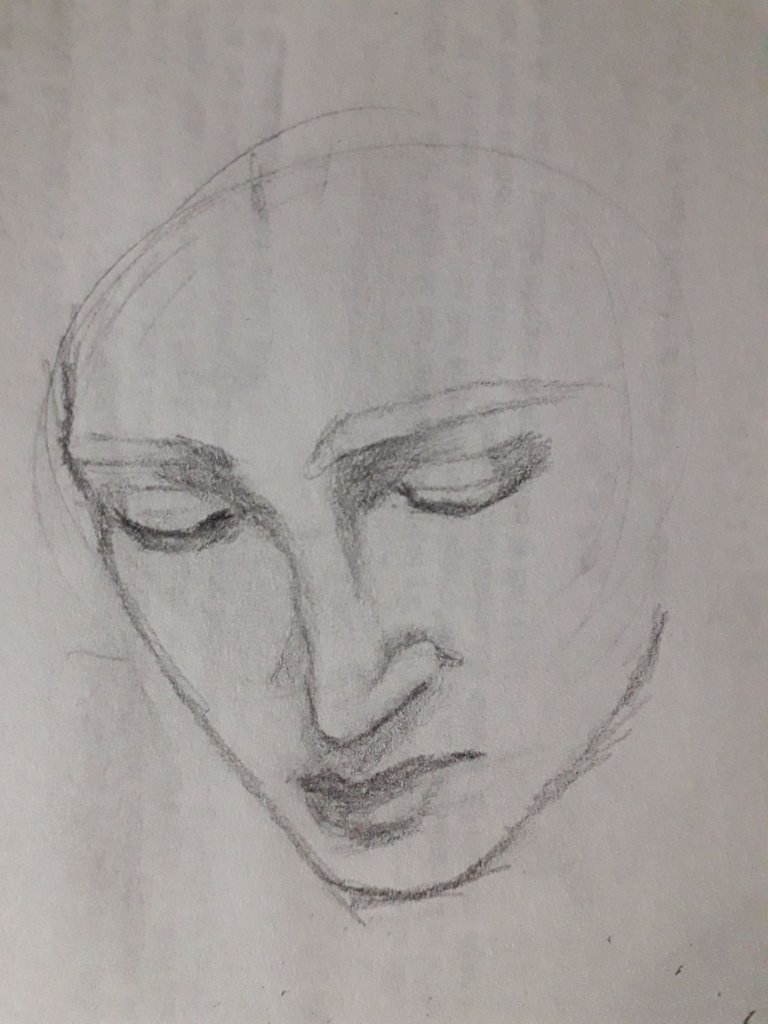
Acá di más sombras, las cuales están proyectadas desde arriba a la derecha. Las sombras más predominantes son las del entrecejo y la que está proyectada por la nariz. También es importante añadir sombra en los labios, para aportar volumen, ya que es una zona bastante “redonda” de nuestro rostro. Asimismo, comencé a dibujar las cejas, las cuales son más que todo un contorno.
Here I gave more shadows, which are cast from the upper right. The most predominant shadows are between the eyebrows and the one that is projected from the nose. It is also important to add shadow on the lips, to add volume, as it is a quite “round” area of our face. I also started to draw the eyebrows, which are more of an outline than anything else.
 |  |
|---|
Acá difuminé un poco el dibujo con toda mi mano, para esparcir el grafito por toda la hoja y “aclarar”. Es una maña rara que tengo, pero me ha funcionado. También es importante mencionar que me guíe de los elementos del rostro para comenzar a dibujar el contorno del mismo.
Lo siguiente fue oscurecer algunas zonas donde la sombra era más profunda. Como les dije anteriormente, la sombra era más profunda entre los ojos y el entrecejo, y bajo la nariz, proyectada sobre la boca. Hablando de la boca, aquí cambié su expresión, jijiji. También intensifiqué las sombras de los labios. Siento que logré una expresión más tranquila.
Here I blurred the drawing a little with my whole hand, to spread the graphite all over the sheet and “lighten” it. It is a rare skill that I have, but it has worked for me. It is also important to mention that I used the elements of the face to start drawing the contour of the face.
The next thing was to darken some areas where the shadow was deeper. As I told you before, the shadow was deepest between the eyes and between the eyebrows, and under the nose, projected over the mouth. Speaking of the mouth, here I changed her expression, hehehe. I also intensified the shadows on the lips. I feel like I achieved a calmer expression.
 |  |
|---|
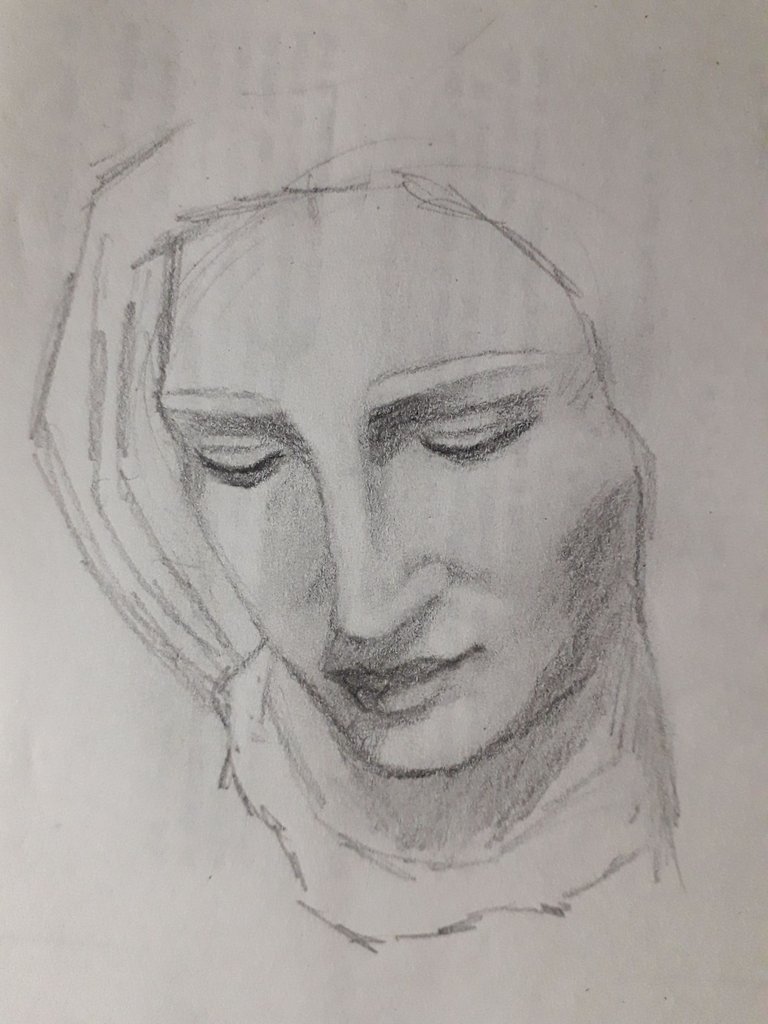
Comencé a dibujar el cuello junto con su sombra, dando apenas unos trazos largos e inclinados, con el lápiz un poco acostado. También intenté oscurecer los ojos para darles más protagonismo, así como también remarcar un poco los bordes de las cejas.
I started to draw the neck together with her shadow, giving just a few long and slanted strokes, with the pencil a little bit lying down. I also tried to darken the eyes to give them more prominence, as well as to highlight a little the edges of the eyebrows.

Aquí fueron todas las sombras. Las sombras más sutiles las di difuminando trazos muy suaves. Todo se trató de dar trazos suaves y difumine. Di otra capa de trazos en las zonas más oscuras, como se ve en la mejilla. También remarqué el mentón porque es una zona donde las sombras suelen ser un poco más intensas.
Here were all the shadows. The more subtle shadows I did by blending very soft strokes. It was all about soft strokes and blending. I gave another layer of strokes in the darker areas, as seen on the cheek. I also highlighted the chin because it is an area where the shadows tend to be a little more intense.
 |  |
|---|
Con trazos rectos y suaves, comencé a bosquejar la túnica de la mujer. También di unos trazos apenas bajo el cuello, la idea era solo intuir el cuello de sus vestiduras.
Luego, comencé a dar un poco de más detalle, dibujando los pliegues que se hacen en la parte superior de la cabeza, en la túnica. Se nota que es algo que nunca he dibujado antes, pero la idea es practicar.
With straight and smooth strokes, I began to sketch the woman's tunic. I also gave a few strokes just below the neck, the idea was just to intuit the neck of her clothes.
Then, I began to give a little more detail, drawing the folds that are made on the top of the head, in the tunic. You can tell it's something I've never drawn before, but the idea is to practice.

Lo siguiente fue tomar ese boceto base y remarcarlo, dando sombras suaves en donde se encontraban los pliegues. Hay zonas donde hice los pliegues como simples líneas suaves, pues aún no sé dibujar ropa. Sin embargo, muchas veces es mejor simplemente hacer trazos intuitivos, pues se entienden igual, tal como en este caso.
Otra cosa que hice, la cual fue muy útil, fue difuminar suavemente con mi dedo por encima de toda la túnica de la mujer. También di trazos rayados en el cuello de las ropas de esta mujer, para dar esa idea de color.
The next thing was to take that base sketch and highlight it, giving soft shadows where the folds were. There are areas where I made the folds as simple soft lines, as I don't know how to draw clothes yet. However, many times it is better to just make intuitive strokes, because they are understood anyway, as in this case.
Another thing I did, which was very helpful, was to gently smudge with my finger over the woman's entire tunic. I also gave striped strokes on the collar of this woman's clothes, to give that idea of color.

El último paso fue pasar un borrador por las zonas donde quería dar luz, ya que al estar más blancas en comparación al resto del dibujo, dan esta impresión. Por esto es que difuminé durante todo el dibujo, poco a poco, para que fuera agarrando el color del grafito y poder borrar ciertas zonas luego. Lo último que hice fue, ya adivinará, difuminar para que los bordes del borrado quedaran más suaves.
Y ya estaría.
Lo que más me gusta de dibujar estatuas, es que es menos complicado bocetear y entender las sombras. Este dibujo me gustó, pero no tanto porque son un poco raras las proporciones de la tela, pero es algo que se arregla con práctica.
Sin nada más que añadir… Cuídense, tomen agua, y no se olviden de sonreír. ¡Se les quiere! Nos vemos en el próximo post, ¡chau!
The last step was to pass an eraser over the areas where I wanted to give light, since they are whiter than the rest of the drawing, giving this impression. That's why I blurred throughout the drawing, little by little, so that it could take the color of the graphite and be able to erase certain areas later. The last thing I did was, you guessed it, blur so that the edges of the erasure would be softer.
And that was it.
What I like most about drawing statues is that it is less complicated to sketch and understand the shadows. I liked this drawing, but not so much because the proportions of the canvas are a little weird, but it's something that can be fixed with practice.
Without anything else to add… Take care, drink water, and don't forget to smile. Love you! See you in the next post, bye!
Créditos | Credits
- Traducción al inglés DeepL (lo siento por cualquier error, el inglés es mi segundo idioma.)
- English translation DeepL (sorry for any mistakes, English is my second language)
- Banners hechos en Canva
- Banners made in Canva
- Las fotos usadas en el post fueron tomadas por mí, usando un Samsung Galaxy J6.
- Photos used in the post were taken by me, using a Samsung Galaxy J6.
Excelente trabajo. Felicitaciones 😘👏
Muchas gracias!
Un placer😘
Seems she was praying to her maker, It's a creative drawing, you make it very beautiful, regard.
Awww, how sweet! Thank youuu 💖
welcome.
El difuminado de la túnica le doy un toque especial a tu obra ,felicidades te quedó muy hermosa.
Gracias!, es bueno saberlo, porque me sentía un poco insegura sobre el difuminado, jiji
Woooooo te quedó espectacular ! Supiste darle ese toque de suavidad a la expresión, sobre todo en esa posición que está bien difícil
Muchas gracias! Hice lo que pude, jaja, al menos quedó decente. ^^
Congratulations @celely! You have completed the following achievement on the Hive blockchain And have been rewarded with New badge(s)
Your next target is to reach 4000 upvotes.
You can view your badges on your board and compare yourself to others in the Ranking
If you no longer want to receive notifications, reply to this comment with the word
STOPCheck out our last posts:
Congratulations @celely!
You raised your level and are now a Minnow!
Check out our last posts:
Síííííí
Hello Celely. como va todo? tiempo sin hablar. Que buen art, excelente el post desarrollando todo el proceso de dibujo. me encanta. felicitacionesssss!!!