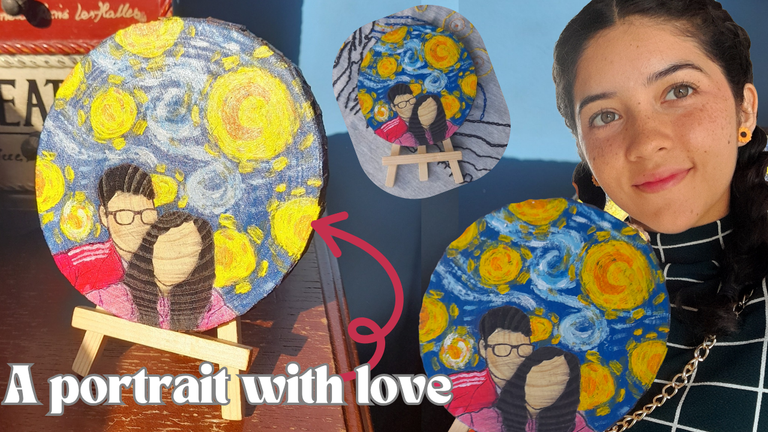
Me encanta pintar y dar vida a mis ideas a través del arte. Siempre que tengo oportunidad, busco crear cosas con mis propias manos, dejando que mi creatividad fluya libremente. Lo que más disfruto es cuando estos proyectos no solo tienen un propósito artístico, sino que también pueden convertirse en un regalo significativo para alguien especial. Para mí, no hay mejor manera de expresar cariño que con un detalle hecho con dedicación y amor.

Hace unos meses, mi novio estaba por cumplir años, y quería sorprenderlo con algo especial. Pensé en muchas opciones, pero finalmente se me ocurrió hacerle un retrato basado en una foto de ambos que nos encanta. Me pareció una idea maravillosa porque, además de ser un detalle personalizado, reflejaba un momento importante para nosotros. Con entusiasmo, me puse manos a la obra y comencé a planificar todo lo necesario para llevar a cabo esta creación.
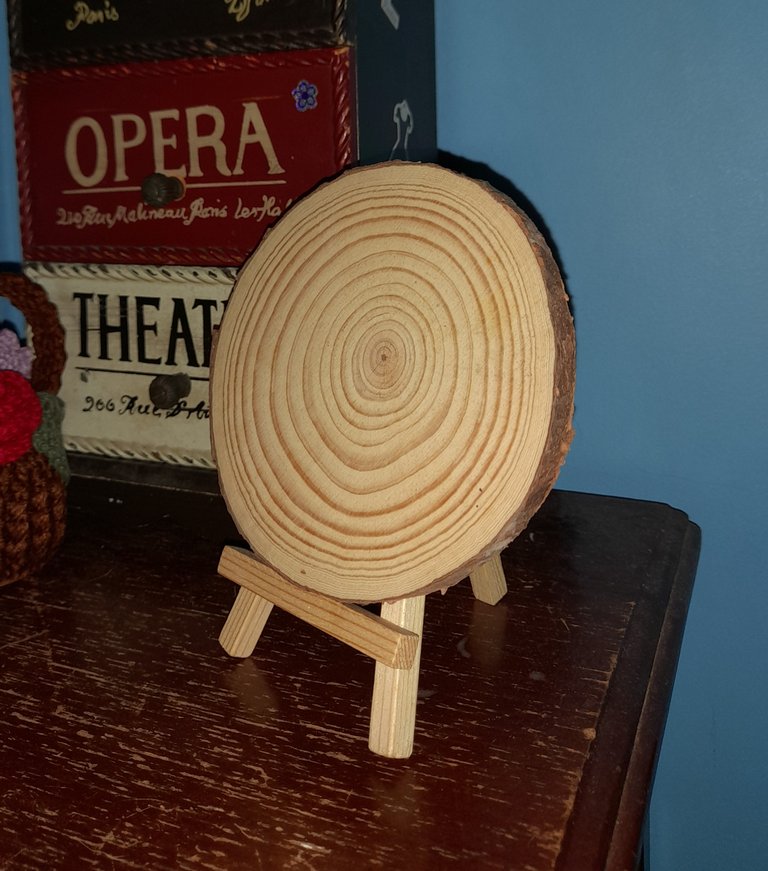
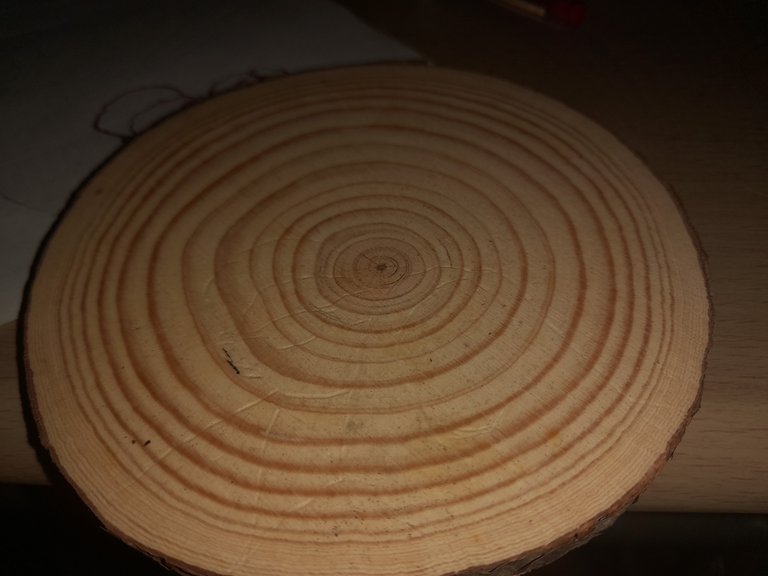
Entre los materiales que utilicé estaban: un mini soporte de madera con su lienzo, pinturas acrílicas, un lapicero, una hoja para realizar el boceto inicial y pega blanca para los detalles finales. Tener todos los materiales organizados antes de comenzar fue esencial para asegurarme de que el proceso fluyera sin inconvenientes.
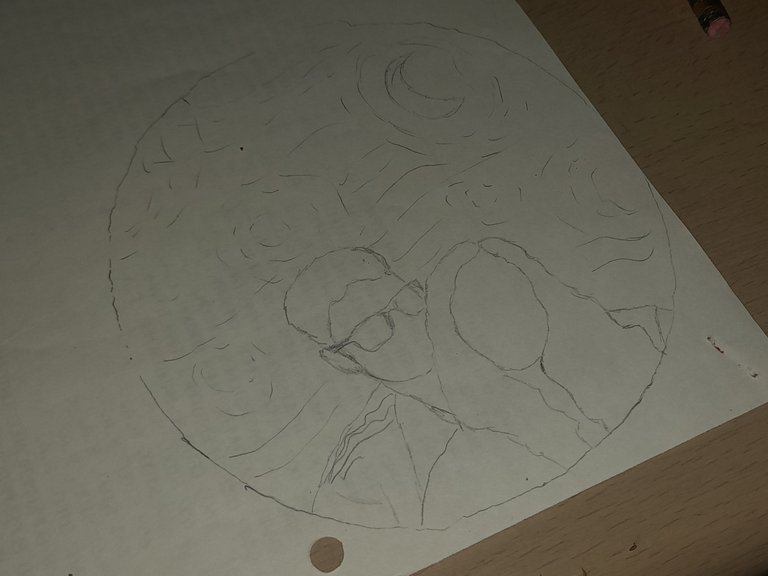
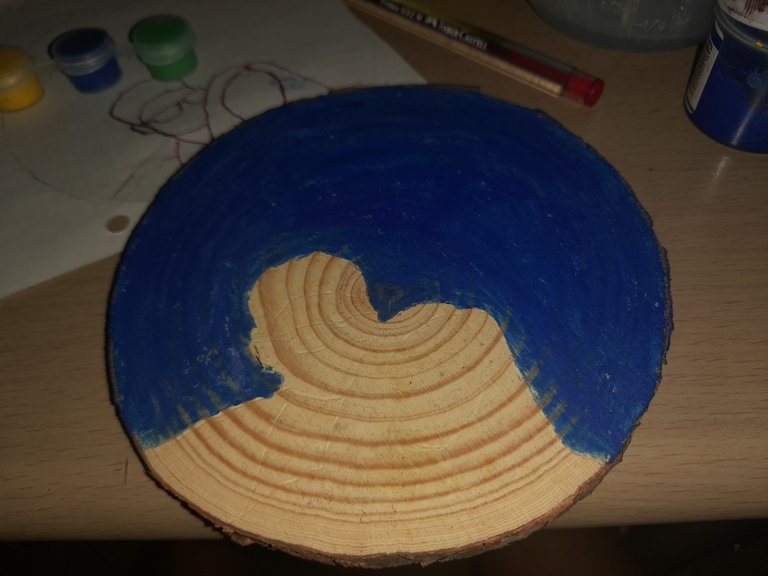
El primer paso consistió en realizar el boceto en papel, guiándome por la foto que había elegido. Quería capturar con precisión las formas y proporciones, asegurándome de que el resultado reflejara fielmente nuestra imagen. Una vez que terminé el boceto en papel, lo calqué sobre la madera para establecer una base y minimizar posibles errores al pintar.
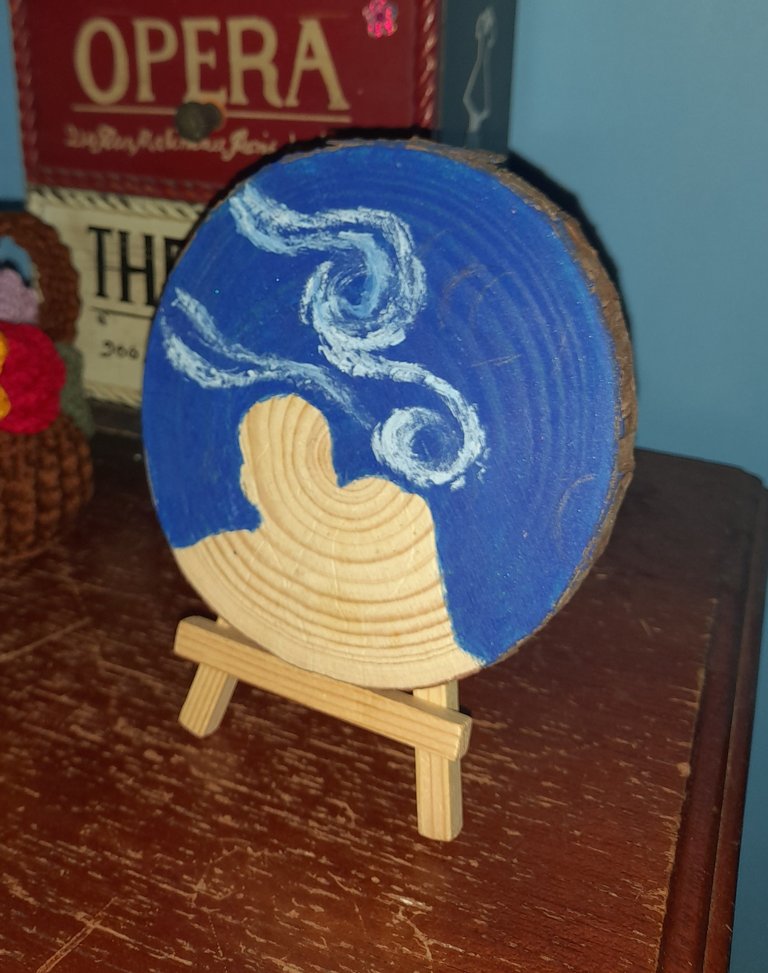
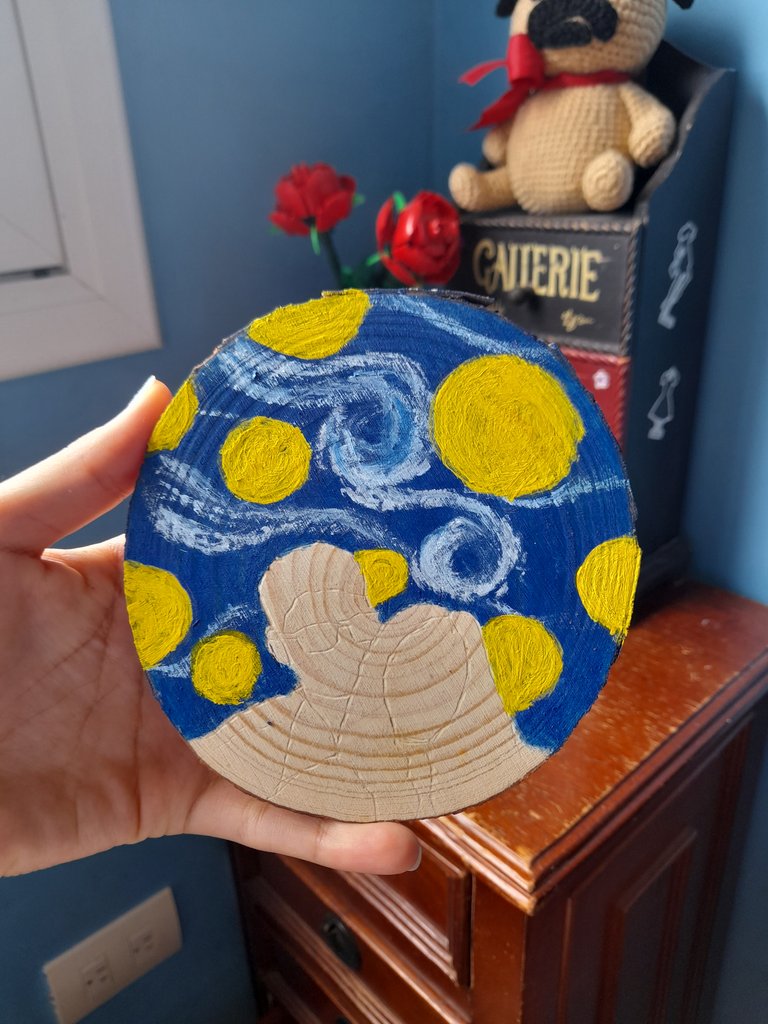
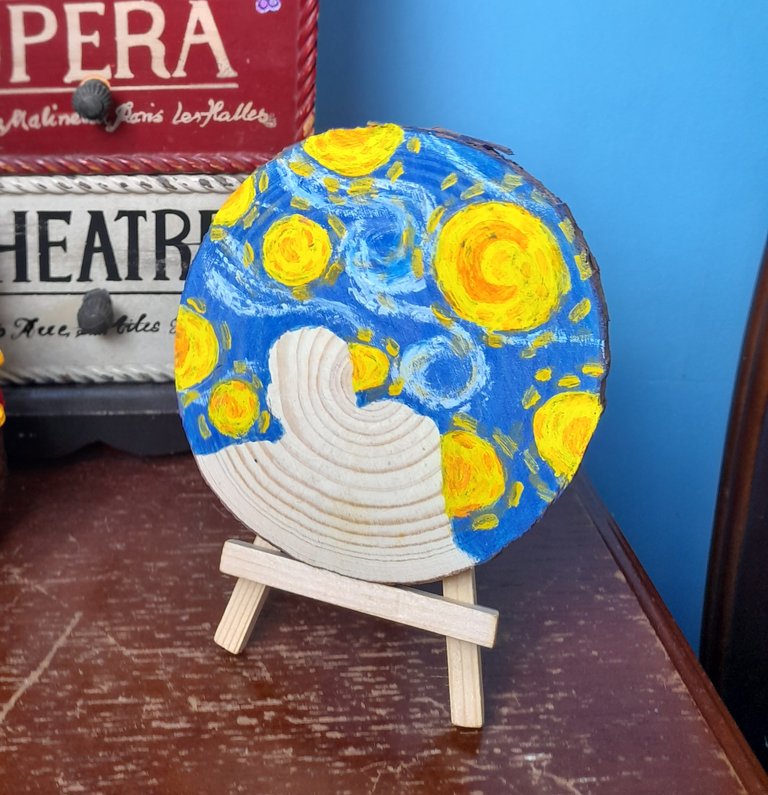
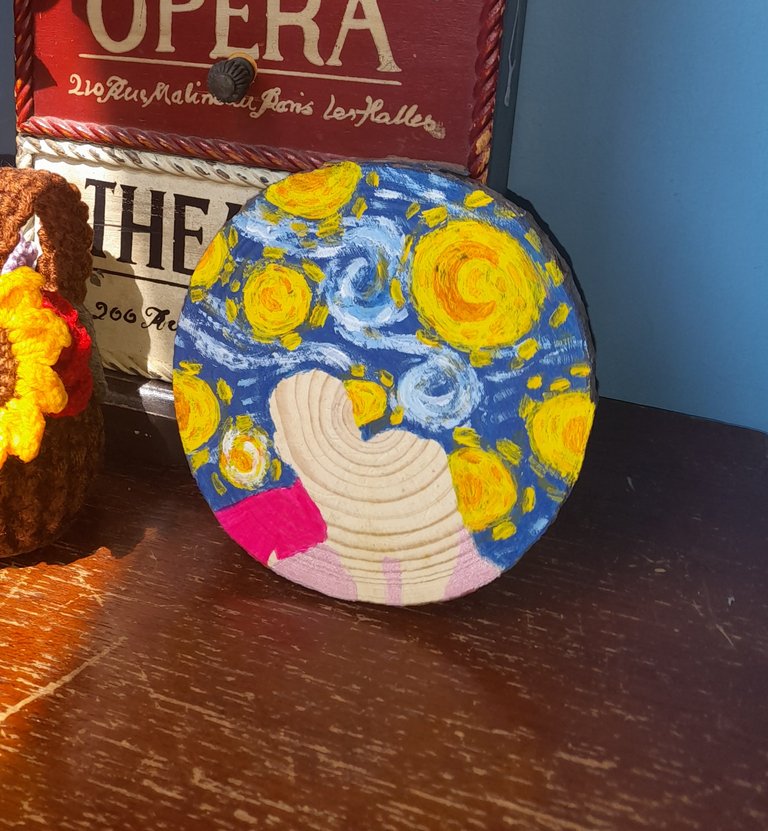
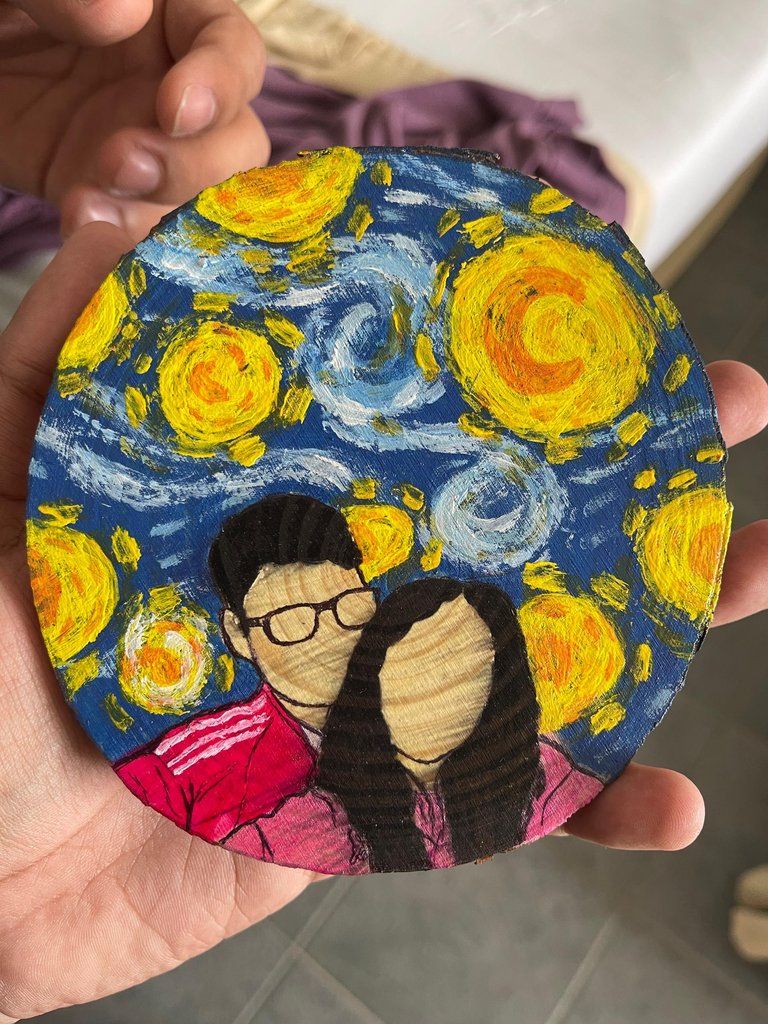
A continuación, comencé con el fondo. Decidí inspirarme en La noche estrellada de Van Gogh, un estilo que siempre me ha fascinado por su profundidad y dinamismo. Pinté el fondo en tonos de azul intenso, creando una atmósfera nocturna vibrante. Luego, añadí detalles en azul claro para aportar textura y movimiento. Para las estrellas, utilicé círculos amarillos y pequeños toques anaranjados, dándoles un efecto cálido y resplandeciente.
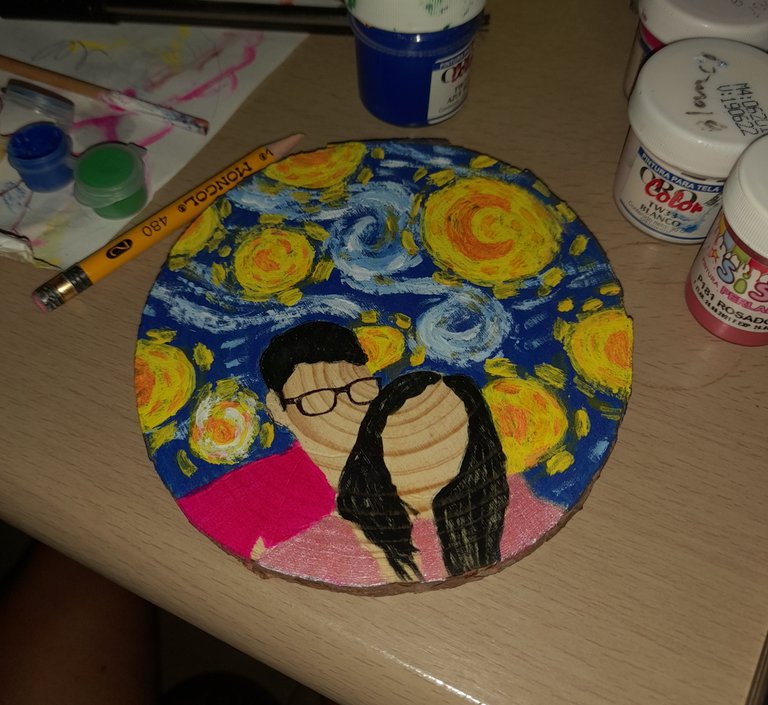
Cuando terminé el fondo, pasé a pintar las figuras. Comencé por los colores base de la ropa, tratando de respetar los tonos originales. Después pinté el cabello, buscando no salirme de las líneas. Para los detalles más pequeños, como los lentes y otros elementos finos, opté por usar un lapicero, lo que me permitió definir las líneas con mayor exactitud.
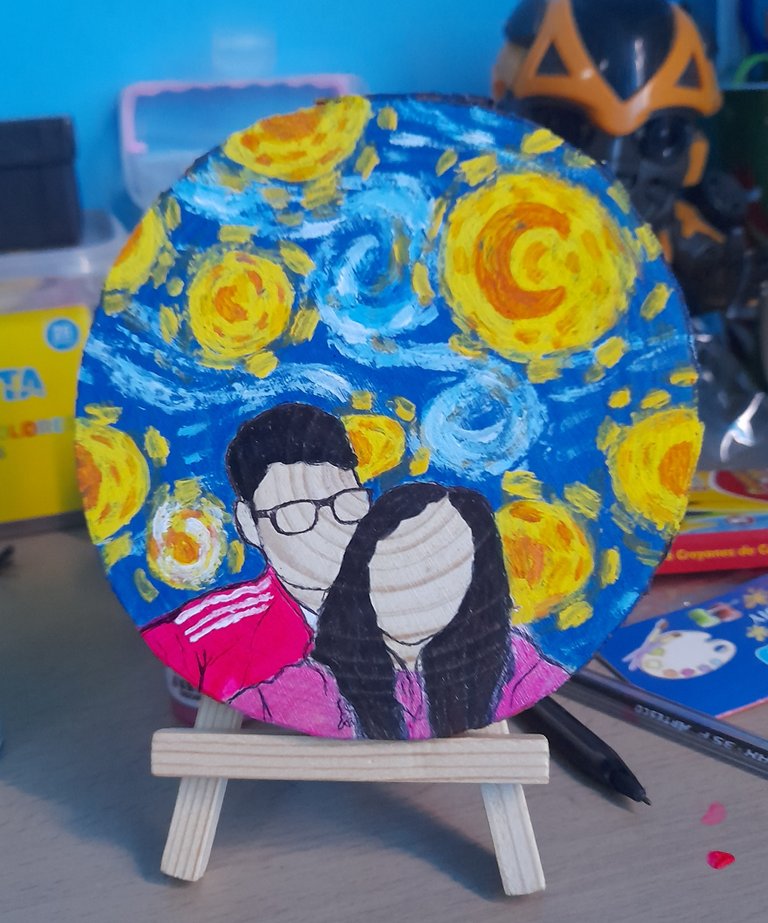
Finalmente, cuando toda la pintura estuvo seca y los detalles definidos, apliqué una capa de pega blanca sobre la superficie. Esto ayudó a sellar la obra y darle un acabado más profesional, protegiéndola y resaltando los colores de manera uniforme. Al ver el resultado, me sentí increíblemente satisfecha. No solo era un regalo hermoso, sino que representaba el cariño y el esfuerzo que había puesto en cada trazo.
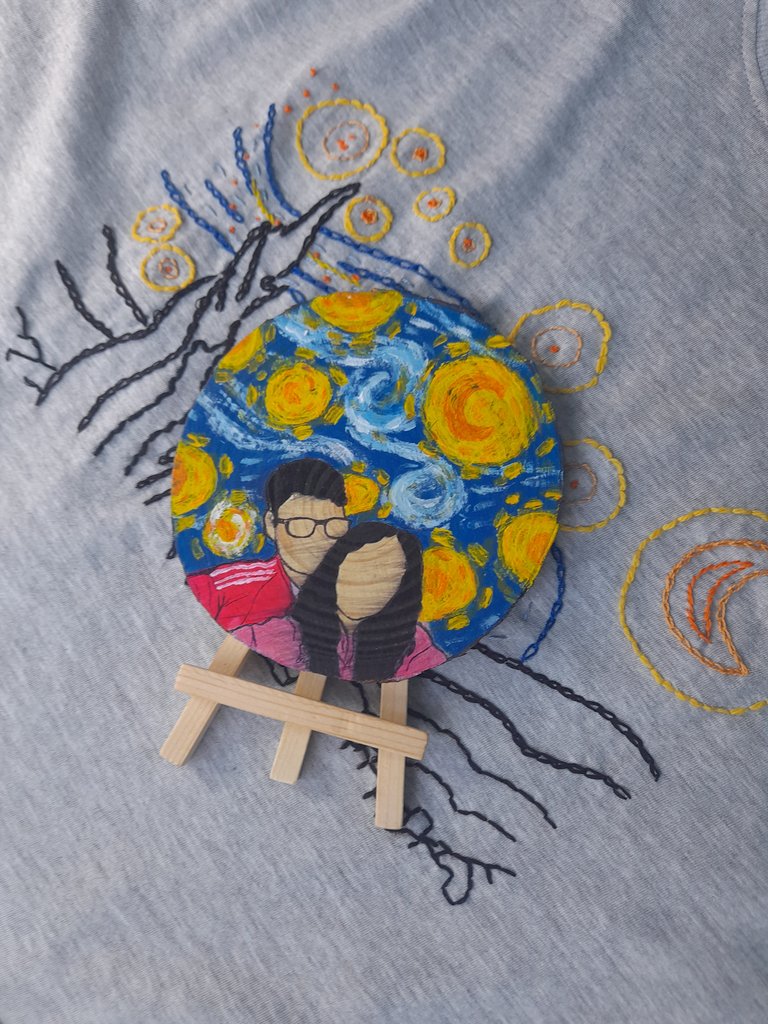
Cuando se lo entregué, a mi novio le encantó. Ver su reacción me hizo sentir muy feliz, porque sabía que este pequeño gesto tenía un gran significado para ambos. Sin duda, fue una experiencia gratificante, y me encantó poder crear algo tan especial con mis propias manos. Gracias por leer mi post, espero que hayan disfrutado el proceso tanto como yo. ¡Hasta la próxima!


I love painting and bringing my ideas to life through art. Whenever I have the opportunity, I enjoy creating things with my own hands, letting my creativity flow freely. What I cherish the most is when these projects not only serve an artistic purpose but also become meaningful gifts for someone special. For me, there’s no better way to express love and affection than through a handmade gift created with dedication and care.
A few months ago, my boyfriend’s birthday was approaching, and I wanted to surprise him with something unique. I considered many options, but eventually, I came up with the idea of painting a portrait based on a photo of the two of us that we love. It seemed like a wonderful idea because, besides being a personalized gift, it captured an important moment in our lives. With excitement, I set out to plan every detail needed to bring this creation to life.
Among the materials I used were: a small wooden easel with a matching canvas, acrylic paints the initial design, and white glue for the finishing touches. Having all the materials organized before starting was essential to ensure a smooth process.
The first step was to sketch the portrait on paper, using the chosen photo as a reference. I wanted to capture the shapes and proportions as accurately as possible to make sure the final result reflected our image faithfully. Once I completed the paper sketch, I traced it onto the wooden canvas to create a solid base and minimize potential painting mistakes.
Next, I started working on the background. I decided to take inspiration from The Starry Night by Van Gogh, a style that has always fascinated me for its depth and dynamism. I painted the background in deep blue tones to create a vibrant nighttime atmosphere. Then, I added lighter blue details to give texture and movement. For the stars, I used yellow circles with subtle orange touches, creating a warm and glowing effect.
Once I finished the background, I moved on to painting the figures. I began with the base colors of the clothing, trying to stay true to the original tones while adding my artistic touch. Then, I painted the hair, carefully following the outlined shapes. For the finer details, such as the glasses and other small elements, I used a pen, which allowed me to define lines with greater precision.
Finally, after the paint had dried and all the details were completed, I applied a layer of white glue over the surface. This helped seal the painting and gave it a more polished finish, protecting it while enhancing the colors uniformly. Seeing the final result made me feel incredibly satisfied. Not only was it a beautiful gift, but it also represented the love and effort I had poured into every brushstroke.
When I gave it to my boyfriend, he absolutely loved it. Watching his reaction made me so happy because I knew this small gesture carried great meaning for both of us. It was, without a doubt, a rewarding experience, and I loved creating something so special with my own hands. Thank you for reading my post. I hope you enjoyed the creative process as much as I did. Until next time!
Posted Using INLEO
Congratulations @danielaserena! You have completed the following achievement on the Hive blockchain And have been rewarded with New badge(s)
Your next target is to reach 50 upvotes.
Your next payout target is 100 HP.
The unit is Hive Power equivalent because post and comment rewards can be split into HP and HBD
You can view your badges on your board and compare yourself to others in the Ranking
If you no longer want to receive notifications, reply to this comment with the word
STOPCheck out our last posts:
😮💜
🥰
Daniela, qué lindo te quedó, y definitivamente es un regalo bien especial, cilindro todo lo que hacemos a mano
Hola Rosa🥰 gracias
Contáctenos para saber más del proyecto a nuestro servidor de Discord.
Si deseas delegar HP al proyecto: Delegue 5 HP - Delegue 10 HP - Delegue 20 HP - Delegue 30 HP - Delegue 50 HP - Delegue 100 HP.
Muy lindo trabajo, la base que escogiste para hacer la pintura es preciosa.
Gracias por compartirlo en la comunidad
Hola🤗gracias, me alegra que te haya gustado
@tipu curate 8
Upvoted 👌 (Mana: 0/75) Liquid rewards.
Wowww, que buen regalo, un gran Art de tu parte. Está buenísimo como has expuesto todo el proceso. Felicitacionessss!!!