
Dear Hive community, a new week means a new entry!. This time, I’m starting with the design of a mermaid that caught my attention for its color palette and the room it leaves for interpretation—her face isn’t clearly visible, but she wears a stunning violet armor.
I used several elements that I’ll be showcasing, as usual, in the upcoming process screenshots. Join me in this new creative journey for my weekly participation!
Querida comunidad de Hive, ¡semana nueva, participación nueva!. Comienzo esta vez con el diseño de una sirena que me llamó la atención por su paleta de colores y porque deja espacio a la interpretación: su rostro no se distingue con claridad, pero luce una espléndida armadura violeta. Utilicé varios elementos que, como de costumbre, iré mostrando en las capturas que acompañan el proceso. ¡Acompañame en este nuevo recorrido creativo de mi participación semanal!

To create a base, I usually generate a nude model, which allows me to build the armor more accurately. I also make her bald to better stylize the hair, since it's hard for me to create it without a guide or texture.
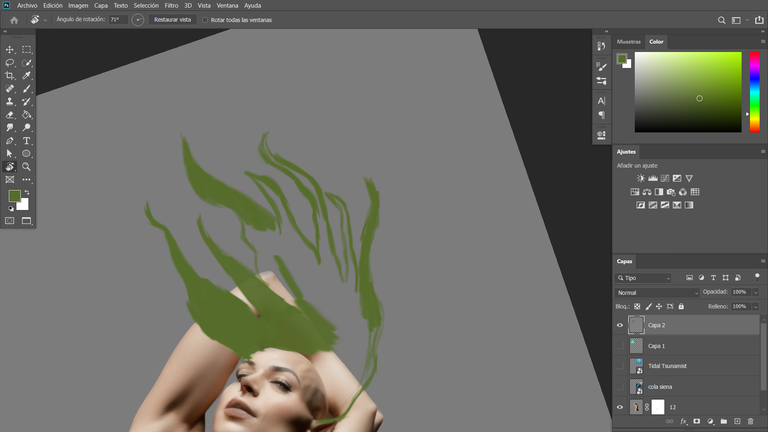
After that step, I elongated her ears to better match the character's style and started working on the hair using pieces from the original image: I cut the hair and began sketching the edges.
Using hair-shaped brushes, I painted on and around the base with various shades of green. Once I was satisfied with the result, I moved on to the skin.
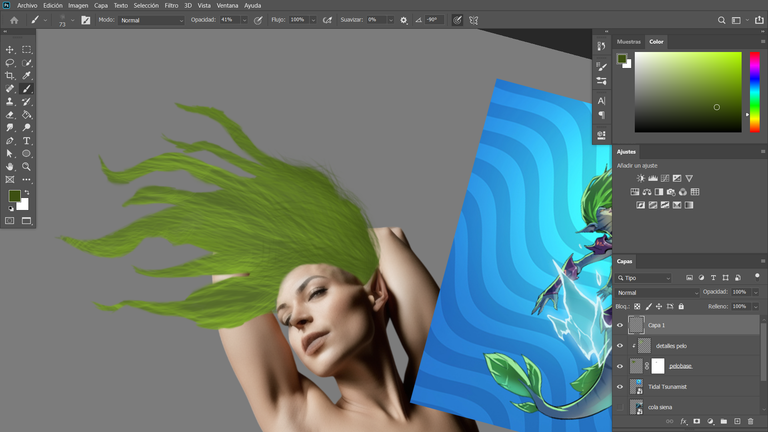
For the skin, I used a gradient map based on the main colors, applying blue tones to add depth and shadow across the body.
Para establecer una base, suelo generar una modelo desnuda, lo que me permite construir la armadura con mayor precisión. También la creo calva para poder estilizar el cabello de forma más libre, ya que sin una guía o textura previa me resulta difícil trabajarlo.
Después de este paso, alargué sus orejas para ajustarlas mejor al estilo del personaje y comencé a trabajar el cabello utilizando partes de la imagen original: recorté el pelo y empecé a bocetar los bordes.
Con pinceles específicos de forma capilar, pinté encima y por fuera con diferentes tonos de verde. Al quedar conforme con el resultado, continué con la piel.
Para su piel, utilicé un mapa de degradado tomando los colores principales, y apliqué sombras con un tono azul para dar profundidad al resto del cuerpo.


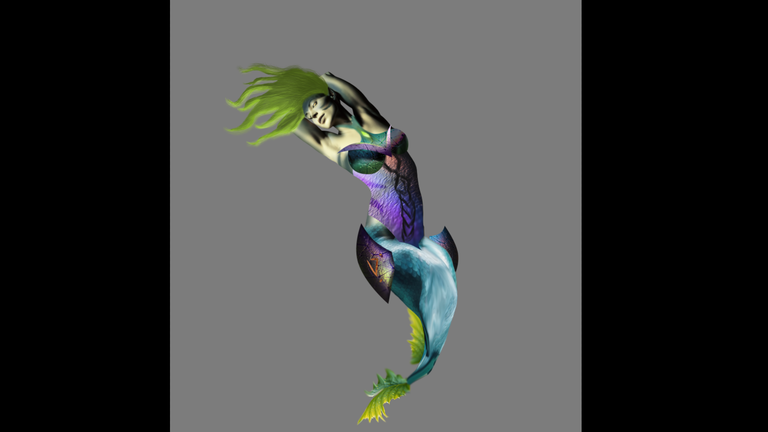
Based on the captures, I completed the final composition by joining the human upper half with the mermaid tail. I stretched and deformed both parts to achieve an almost seamless fusion. For the tip of the tail, I used a leaf, which I deformed and blurred to add more depth, placing it behind the lower layers.
Next, using a violet-toned texture, I created the rest of her armor with the lasso tool and geometric shapes.
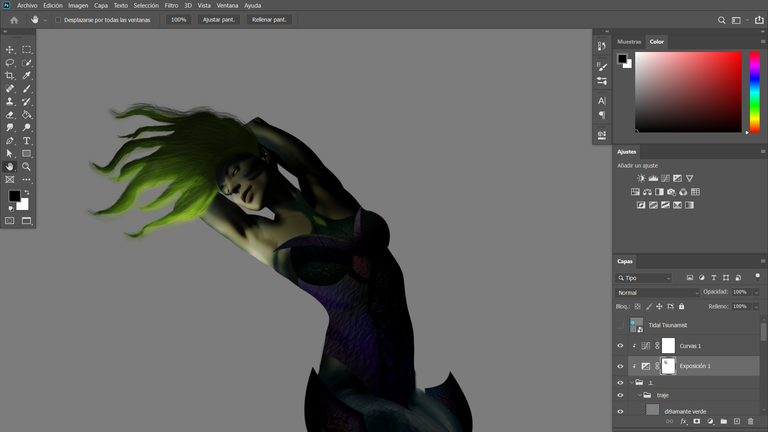
Once all the parts were unified, my favorite part began: adding light and shadow. I used an exposure layer and, with a mask, removed dark areas to highlight the lower part using a color that contrasts with the rest.
To finish, I added a light blue glow in the background, which brings overall harmony to the piece.
The use of gray was also essential, as it helps quickly identify visual inconsistencies and balance the contrast.
A partir de las capturas, realicé la composición final uniendo su mitad humana con la cola de sirena. Estiré y deformé ambas partes hasta lograr una fusión casi perfecta. Para el extremo de la cola, utilicé una hoja que deformé y desenfoqué, logrando mayor profundidad en el diseño al ubicarla detrás de las capas que forman su parte inferior.
Luego, con una textura de tono violeta, creé el resto de su armadura utilizando la herramienta lazo y figuras geométricas.
Una vez unificadas todas las partes, llegó mi momento favorito: aplicar luces y sombras. Usé una capa de exposición y, mediante una máscara, eliminé zonas oscuras para iluminar la parte inferior con un color que contraste con el resto del diseño.
Finalmente, agregué una luz de fondo celeste que aporta armonía general a la escena.
El uso del color gris también fue clave, ya que ayuda a detectar rápidamente errores visuales y a equilibrar mejor los contrastes.


Have you heard about the new Splinterlands Community PRAETORIA?
Give it a tour and check out the community for real Splinterlands conversation, ideas, feedback & creativity from Praetoria’s citizens.