¡Hola mis queridos amigos creativos! Es un nuevo día y vengo con un nuevo diseño, uno colorido y divertido, pero por supuesto, también femenino y bonito. Se trata de un juego de pulseras con colores neón combinadas con perlas, haciendo un equilibrio entre lo impactante de los colores y la delicadeza de las perlas. La idea surgió cuando revisaba entre mis materiales y encontré estas “tiras colorinches”, así que decidí alegrar mi día con ellas y espero que el de ustedes también. No te pierdas este paso a paso para que obtengas un set de pulseras llamativas y versátiles.
English Version
Hello my dear creative friends! It's a new day and I come with a new design, a colorful and fun one, but of course, also feminine and pretty. This is a set of bracelets with neon colors combined with pearls, making a balance between the shocking of the colors and the delicacy of the pearls. The idea came up when I was looking through my materials and found these “colorful strips”, so I decided to brighten up my day with them and I hope yours too. Don't miss this step-by-step to get a set of eye-catching and versatile bracelets.
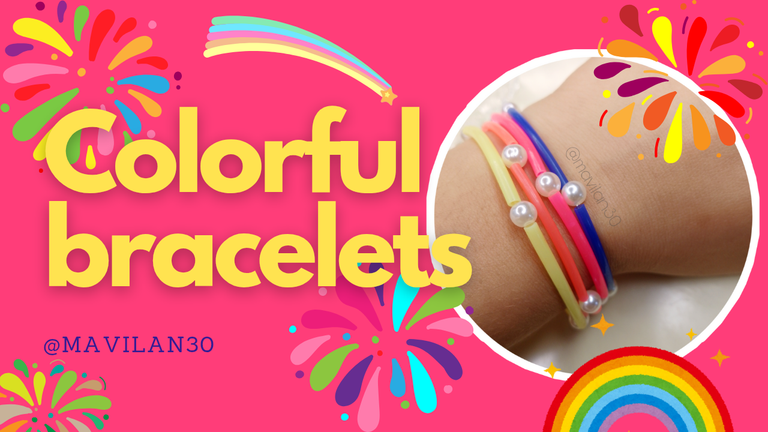
Imagen creada por mí en Canva / Image created by me in Canva
Materiales:
- Nilón elástico
- Tira colorinche (azul, fucsia, coral, amarillo)
- Perlas
- Aguja
- Tijeras
English Version
Materials:
- Elastic nylon
- Colorful strip (blue, fuchsia, coral, yellow)
- Beads
- Needle
- Scissors
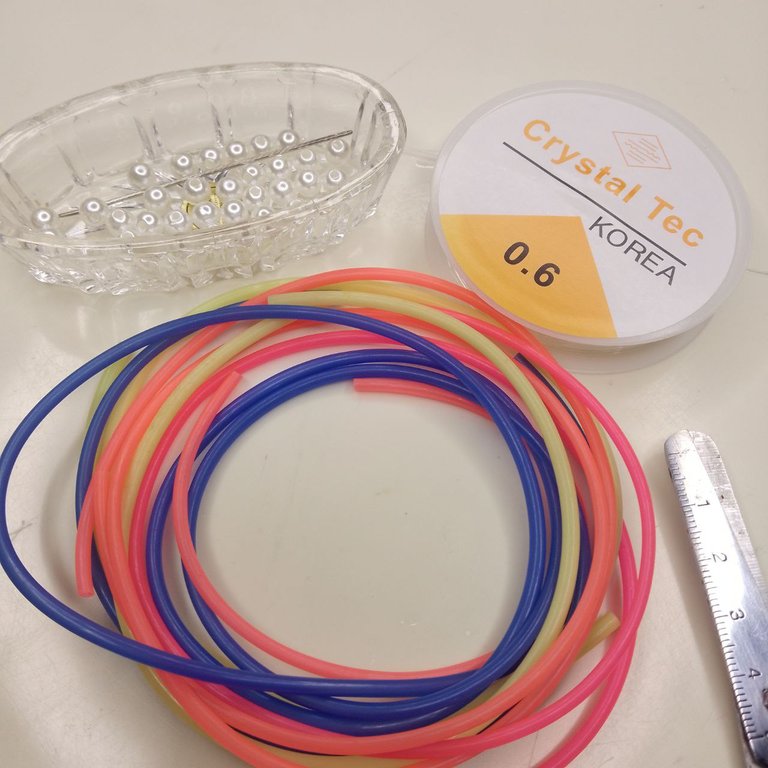
Materiales / Materials
Procedimiento:
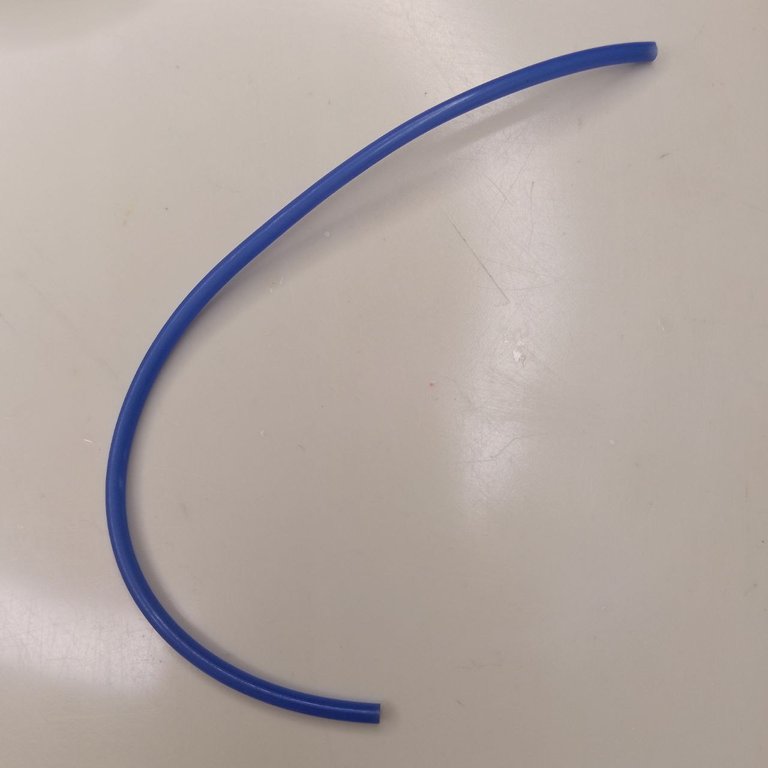
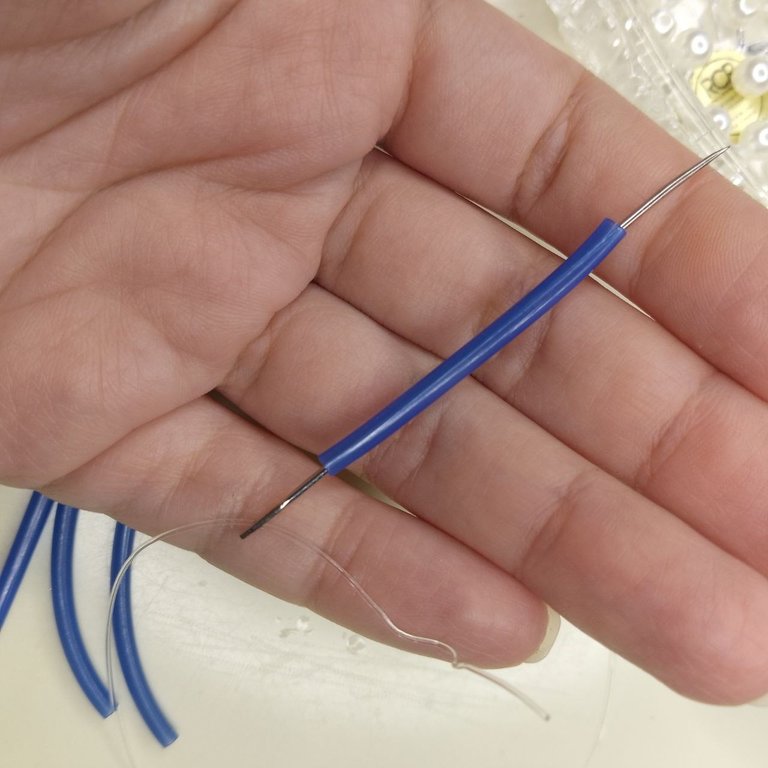
Iniciamos cortando una sección de una de las tiras de colores, si no las conoces, son como una especie de tubito plástico con cierta flexibilidad, he decidido iniciar con la tira color azul pero tú puedes utilizar los colores de tu preferencia o incluso un solo color. Esta tira debe ser más o menos de la longitud del contorno de tu muñeca, en mi caso fueron unos 16 centímetros, pero luego me di cuenta de que cuando integrara las perlas me quedaría algo suelta y aunque se veía bien, yo quería que me quedara pegadita a la muñeca por lo que le resté unos 2 centímetros aproximadamente, pero esto es cuestión de gustos.
English Version
Procedure:
We start by cutting a section of one of the colored strips, if you don't know them, they are like a kind of plastic tube with some flexibility, I decided to start with the blue strip but you can use the colors of your preference or even a single color. This strip should be more or less the length of the contour of your wrist, in my case it was about 16 centimeters, but then I realized that when I integrated the pearls it would be a little loose and although it looked good, I wanted it to be attached to the wrist so I subtracted about 2 centimeters approximately, but this is a matter of taste.
 |  |
|---|
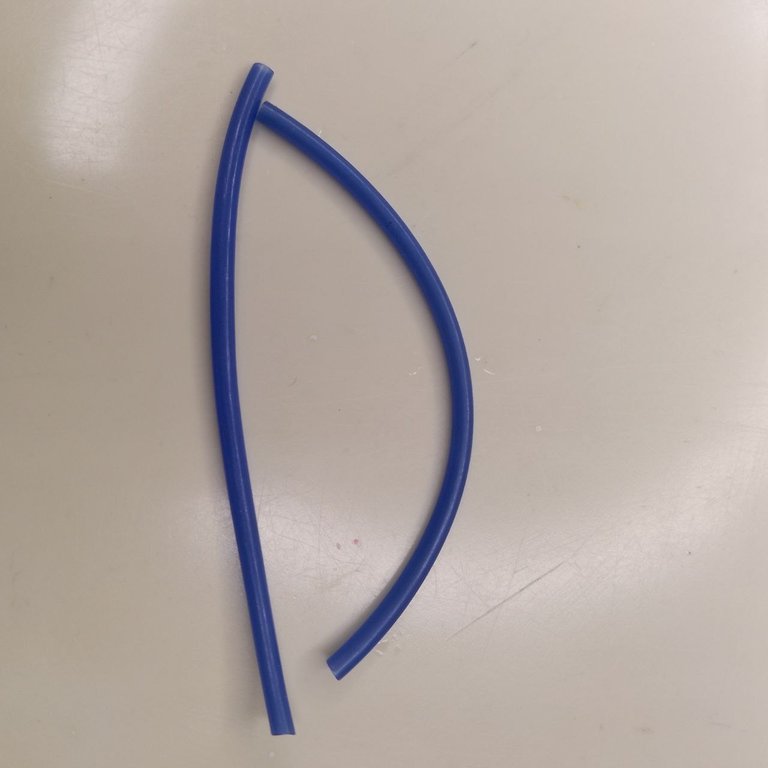
Luego, cortaremos esta tira por la mitad con ayuda de las tijeras y seguidamente, esas dos mitades, las cortaremos a su vez por la mitad también, por lo que ahora tendremos 4 cuartos de tira colorinche azul.
English Version
Then, we will cut this strip in half with the help of the scissors and then, those two halves, we will cut them in half as well, so now we will have 4 quarters of blue colorinche strip.
 |  |
|---|
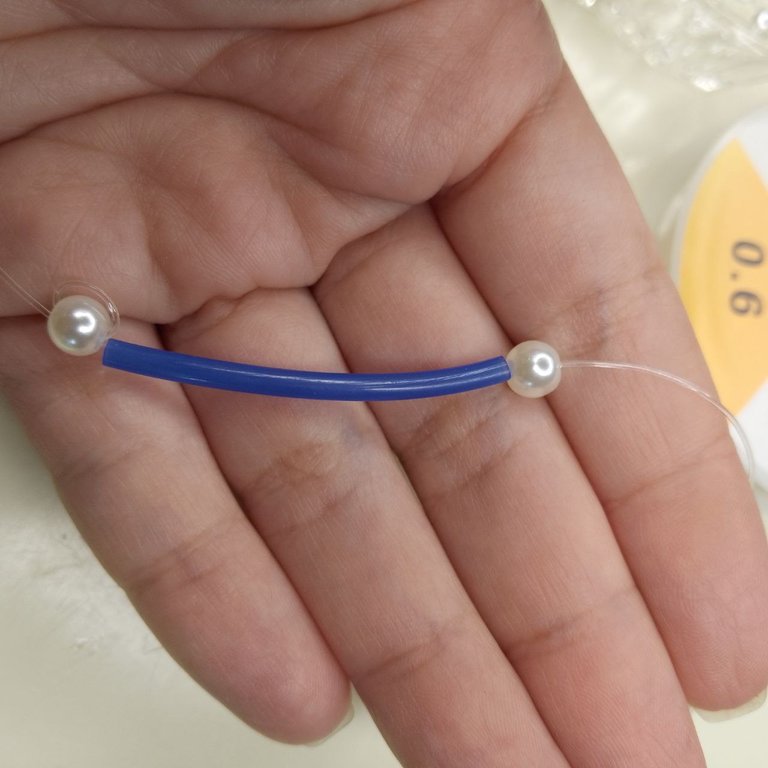
Lo siguiente será cortar una porción de nilón elastizado suficiente para rodear la muñeca y que sobre una porción para hacer el nudo final cómodamente, por lo tanto, ahora estaremos trabajando con un nilón de 28 centímetros. Uno de los extremos del nilón lo introduciremos en el ojal de la aguja y en el otro colocaremos una perla en la que pasaremos el nilón dos veces en el mismo sentido para que quede asegurado mientras ingresamos las demás piezas.
English Version
The next step is to cut a portion of elasticized nylon enough to surround the wrist and have a portion left over to make the final knot comfortably, therefore, now we will be working with a 28 centimeter nylon. One of the ends of the nylon we will introduce it in the needle's eyelet and in the other one we will place a pearl in which we will pass the nylon twice in the same direction so that it is secured while we introduce the other pieces.
 |  |
|---|
Apoyándonos con la aguja ingresaremos entonces uno de los cuartos de tubito azul, seguido de una perla y así sucesivamente hasta llegar al último tubito, donde ya no añadiremos una siguiente perla, puesto que la que tenemos asegurando el otro extremo es la que le corresponde.
English Version
Supporting us with the needle, we will then enter one of the blue quarter tubes, followed by a bead and so on until we reach the last tube, where we will not add the next bead, since the one we have securing the other end is the one that corresponds to it.
 |  |
|---|
 |  |
|---|
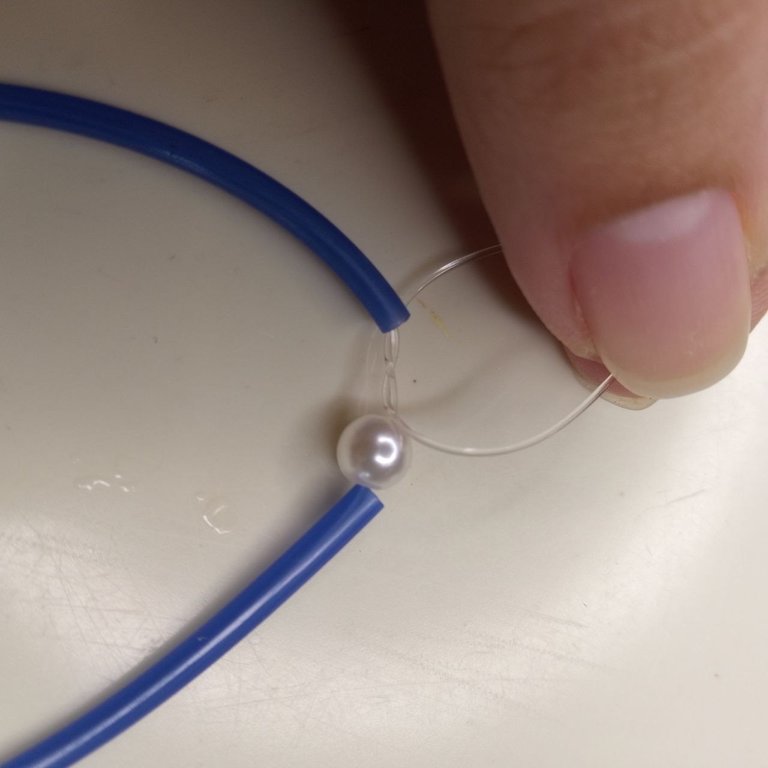
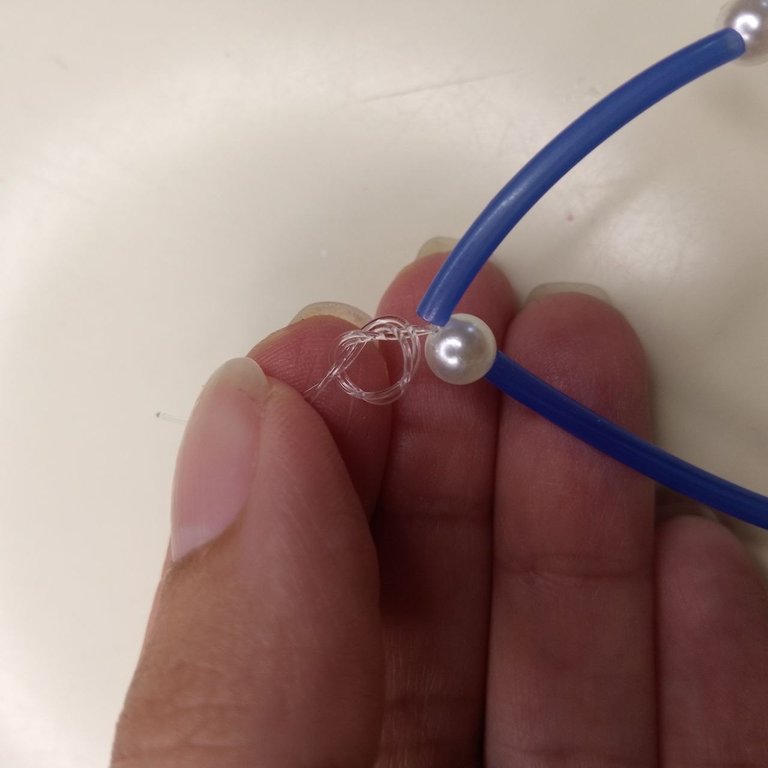
Es momento de soltar el nilón del extremo de la perla y proceder a hacer el tan “temido” nudo. Digo temido porque a muchos nos ha dado problema anudar el final de nuestras creaciones en las que empleamos el nilón elástico, pero luego de varios intentos, les muestro el que a mí me funcionó. Hacemos un primer nudo sencillo seguido de un segundo nudo sencillo y apretamos bien.
English Version
It's time to release the nylon from the end of the bead and proceed to tie the “dreaded” knot. I say “dreaded” because many of us have had trouble knotting the end of our creations in which we use the elastic nylon, but after several attempts, I show you the one that worked for me. We make a first simple knot followed by a second simple knot and tighten well.
 |  |
|---|

Nudo sencillo / Simple knot
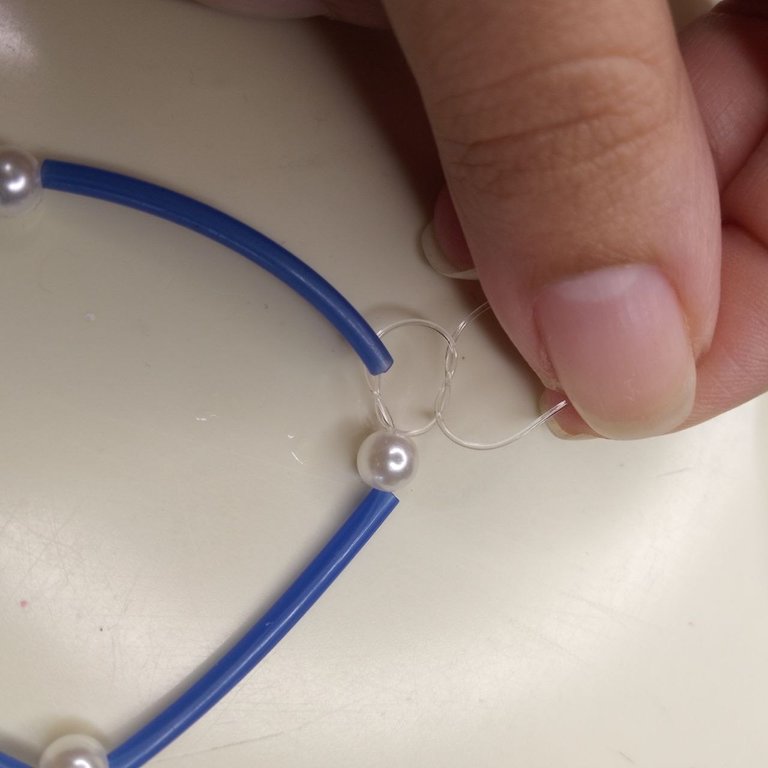
Y terminamos con un tercer nudo, solo que este será pasando ambos extremos a través de la vuelta, tal como muestro en las imágenes. Lo apretamos lo más posible y les aseguro que no se suelta con nada.
English Version
And we finish with a third knot, only this one will be passing both ends through the loop, as shown in the pictures. We tighten it as much as possible and I assure you that it will not come loose with anything.
 |  |
|---|
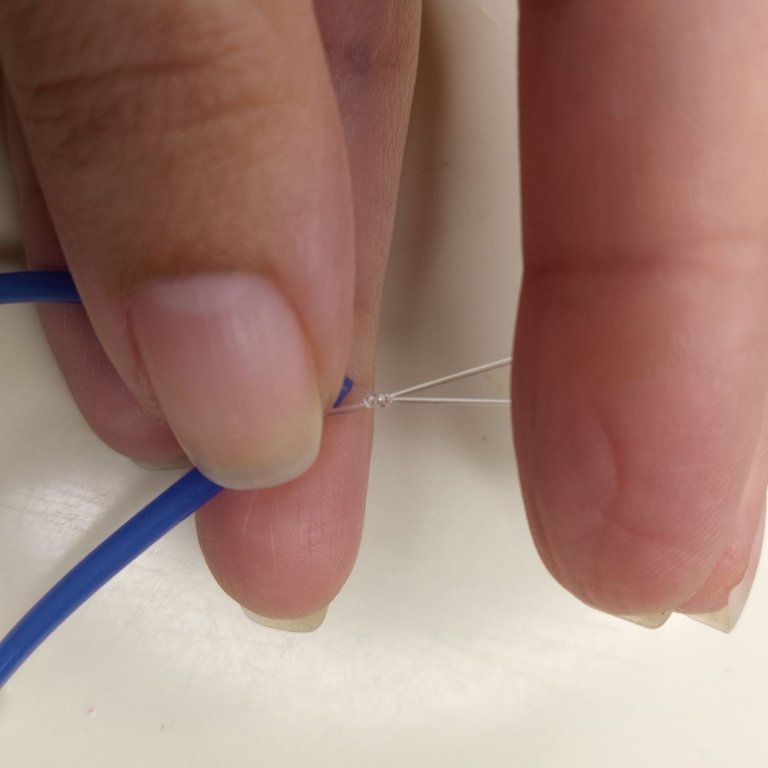
Cortamos los excedentes y escondemos el nudo dentro de alguno de los tubitos y listo.
English Version
We cut the excess and hide the knot inside one of the tubes and that's it.
 |  |
|---|
Sin embargo, siento que una por sí sola no se ve tan llamativa, así que hice de todos los colores que disponía y armé un set súper colorido que siento que se ve espectacular ¿ustedes qué opinan? ¿las usarían u obsequiarían? Los leo en los comentarios.
English Version
However, I feel that one by itself doesn't look so striking, so I made all the colors I had available and put together a super colorful set that I feel looks spectacular, what do you think, would you use them or give them as a gift? I'll read you in the comments.
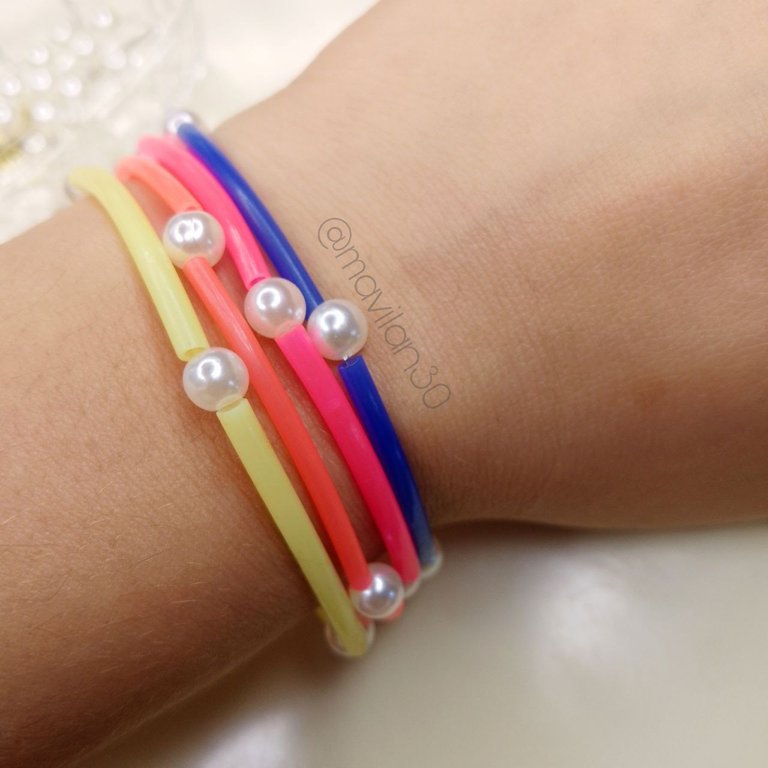
Set completo / Full set
¡Muchas gracias por leerme!
Thank you so much for reading me!
Fotografías propias, tomadas con mi Tecno Spark 10C.
Traducido al inglés con DeepL.
English Version
Own photographs, taken with my Tecno Spark 10C.
Translated to English with DeepL.

Hola 👋🏽
Me encanta como se ven estas pulseras. ¿Esas tiras cómo se piden? ¿Colorinche? No las conozco, se ven bien lindas las pulseras que hiciste 😌 gracias por compartir 😊
Hola amiga! Muchas gracias, me contenta que te gusten💖
Sí, cuando las compré así decía en la factura "tira colorinche"🌈
Un abrazo🤗
Muchas gracias 🫂
The colorful bracelets are vibrant and eye catching. The pattern is a delight. Bravo.
selected by @stevenson7
Thank you so much for all the support!🤗 I'm so glad you liked it✨
¿ᴺᵉᶜᵉˢᶦᵗᵃˢ ᴴᴮᴰ? ᵀᵉ ˡᵒ ᵖʳᵉˢᵗᵃᵐᵒˢ ᶜᵒⁿ @ruta.loans
Muchas gracias por todo el apoyo💖
They are colorful and lovely
Thank you so much 💖✨