Hello everyone...✨
Hello to my dear Hivers and the dear community of artists Diyhub, as always very pleased and excited to be here again, showing you my work made with love and especially for you.
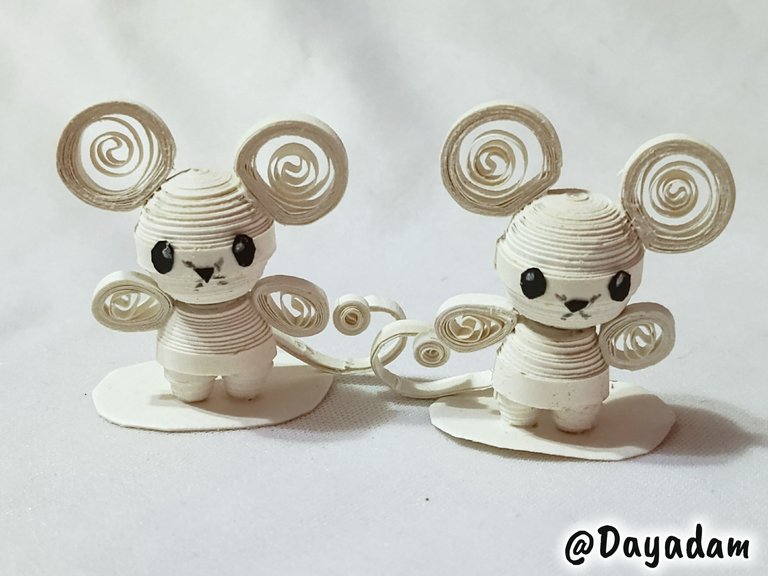
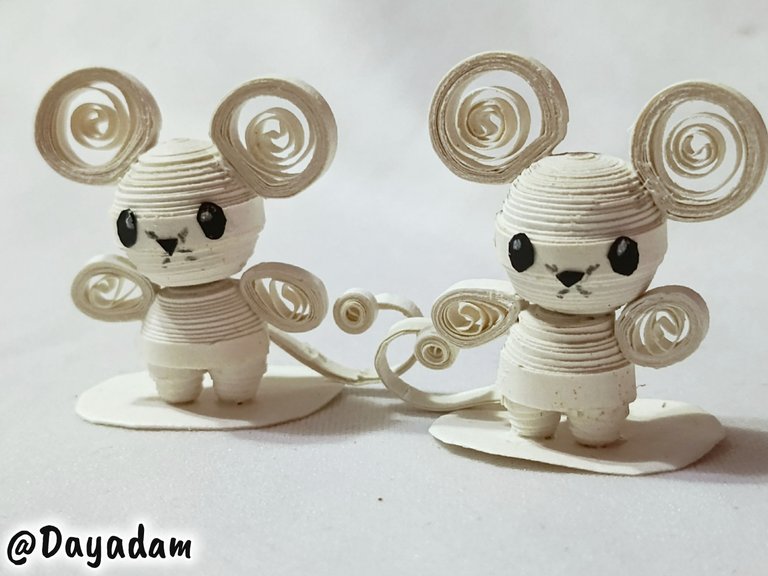
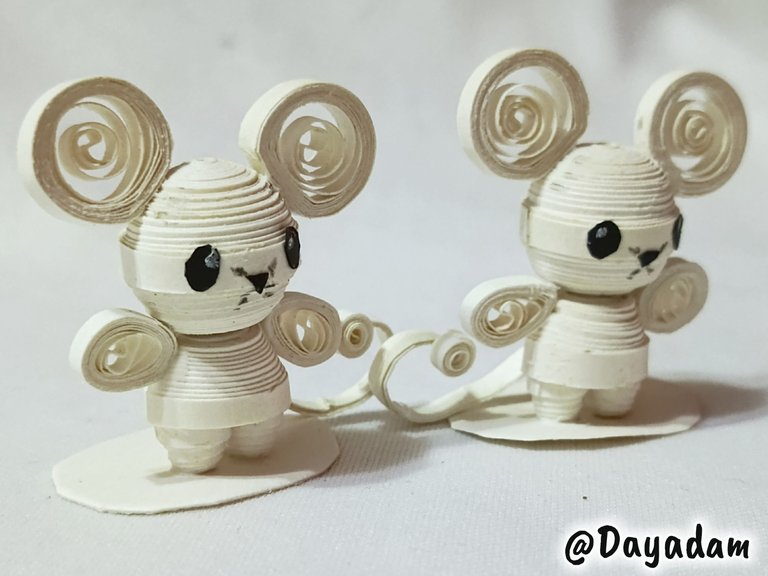
Today I bring you a new work with my quilling art, among so many Pokémon I got one that caught my attention, it is called Tandemouse, of which I made a decorative 3D figure.
Hoping you like it, I leave you my creative process:
Let's get started:😃

Hola a Todos...✨
Hello to my dear Hivers and the dear community of artists Diyhub, as always very pleased and excited to be here again, showing you my work made with love and especially for you.
Para hoy les traigo un trabajo nuevo con mi arte en quilling, entre tantos Pokémon conseguí uno que me llamó la atención, tiene por nombre Tandemouse, del cual realicé una figura decorativa en 3D.
Esperando que sea de su agrado, les dejo mi proceso creativo:
Comencemos:😃
 |
 |

• Cintas para quilling.
• Cartulina blanca y negra.
• Guillotina para cortar papel.
• Plantilla para moldear círculos.
• Lápiz negro y blanco.
• Pega blanca extra fuerte (de carpintería).
• Tijera.
• Pincel.
- Ribbons for quilling.
- Black and white cardboard.
- Guillotine to cut paper.
- Template to mold circles.
- Black and white pencil.
- Extra strong white glue (carpentry glue).
- Scissors.
- Paintbrush.

To make this work previously with a paper cutter, cut some strips of white cardboard.
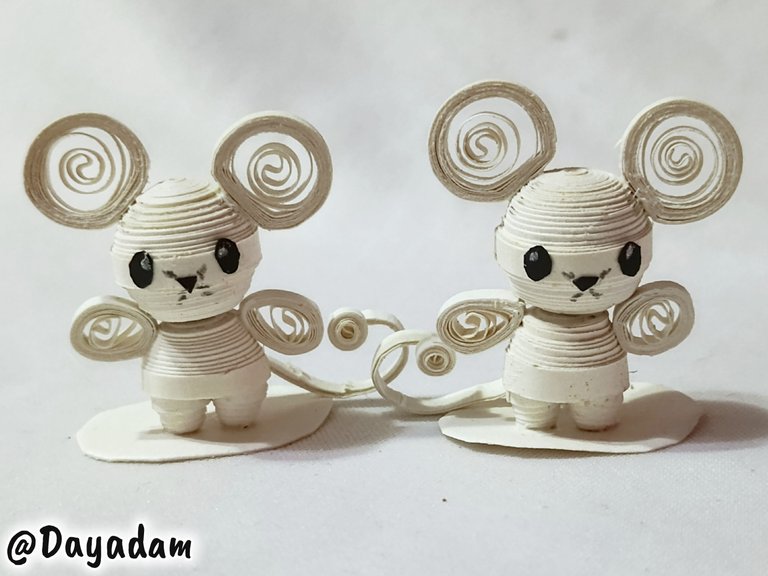
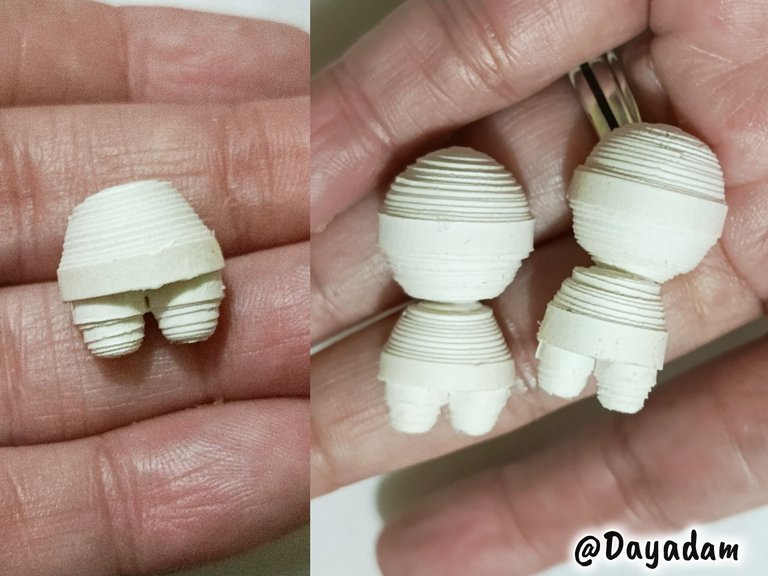
This character is based on two totally equal figures, with the difference that the tails have to be inverted to join both figures.
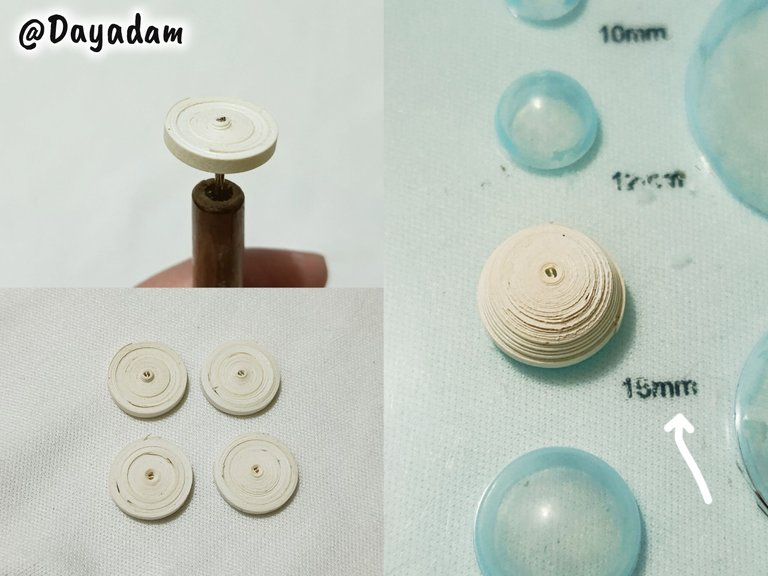
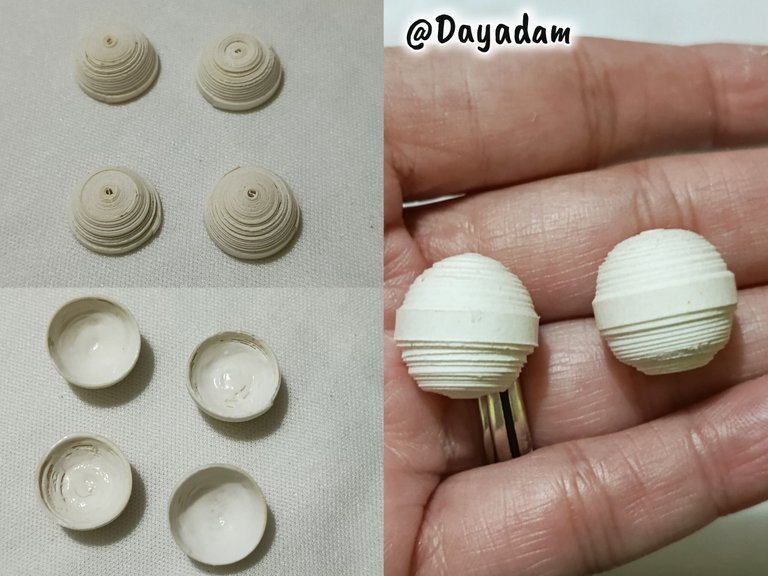
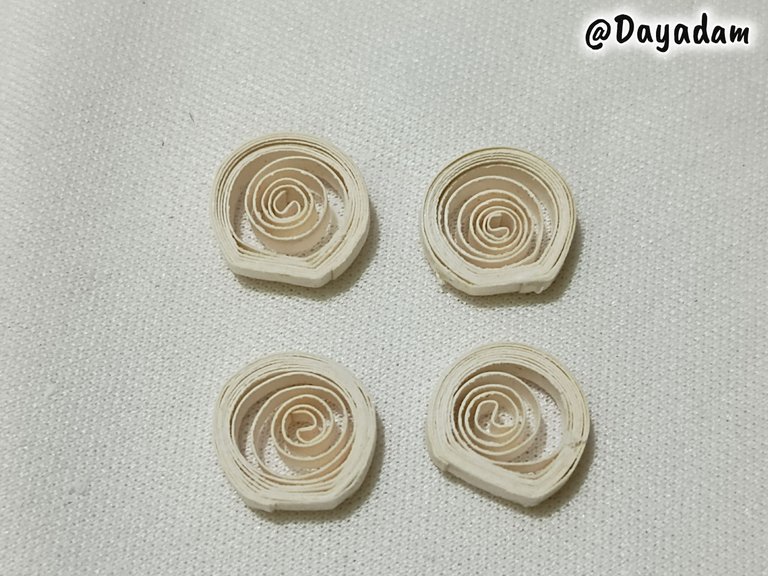
- We start by taking a strip of white color with the needle we roll until we reach the end of the tape, seals with white glue we take out and from the needle. We will need four equal closed circles, these we will mold them in a template to mold circles in the measure number 15 mm.
- We proceed to remove from the template and apply extra strong white glue on the inside to prevent them from moving or deforming, let them dry very well.
- We will join the circles by passing a ribbon through the middle of them with extra strong white glue, to form the head of the character.
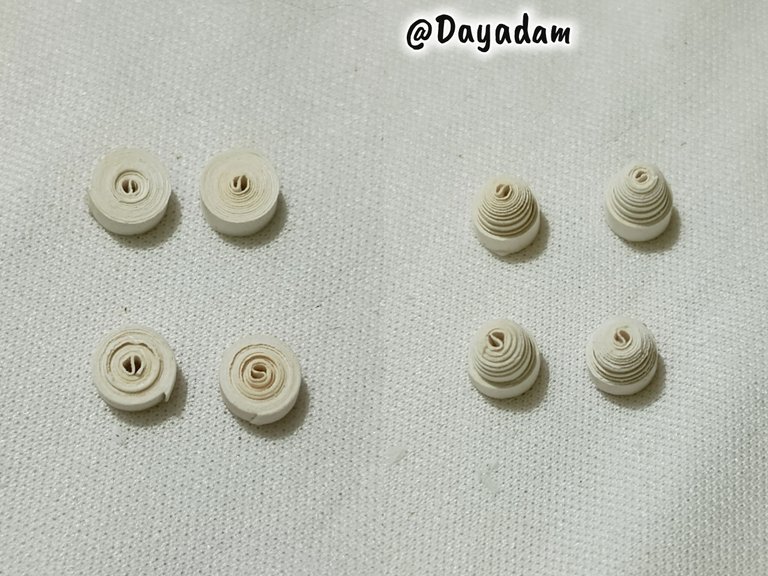
- For the body we will make 2 closed circles a little smaller, we will mold them with our fingers as a kind of cone with the flat top, we will apply glue on the inside.

Para realizar este trabajo previamente con una guillotina de cortar papel, pique algunas tiras de una cartulina de color blanco.
Este personaje está basado en dos figuras totalmente iguales, con la diferencia que llevar las colas de manera invertida para unir ambas figuras.
• Comenzamos tomando una tira de color blanco con la aguja enrollamos hasta llegar al final de la cinta, sellos con pega blanca sacamos y de la aguja. Necesitaremos cuatro círculos cerrados iguales, estos los moldearemos en una plantilla para moldear círculos en la medida número 15 mm.
• Procedemos a sacar de la plantilla y aplicaremos pega blanca extra fuerte por su parte interna para evitar que los mismos se muevan o se deformen, dejamos secar muy bien.
• Uniremos los círculos pasando una cinta por el medio de los mismos con pega blanca extra fuerte, para formar la cabeza del personaje.
• Para el cuerpo realizaremos 2 círculos cerrados un poco más pequeños, estos los moldearemos con los dedos como una especie de cono con la parte de arriba plana, aplicaremos pegada en la parte interna.
|||
|-|-|-|
| |
| |
| |
|
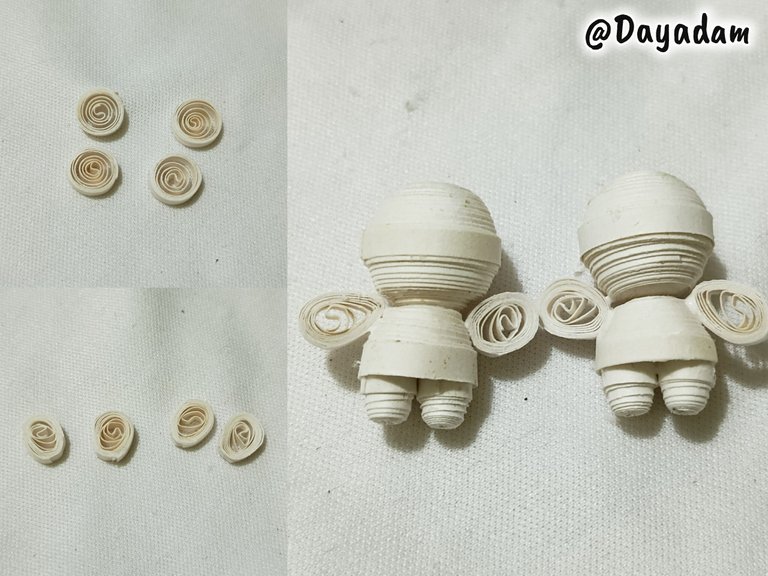
- To make the legs, we will carry out 4 small closed circles which we will remove a little with the tip of a brush, we will apply glue on the inside and pay for the bottom of the body.
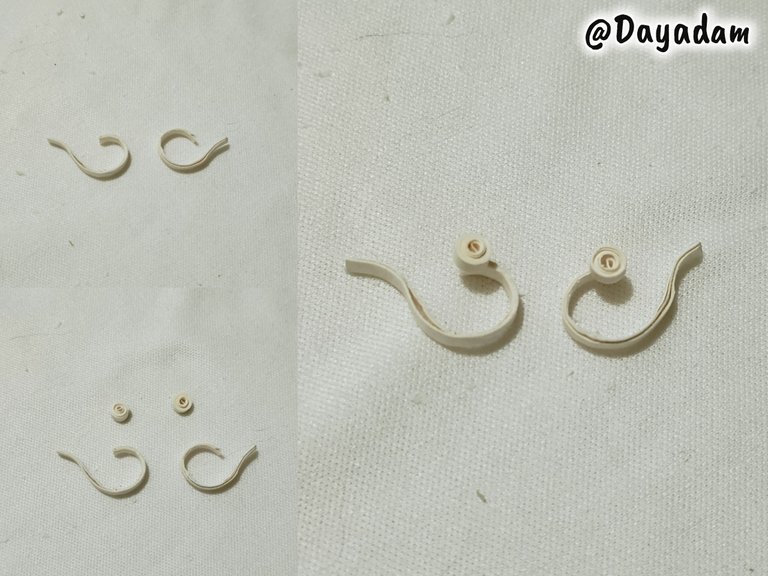
- For the arms we will make 4 open circles which we will mold as you can see in the image, we will glue them on the upper part of the sides of the body of the character.
• Para realizar las patas, llevaremos a cabo 4 pequeños círculos cerrados los cuales sacaremos un poco con la punta de un pincel, aplicaremos pega por la parte interna y pagaremos de la parte de abajo del cuerpo.
• Para los brazos realizaremos 4 círculos abiertos los cuales moldearemos tal y como pueden ver en la imagen, estos los pegaremos en la parte de arriba a los lados, del cuerpo del personaje.
 |  |  |
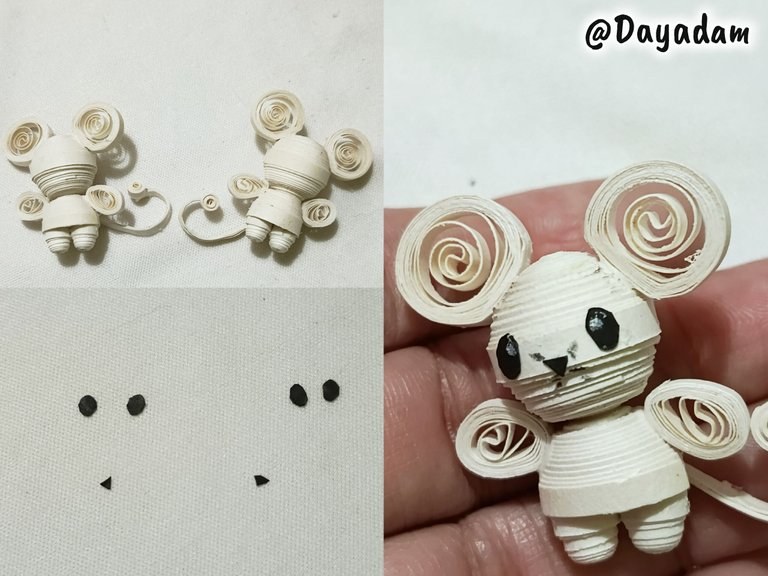
• Para las orejas realizaremos cuatro círculos abiertos más grandes estos los moldearemos aplanando un poco la parte de abajo, pegaremos en la parte de arriba a los lados, de la cabeza del personaje.
• Para realizar la cola moldearemos un trozo de cinta y realizaremos un círculo cerrado pequeño el cual pegaremos en la parte de arriba de la cola, pegamos el cuerpo de personaje.
• Para finalizar recorte los ojos y nariz de un trozo de cartulina negra, pegué en la cara del personaje, y realicé algunos detalles con un lápiz de color negro en la nariz.
De esta manera finalice este Pokémon Tanguemouse en 3D, en la técnica de técnica de quilling.
 |  |  |

 |
|
 |
 |
 |
What did you think, did you like it?
I hope you did, I hope you liked my explanation, procedure and photos, I made them with love for you.
"Let out that muse that inspires you, and let your imagination fly".
Thank you all, see you next time ✨.
¿Que les pareció, les gustó?
Espero que sí, que les haya gustado mi explicación, procedimiento y fotos, los hice con mucho cariño por y para ustedes.
"Deja salir esa musa que te inspira, y deja volar tu imaginación".
Gracias a todos, nos vemos en la próxima✨
This is really impressive
Great craft
Thank you so much for your nice appreciation 💞
This is such a lovely creation. The 3D quilling work on Tandemaus is incredibly detailed. well done.
selected by @stevenson7
Thank you for your beautiful appreciation of my work and support ✨
Awwww pero que cositas más tiernas😍 te quedaron demasiado bonitos💖
Gracias mi linda 🥰
!LADY
wow their expressions are so cute, they look like little fairies from a fairy tale. creative, super cute👍😁
Ainssss 🥰 Thank you so much 💞
!LUV
Te quedaron muy bonitos, me gustó muchísimo. Desde hace tiempo he querido aprender a hacer figuritas con esa técnica, pero no me he puesto a intentarlo.
Me alegra muchísimo que te hayan gustado, bienvenida a mi blog. Ojalá pronto te animes a hacer algo, me etiquetas. Estamos llegando acá a la orden 💖
!HUG