Hello Hivians!
If I want to create certain effects in light painting, I need special tools. Today I'm going to look at how I can make these tools easily.
Wenn ich bestimmte Effekte beim Lightpainting darstellen möchte, bedarf es spezieller Werkzeuge. Heute geht es darum, wie ich diese Werkzeuge einfach herstellen kann.
NIKON Z 5
CANON EF16-35mm ƒ4L IS USM
ISO 100 I 16mm I ƒ5.6 I 274 s
Making Of
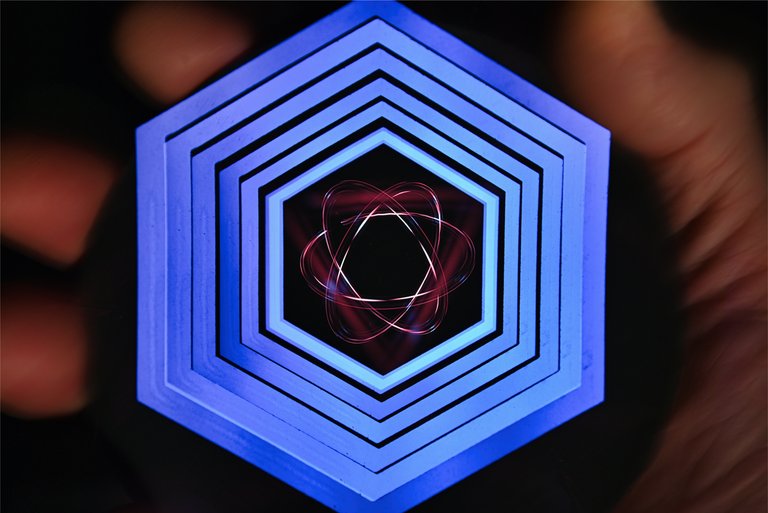
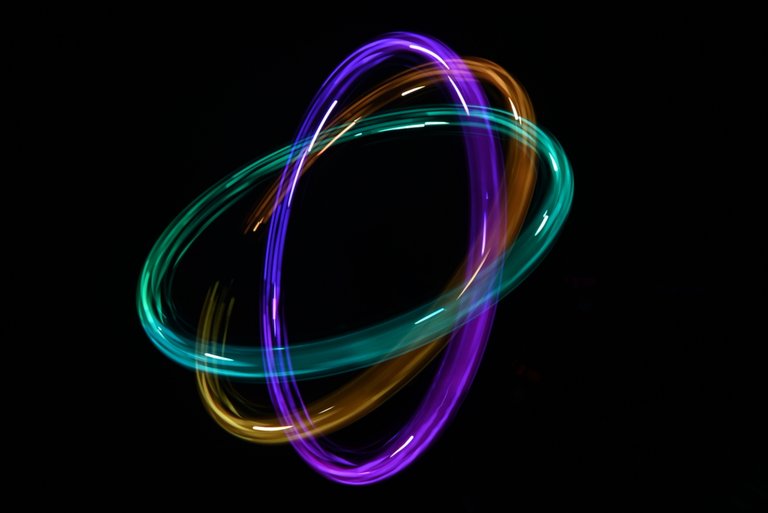
How was the cover picture created? Three steps were necessary to achieve this result.
First, I covered a beer coaster with black paper. I held this beer coaster in my right hand in front of the camera. I had previously set the focal length on the lens to 35mm and the focus to 28cm. I released the camera with my left hand, took a NOCTIGON DM11 and briefly illuminated the right hand from below.
I then covered the lens with black Molton, switched on the light to mount a frame with a hexagon template on the previously placed tripod in front of the camera. Then I turned off the light, removed the Molton from the lens and illuminated the template by shining a flashlight with a blue filter and black fiberglass over the template from behind. I repeated this five times, reducing the focal length of the lens each time.
Then I covered the lens with molleton again, removed the template, set the focus to infinity and switched on the previously aligned rotation aid and the lamp mounted there. Now I removed the lens cover for one rotation of the flashlight, covered the lens and rotated the camera 120° around the optical axis. This last step was carried out a total of three times. You can see the result above.
Wie entstand das Titelbild? Drei Arbeitsschritte waren notwendig, um zu diesem Ergebnis zu kommen. Zuerst beklebte ich einen Bieruntersetzer mit schwarzem Papier. Diesen Bieruntersetzer hielt ich in der rechten Hand vor die Kamera. Die Brennweite am Objektiv hatte ich vorher auf 35mm und die Schärfe auf 28cm eingestellt. Mit der linken Hand löste ich die Kamera aus, nahm eine NOCTIGON DM11 und leuchtete die rechte Hand von unten kurz an. Danach verdeckte ich das Objektiv mit schwarzem Molton, schaltete das Licht ein, um einen Rahmen mit einer Hexagon-Schablone auf das vorher platzierte Stativ vor der Kamera zu montieren. Dann schaltete ich das Licht aus, nahm den Molton vom Objektiv und beleuchtete die Schablone, indem ich von hinten mit einer Taschenlampe mit blauem Filter und schwarzem Glasfiber über die Schablone strich. Das ganze wiederholte ich fünfmal, wobei ich die Brennweite am Objektiv jedes Mal verkleinerte. Danach verdeckte ich das Objektiv wieder mit Molton, demontierte ich die Schablone, stellte die Schärfe auf unendlich und schaltete die vorher ausgerichtete Rotationshilfe, sowie die dort montierte Lampe ein. Jetzt entfernte ich die Objektivabdeckung für eine Umdrehung der Taschenlampe, verdeckte das Objektiv, drehte die Kamera 120° um die optische Achse. Dieser letzte Schritt wurde insgesamt dreimal durchgeführt. Das Ergebnis siehst du oben.
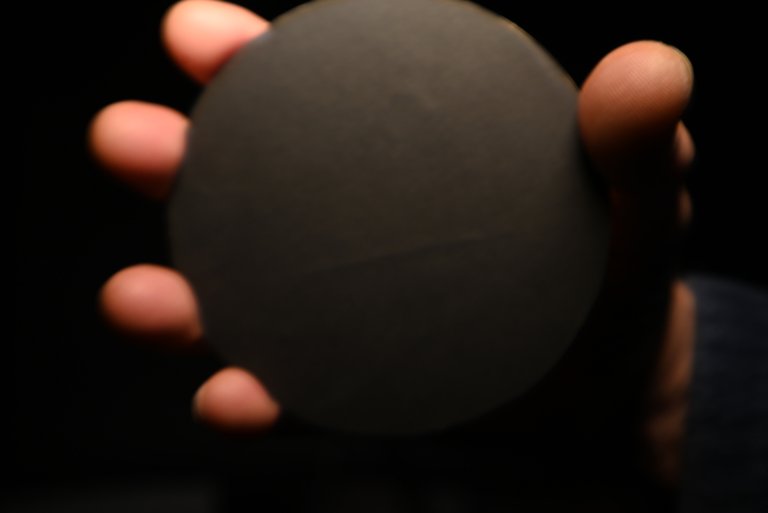
Beer coasters covered with black paper
Bieruntersetzer mit schwarzem Papier überzogen

Hexagon stencil made from black paper
Hexagon-Schablone aus schwarzem Papier
The Tools
Of course, the whole thing requires some preparation. I have already described the beer coaster above. I had the template for the second step
@lichtkunstfoto kindly cut it out for me with the laser. Thanks for that! I just had to glue them together and position them in the frame.
Das Ganze bedarf natürlich einiger Vorbereitungen. Das mit dem Bieruntersetzer hatte ich bereits oben beschrieben. Die Schablone für den zweiten Schritt hatte mir
@lichtkunstfoto freundlicherweise mit dem Laser ausgeschnitten. Danke dafür! Ich musste diese nur noch zusammenkleben und im Rahmen positionieren.
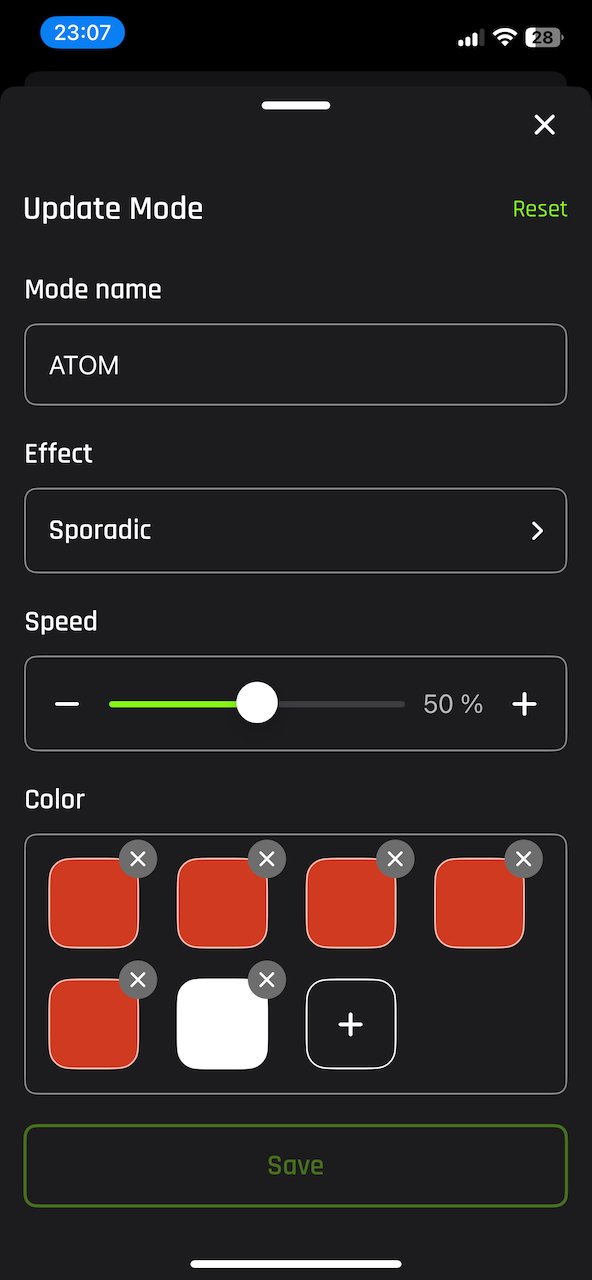
Configuration of the RGB CRITTER BT FLASHLIGHT
Konfiguration des RGB CRITTER BT FLASHLIGHT
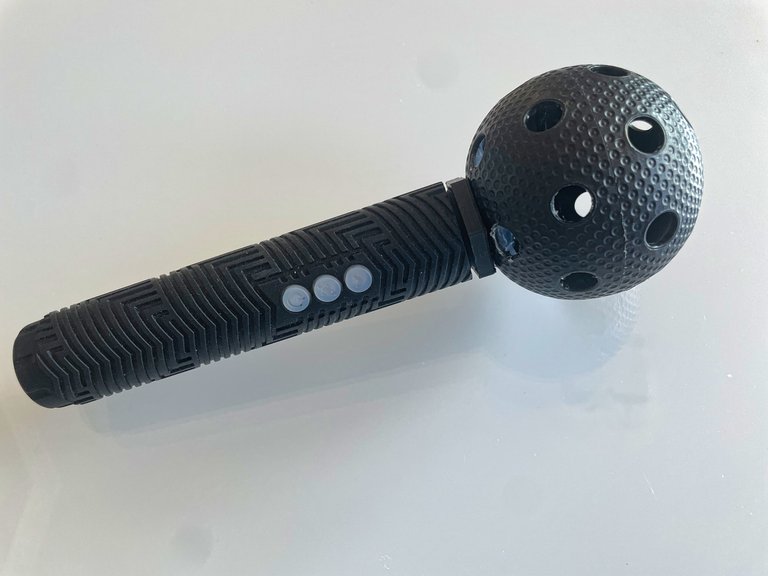

Light shaper on the RGB CRITTER BT FLASHLIGHT
Lichtformer für das RGB CRITTER BT FLASHLIGHT
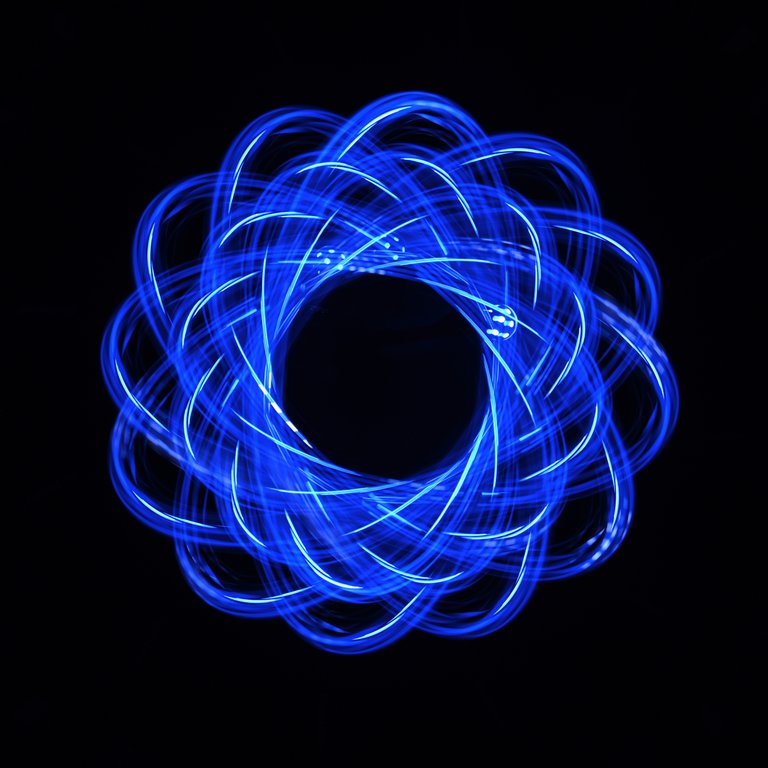
I had also previously built a light shaper from a field hockey ball and attached it to the lamp using a threaded piece. As you can see in the picture below, this light shaper makes the light trail look like a transparent tube. The whole thing was intended as an atomic model for one of the next projects. However, I found the light trails so interesting that I spontaneously integrated them into the project described today.
Außerdem hatte ich zuvor einen Lichtformer aus einem Hockeyball gebaut und mit Hilfe eines Gewindestücks an die Lampe montiert. Dieser Lichtformer läßt, wie im Bild unten zu sehen, die Lichtspur wie eine transparente Röhre wirken. Gedacht war das Ganze als Atommodell für eines der nächsten Projekte. Die Lichtspuren fand ich jedoch so interessant, dass ich sie spontan in das heute beschriebene Projekt integrierte.
Light trails with light shaper on the RGB CRITTER BT Flashlight
Leuchtspuren mit Lichtformer auf der RGB CRITTER BT-Taschenlampe
I had never used stencils for light painting before. So this is a first. At first I did a test with a circle stencil. In the end, I decided to use the hexagon.
Nie zuvor hatte ich Schablonen beim Lightpainting eingesetzt. Dies ist also eine Premiere. Zuerst hatte ich einen Test mit einer Kreisschablone durchgeführt. Letztendlich entschied ich mich dann doch für das Hexagon.

NIKON Z 5
CANON EF16-35mm ƒ4L IS USM
ISO 100 I 16mm I ƒ8 I 278 s
Es bedurfte einiger Tests, die richtigen Einstellungen am Rotationstool zu finden. Das Licht der Taschenlampe muss mit der Geschwindigkeit des Rotationstools abgestimmt werden, sonst wird der Lichtformer selbst in den Lichtspuren sichtbar.
Das Rotations-Tool hatte ich
hier bereits vorgestellt...

The light shaper is visible here in the light trails
Der Lichtformer ist hier in den Lichtspuren zu erkennen
It took me several days to prepare the tools. The cover picture itself was ready in an hour.
Below is a picture from the set. I hope that I was able to inspire you with this post and that I will see you here again next Sunday.
So stay tuned!
Für die Vorbereitung der Tools benötigte ich mehrere Tage. Das Titelbild selbst war in einer Stunde im Kasten.
Unten zeige ich ein Bild vom Set. Ich hoffe, dass ich dich mit diesem Beitrag inspirieren konnte und wir uns am nächsten Sonntag an dieser Stelle wiedersehen.
Also bleibt dran!

The Set
What Is Light Painting?
Light painting is a unique art form. As a rule, the darkness is illuminated by the artist with various light sources and traces of light are painted into the picture with various lighting tools. Various techniques are used, such as camera rotation or other movements of the camera during exposure. The creative possibilities are almost unlimited. When using ND filters, this technique can also be used in daylight. All images were taken during a single exposure. Apart from denoising, sharpening, cropping and possibly adjusting the white balance, the images are not processed on the computer.
Lichtmalerei ist eine einzigartige Kunstform. In der Regel wird die Dunkelheit mit diversen Lichtquellen vom Künstler ausgeleuchtet und Lichtspuren mit diversen Lichtwerkzeugen ins Bild gemalt. Dabei kommen verschiedene Techniken zum Einsatz, wie Kamerarotation oder andere Bewegungen der Kamera während der Belichtung. Die kreativen Möglichkeiten sind nahezu unbegrenzt. Bei Einsatz von ND-Filtern kann diese Technik auch bei Tageslicht angewand werden. Alle Bilder wurden während einer einzigen Belichtung aufgenommen. Abgesehen vom Entrauschen, Schärfen, Beschneiden und eventuellem Anpassen des Weißabgleichs werden die Bilder nicht am Computer bearbeitet.
CandelART
more about me and my art:

WE ARE LIGHT PAINTERS
To help and support the LightPainters community here on Hive I would appreciate your delegation of HivePower. Any amount is appreciated. It does not require much to get started, we are happy for any gesture. @lightpainters
How to delegate?
Delegate 50HivePower, [50HP]
Delegate 250HivePower, [250HP]
Delegate 500HivePower, [500HP]
Delegate 1000HivePower, [1000HP]
All the Hive Power will help to upvote the artist's contribution as part of the LightPainters community.
Cool geworden.
Danke! Das war eine spontane Idee zum Tool-Test. 😊
Amazing!!!
!discovery shots
!PIZZA
Thanks @jlinaresp ! 😊
Wow!! So educative, am going to try out few things I learned from here
That makes me happy. Good luck! 👍😊
Very attractive artistry, the colours are amazing, bravo
Thank you! 😊
Thank you too, keep it up.
$PIZZA slices delivered:
@jlinaresp(7/15) tipped @candelart
Come get MOONed!
#hive #posh
Amazing Shots, great and educational post
!DIY
Thank you! 😊
That's amazing!
I've never heard of this before but it is beautiful nonetheless!
Off topic: how did you get it to have the different language paragraphs be side by side?
Thank you very much! I'm glad you like my post.
I use the following formatting for the blog structure:
Headline
This post was shared and voted inside the discord by the curators team of Discovery-it in collaboration with Visual Shots community.
Discovery-it is also a Witness, vote for us here
Delegate to us for passive income. Check our 80% fee-back Program
Congratulations @candelart! You have completed the following achievement on the Hive blockchain And have been rewarded with New badge(s)
Your next target is to reach 7000 upvotes.
You can view your badges on your board and compare yourself to others in the Ranking
If you no longer want to receive notifications, reply to this comment with the word
STOP